Safety equipment on ships is critical for ensuring the protection of crew members, passengers, and cargo during voyages. Ships operate in environments that present numerous hazards, such as rough seas, extreme weather, and mechanical malfunctions. Essential safety equipment includes life jackets, lifeboats, life rafts, and personal flotation devices (PFDs) designed to keep individuals afloat in case of emergencies. Firefighting gear, including fire extinguishers, fire hoses, and fire blankets, is also mandatory, as ships are highly susceptible to fire outbreaks. Additionally, immersion suits, which protect against hypothermia in cold water, are crucial for survival during abandon-ship scenarios.
Navigational safety equipment, such as radar, Global Positioning System (GPS), and emergency position-indicating radio beacons (EPIRBs), helps in preventing accidents and facilitates search and rescue operations. Ships must also have properly maintained communication devices like VHF radios and satellite phones to stay in contact with nearby vessels and rescue authorities. Regular drills, such as lifeboat launching and fire response exercises, are conducted to ensure that the crew is well-versed in the use of Equipment of a Sailboat: What You Need to Have on Board While Sailingsafety equipment, enhancing preparedness for emergencies at sea. Regulatory bodies, such as the International Maritime Organization (IMO), enforce strict safety standards to ensure that vessels are equipped with the necessary gear for safeguarding life at sea.
THE VERY ACT of surveying a boat is done with the interest of safety in mind, and if you resolve any problems you find, in theory you shouldn’t need the safety equipment. However, nothing is certain at sea so the safety equipment check is a vital part of any survey.
Anchor, line and shackles
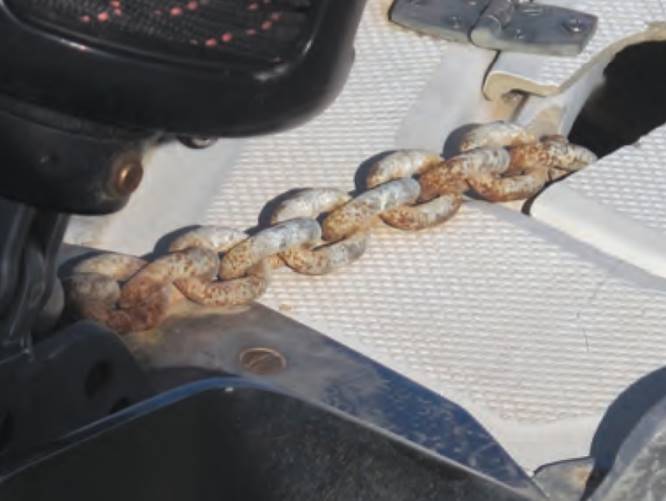
THE ANCHOR AND its line should be considered a vital part of safety equipment as it may be your last resort if your engine or sails fail. In most cases it will be constructed from galvanised steel, although only part of the line may be chain and the rest of it rope. Check galvanised steel for corrosion, which will occur when the galvanising has worn away. You will probably see signs of surface corrosion on both the anchor itself and the length of chain closest to the anchor, i. e. the part that drags along the seabed, which is unlikely to be of any consequence (except to leave nasty rust stains on deck if that is where you stow the anchor). So as far as anchor wear and tear is concerned, you need to examine the bearings of any moving parts and the nips of the chain (the inside of the links where one link rubs against another).
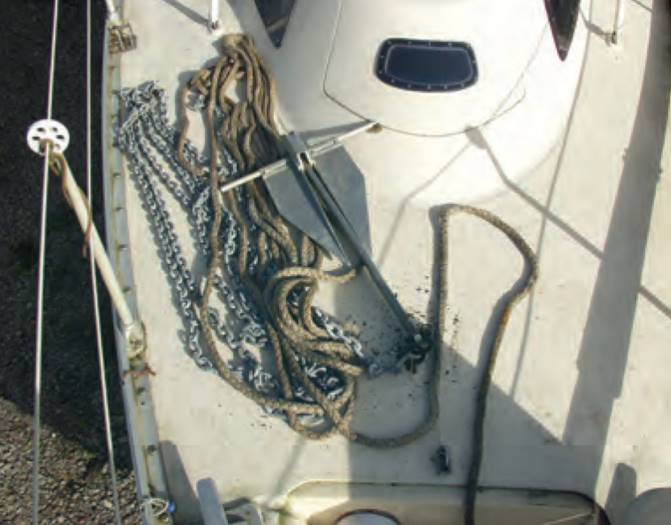
To carry out these checks everything must be slack so that you can «waggle» the moving bits of the anchor. What you are looking for is any excessive play between the moving parts and whether there is still adequate metal left to maintain the required strength. Look for wear in the nips of the chain; if the anchor is mainly used on a sand or gravel bottom, expect quite a lot of wear, while a muddy bottom creates far less abrasion. If there’s a dip in the rounded surface of a link, use a pair of callipers to measure it: if it’s around 3/4 of the original size of an unworn link, it is time to replace the chain. However, anchors and their chains usually have a good safety margin of strength so a fair bit of wear is permissible.
During this inspection, look closely at the shackles that make the connections between the anchor and its chain and those that may be fitted to connect different lengths of chain together. If they are screw shackles the pins of the shackles should be moused, i. e. secured with a piece of wire so that the pin cannot come unscrewed. If the anchor line is a combination of rope and chain, the rope is the weak link and needs to be kept in sound condition, so look for any signs of wear along its length. Take no chances with the rope section; if you feel the time has come for renewal, it is still probably more than adequate for use as a mooring rope. Finally, check that the inboard end is secured down in the chain locker, and preferably at a point where it is accessible with a knife in case you have to slip the anchor line at any time – you don’t want to have to enter the chain locker to do that!
Anchor chain is usually made from galvanised steel which can react with aluminium, so the chain should lie on an insulating mat when stowed in an aluminium chain locker. You will probably find that the galvanising has worn off in the first fathom or two from the anchor so that it is rusty. This is normal with a galvanised chain, but the amount of rust could give an indication of the level of usage (and possible need for replacement).
Liferaft, lifejackets and flares
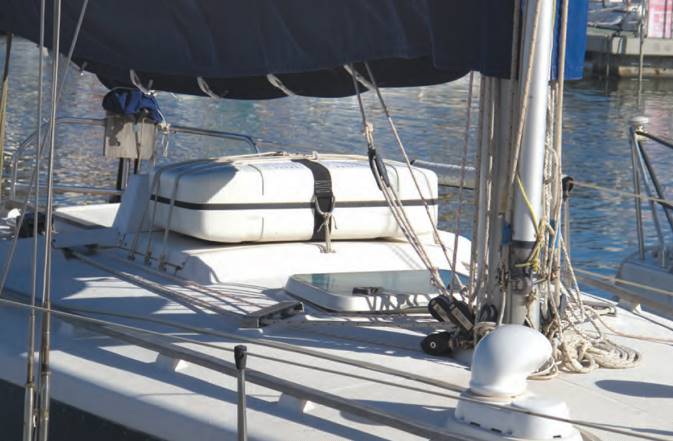
THE LIFERAFT IS an essential piece of kit and offers you a means of escape, but only if it is in working order. You cannot open it up to check it but you can check that it is installed correctly and has been serviced according to the schedule. Servicing used to be on an annual basis but has now been extended to two year intervals, during which the service agent weighs the inflation bottle and checks the air-holding qualities of the raft. There is usually a service schedule attached to the raft casing in some way to indicate when the last service was carried out.
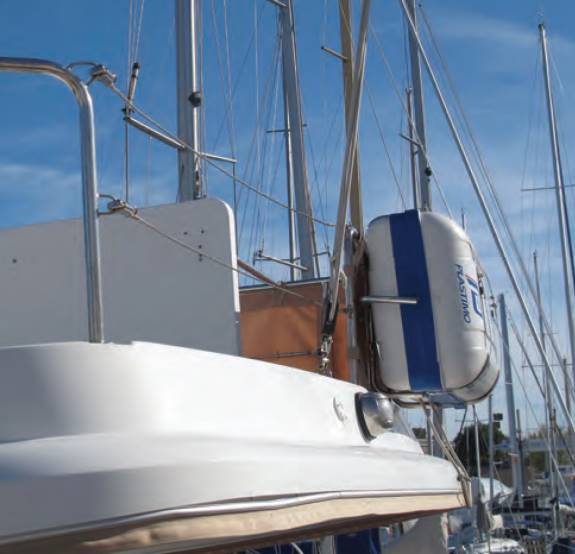
Ensure that the raft is adequately stowed and the painter has been secured to a strong point on board. The method should be a system of straps with a quick release, but it is not uncommon to see a raft lashed down so tightly to the deck that only a sharp knife would free it. Some are even padlocked in place to prevent theft, which is fine in harbour as long as it is unlocked before going to sea. Liferafts may also be stowed in a compartment somewhere around the stern, where they have to be lifted out and thrown overboard. When considering stowage, do bear in mind that liferafts are heavy bits of kit and difficult to handle on a moving boat. Furthermore, if the liferaft can move about, it can suffer wear (for the same reason, there should not be anything else stowed in the same compartment). Check the outside of the raft for any signs of wear and tear which may have extended into the raft itself.
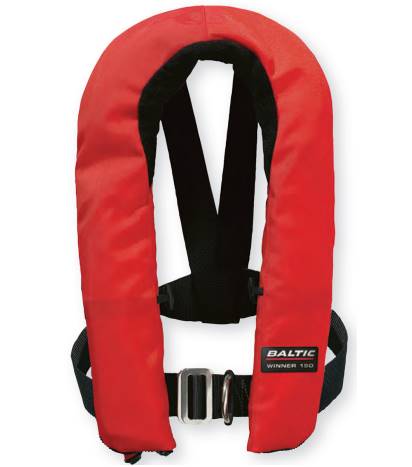
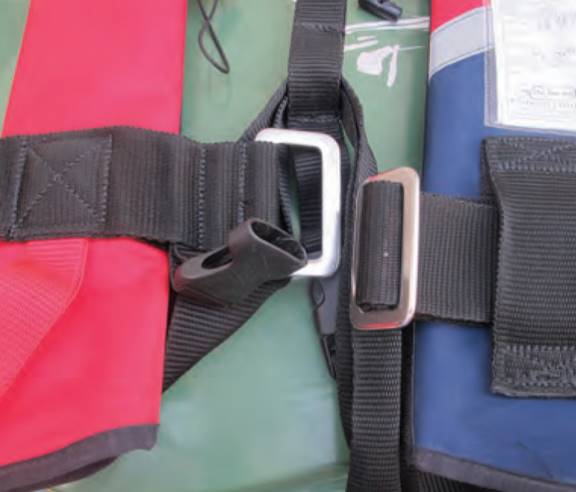
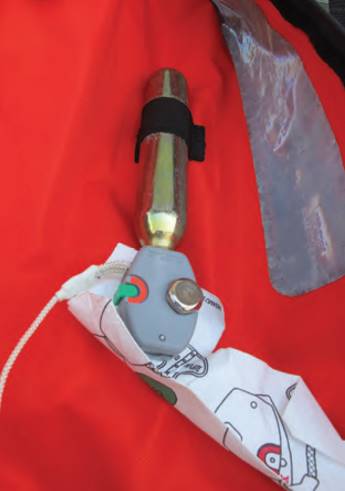
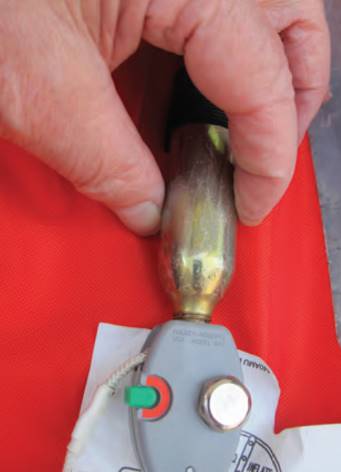
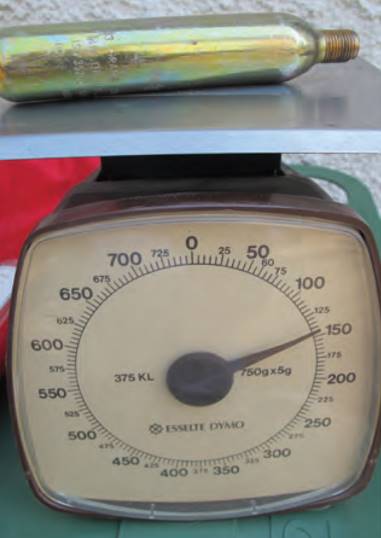
On the other hand, there are no demands for lifejackets to be regularly checked by service agents. To check inflatable jackets, pull hard on all the straps and inspect the stitching to make sure they are in good order and firmly attached. To check lifejackets with gas cylinder inflation, unscrew the metal cylinder and weigh it, in order to determine that there is enough gas for inflation. The difference in weight between a full cylinder and an empty one is quite small so you need a sensitive pair of scales (something like postal scales will do the job).
The full weight of the cylinder should be stamped on the outside of the bottle and it is simply a case of checking this weight to confirm that there is still gas in the bottle. While you have the gas cylinder removed, also test the lifejacket’s operating mechanism by pulling the cord and checking that the firing pin works. Finally, manually inflate the lifejacket through the tube and leave it for a few hours to check that it is holding air. Then put it all back together and you have a lifejacket that should work for the next year or so.
More sophisticated inflatable lifejackets have an automatic system that inflates the lifejacket when it is immersed in water. You can still do the cylinder weighing and manual inflation tests, but there is no easy way to check the automatic system. However, the lifejacket will still operate manually even if the automatic system is defective.
There should be distress flares on board as a requirement and you can check them with a visual inspection. They should be clean and free of any signs of damage. Check the date of manufacture or expiry date, which should be clearly labelled; flares are normally given a four year life span, after which they need replacing.
Fire safety
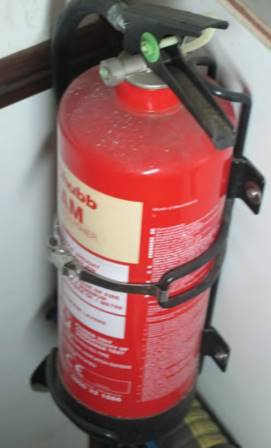
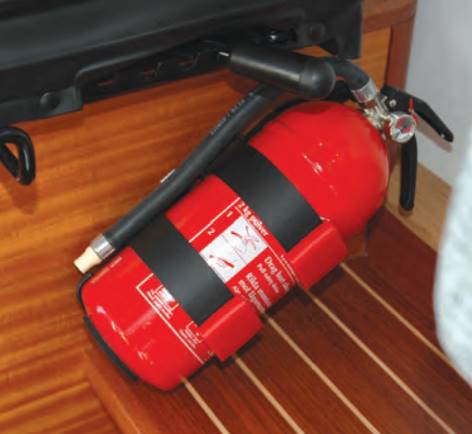
FIRE IS A nasty experience at sea so you need the means on board to tackle it. While a bucket with a lanyard is one of the best fire-fighting tools to have on board a small boat, the regulations demand you carry adequate fire extinguishers. They come in many shapes and sizes but for boat use they should be small enough to operate one-handed, because you need to secure yourself with the other hand if the boat is rolling about. Most fire extinguishers are designed for use on land and have steel containers and fittings, so your inspection should check for signs of corrosion.
There may be a gauge on the extinguisher to show that it is up to pressure (the needle should be in the green), while other fire extinguishers can be checked by weighing them. You should find the appropriate instructions on the outside of the container and most extinguishers should be serviced every year or two. There are plenty of specialised firms that can do this for you but as they are also in the business of supplying new extinguishers, their checks may not always be unbiased. If you have the instructions, you can do the checks yourself. Finally, fire extinguishers should be located by the exit door of a compartment so that you can get to them without actually entering the burning area.
The engine compartment and galley are the most likely sources of fire, unless you allow smoking down below. You may find your boat or the one you are assessing has a fixed extinguishing system installed in the engine compartment, allowing you to remotely activate the system without having to open the compartment, thereby containing the flames.
It is, of course, essential that it is in good working order; there may be instructions for its maintenance on board but the main thing to check is the operating cables or electrical operating system. Some have a simple wire pull activation system, so check the wire is not frayed, corroded or kinked to ensure it will actually work when triggered.
There should also be covers for the engine compartment air inlets so that you can effectively seal the compartment before triggering the extinguisher.
You only get one chance to use these installed systems when there is a fire so you want to get it right first time.
Auxiliary equipment
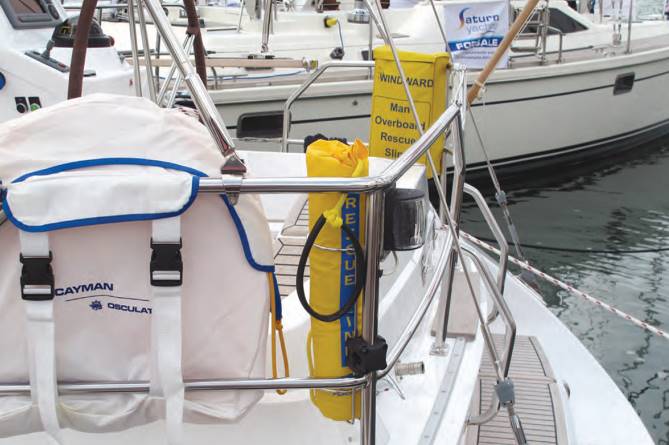
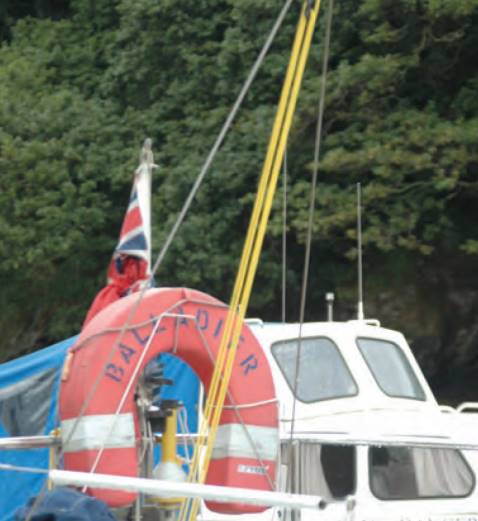
SAILBOATS IN PARTICULAR often have a variety of Basic Equipment of a Sailboat and Their Characteristicsauxiliary safety equipment such as marker buoys and lifebuoys for man-overboard situations.
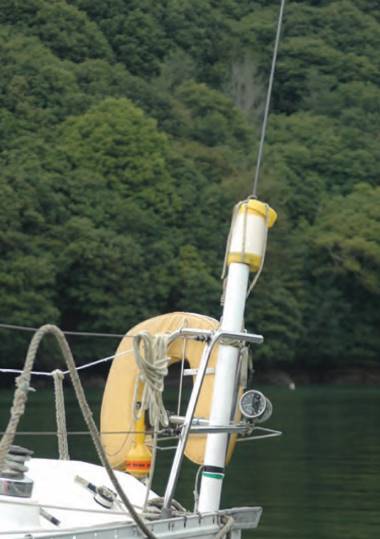
These can be checked out visually to ensure there are no obvious defects and any rope attachments tested for strength and security.
If there is a radar reflector it will most likely be mast mounted, making it impossible to check in detail, so just ensure that it is still securely attached in the correct orientation.
We covered bilge pumps in detail in Marine Plumbing – Systems and Materials“Marine Plumbing – What You Need to Pay Attention To”, but they are an important part of the safety equipment, so be sure to lift the float switch and check that the pump is running and that there is no debris in the bilges that could clog the pump.

As with most things you check during a survey, it is easy to rush and merely glance at the equipment.
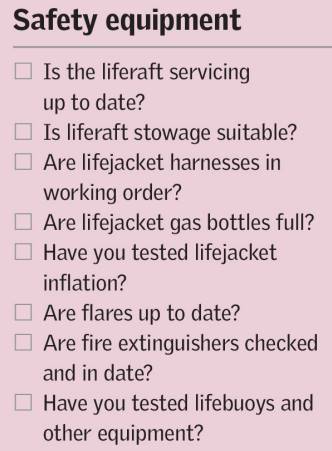
But do bear in mind that it is worth taking the time to thoroughly test your safety equipment – your life may depend on it.
