Learn how to choose a boat with our comprehensive guide covering quality indicators, keels and ballast, hulls, decks, cabin trunks, pilothouses, cockpit layouts, and steering options. Make an informed decision for your next maritime adventure.
If you have followed this guide step by step, you will already have defined the personal and financial constraints that will influence your choice of a boat. These should be in the form of a written list that will be modified and “fine-tuned” as you look at sailboats.
By now you should have selected a basic construction material for your boat and should have narrowed your choices on the type of sail plan and hull-keel-rudder configuration. You should also have reviewed a number of boats against the designers’ “bench” performance data.
Now you are at the stage where you are seriously looking at individual boats. You are walking through them, looking into corners with a flashlight, standing under them, talking to owners and dealers, and trying to envision sailing, living on, and equipping each contender. You have questions about:
- safety,
- quality,
- convenience,
- comfort,
- repairability,
- and performance.
This and the following four chapters set forth specific criteria that you can use as standards when inspecting a sailboat. You do not need to be a surveyor or a ship-wright to make valid judgments about the quality and utility of a sailboat. You do need to carefully review the construction and outfitting of each area and system on each boat in which you’re seriously interested.
One thing you must keep in mind as you review this article is that you must match the construction characteristics and quality of the boat with your intended utilization, finances, and personal preferences. I have tried to emphasize the characteristics of construction, installation and outfitting that I believe represent high quality, but you will never find one boat that meets all of your needs or includes all of these attributes.
Your ideal boat, or the one that best fits your needs, will always be different from the ideal of other sailors, including mine. The ideal boat represents a changing set of requirements. If you could build it, the day you stepped aboard you would start a list of improvements based on your changing needs and the development of new technologies and equipment.
The most you can expect is to find a sailboat that meets more of your requirements than any of the other boats you have considered during a reasonably thorough search. You will always have a list of modifications and equipment necessary to bring the boat up to your particular needs. You will have to accept certain trade-off’s, inconveniences, and less than optimal performance – all resulting from the compromises required by your utilization plans, your financial constraints, and the particular boat you have selected.
Some examples may help illustrate this compromise process:
Example One: You would really like a number ten plus quality (on a ten-point scale), highly customized boat. Because you intend to resell or trade the boat within two years, however, you buy a number five quality boat popular in your sailing area and you add no extra equipment or custom features.
Example Two: You dream about sailing around the world on a fully outfitted blue-water boat. But the reality is that you are short on cash and will probably be restricted to intermittent fair-weather summer day sails with a few weekend trips on protected waters. You could charter a boat for less than ownership costs, but you are tired of renting and want your own starter boat. You end up buying a small number four quality, simply equipped pocket cruiser.
Example Three: You buy a good quality thirty foot cruising boat. After sailing and outfitting it extensively, you still would like a few more features, such as an anchor winch, all-chain anchor rode, refrigeration, diesel stove with oven, and a hard-bottom sailing dinghy. You decide, however, that this equipment is out of scale for the size and weight of your boat. Consequently, you sail without it until you can buy a new boat large enough to accommodate your desired gear and equipment.
An How to Buy a Boat?entire category could have been written on each of the systems covered in these self-survey chapters. The material included, however, has been restricted to the criteria and characteristics that I believe are most relevant to selecting a sailboat. The criteria in the balance of this chapter and in the next four chapters are intended to be referred to as you inspect individual boats. Appendix D***, Self-Survey Criteria Checklist for Buying a Sailboat, suggests a way to summarize the data you collect.
Sample Indicators of Quality
You can make a fairly quick judgment, without being a naval architect or marine engineer, about the overall quality of a boat by reviewing a few sample indicators. When weight is not a consideration, hardware should be bronze, chromed bronze, or stainless steel rather than anodized aluminum. Brass should never be used for any working hardware. Wood should have a dull sheen, with no checks, cracks, or stains. Fiberglass surfaces should be fair and smooth. All work and installations should be neatly done.
Surfaces under bunks, behind drawers, and in lockers and the dark corners of bins should be finished and painted. You should not see any:
- jagged fiberglass;
- splintered raw wood;
- fiberglass dust;
- sawdust;
- dirt;
- lost tools;
- or the remnants of someone’s lunch.
The bilge should be clean and painted and should smell fresh. On a used boat, pull off a winch drum. The gears, pawls, and springs should be uncorroded, clean and lightly covered with grease. A boat that doesn’t measure up to these standards will generally have other inadequacies that may be more difficult to assess or locate.
Keels and Ballast
Ballast may be concrete, iron, steel, or lead. Lead is generally preferred because it has the highest density (provides a lower center of gravity), is almost inert in seawater, and is relatively easy to mold. It is also the most expensive choice. Ballast may be carried inside the hull but is more typically placed entirely within the keel.
Internal hull ballast was extensively used in older boats that depended upon their hull form for most of their stability. It will still appear occasionally in a newer boat as an easy correction to a stability problem or in a racing boat to change its rating. Internal ballast is dangerous, however, because it can come loose in a seaway and pound through the hull.
In terms of stability, it is a poor substitute for carrying additional ballast in the keel, where it lowers the center of gravity more effectively. If you are seriously interested in a boat with internal ballast, I would recommend that you discuss with a designer the effect of removing the internal ballast, including correction of any negative consequences of modifying the keel.
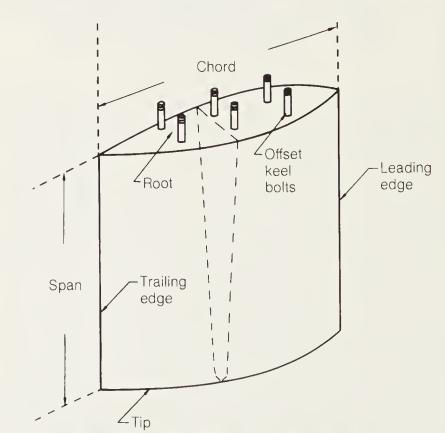
External bolted-on keels are generally lead, though some may be iron. The Basic Hull, Keel, and Rudder Shapesproper keel shape is cast and then bolted into a reinforced floor structure on the bottom of the hull. The keel bolt nuts should be snugged down and double nutted over large washers or backing plates. The standard, referred to as “Nevin’s Rule”, is one square inch of sectional area (of the bolt) for each 1 500 pounds of external ballast.
Two rows of bolts or offsetting bolts distribute the weight much better than a single straight row. All keel bolts should be accessible for inspection and removal, since it is not uncommon for the bolts to leak or require tightening. Inadequate bolts have been known to fail. The hull external ballast joint should be sealed with a bedding compound such as 3M’s 5200 or polysulfide, which won’t crack with age or stress, since the joint flexes slightly when the boat is heeled.

The keel should be faired with an epoxy putty and then sealed with an epoxy sealant. The external lead keel is advantageous in a grounding, since the keel protects the hull and the lead absorbs much of the force of the impact. Our own lead keel survived a collision with a gravel bar at full throttle with nothing more than fore-and-aft gouges on the bottom six inches of the keel. Repairs necessitated by such minor groundings usually consist of nothing more than fairing and repainting the keel at the next haul-out.
Iron or steel keels have a lower density than a lead keel. Therefore, they require a keel of greater volume (more wetted surface) or the ballast ratio will be lower than a comparable design with a lead keel. As with a steel-hulled boat, the iron or steel keel must be meticulously protected from rust, with epoxy sealers now commonly used.
Sandblasting is usually required prior to fairing and repainting a badly pitted keel. Keel bolts and their attachment within the keel must always be closely examined for corrosion since they have a higher potential (particularly on an older, poorly maintained boat) for a catastrophic failure.
Encapsulated ballast keels are an integral part of the hull. The complete hull and keel are molded as a single piece or as two halves (port and starboard), with a cavity for the ballast. This is filled with lead shot, concrete, iron or steel pieces, or an iron or lead casting. Any matrix ballast (iron pigs, lead shot, scrap, or the like) must be bedded in concrete or, better yet, in resin or bitumen with absolutely NO voids.
The top of the ballast should be glassed or epoxied over with no air space. This is particularly important if iron ballast is used because it could expand and crack the keel if it rusted. Encapsulated ballast cannot be lost unless the bottom of the keel is scraped off in a grounding. To provide maximum protection, keel bolts should be sunk through reinforced floors into the ballast. Unlike external keels, leakage from these bolts should not be a problem.
The major drawback with the encapsulated keel is its susceptibility to damage. Even a gentle grounding may require a haul-out and fiberglass work. Because of the possibility of extensive seawater intrusion into the ballast and/or glass laminate, repairs should always be made as soon as possible. To provide minimal protection, a lead or iron shoe should be installed on the bottom and lower leading edge of the keel.
Hulls
A hull that is inadequately stiffened or strengthened will “oilcan” when going to weather. This term refers to the sound that the hull makes in these conditions, like beating on an empty oilcan. It means that the hull is flexing extensively, absorbing some of the forward motion of the boat.
It may, in extreme cases, distort the hull enough to create changes in helm. The stresses of the flexing will cause structural damage if the boat is sailed hard over a long period of time. In a fiberglass boat, this may result in bulkheads separating from the overhead and hull, stress cracks, and delamination.
Hulls are stiffened in a variety of ways, depending upon the Characteristics of Different Types of Construction Materialsbasic construction materials, the size of the boat, and the design. On a fiberglass boat, stiffness can be provided by one or more of the following:
- fiberglass thickness;
- coring the hull;
- using integral stringers and floors;
- an internally secured hull liner;
- fiberglass taping of bulkheads and furniture.
Some of these same methods are also used with other construction materials.
Aluminum and steel hulls should always be carefully checked for rust and galvanic corrosion, particularly at welded joints and through-hull fittings.
Wooden hulls should be examined for dry rot and worm damage. Wood with serious dry rot will be soft and structureless. Mold on the inside of the hull is a warning indicator, and the wood in that area should be checked thoroughly. Joints are also more susceptible to rot and should be examined.
The degree of rot can be ascertained by poking progressively duller objects into the wood, starting with an ice pick or awl. If you can stick a finger directly into the hull, you definitely have problems. The only way to treat the rot is to remove all the bad wood and a smaller area of surrounding wood that appears “good” but may be in the early stages of infection.
Worms will create holes in the wood and, like termites, destroy its structural integrity. Worms inhabit salt water and are prolific in warmer tropical waters. They usually attack the hull where the bottom paint has been scraped off or in areas that are hard to paint, such as around rudder posts and in centerboard trunks. They can attack the entire hull when the bottom paint has sloughed off enough to lose most of its toxicity.
Caulking in a wooden hull should be checked and a number of fasteners pulled to check for corrosion. Are there old paint layers that may need stripping? Is the hull fair? Check to see if the bow and stern overhangs sag. This is called “hogging” and is usually the result of improper cradling during storage. It is difficult or impossible to correct. Does the deck bulge at any of the chain plates? This is caused by too much tension on the rigging or by improperly constructed chain plates. Again, it is difficult to repair.
Fiberglass hulls should be checked for fairness. Are there any bulges or hollows? If bulkheads or liners are visible as “hard spots” on the outside of the hull, it may be the result of poor construction, postconstruction damage, or a poorly completed repair. In any case, further checking from inside the hull opposite the trouble spot is necessary.
The seller may also have some information on the cause of this problem. Look for any crazing or cracking of the gel coat. This is usually only cosmetic but requires further investigation if it is near a stress point such as the mast, the stemhead, chain plates, or through-hull fittings. Are there any voids in the hull lay-up?
Tapping the hull with a ball peen hammer and listening for hollow sounds is the method usually used by surveyors to check for hull voids. On an older boat, small pits or pin holes may indicate a void and should be thoroughly checked. Small voids are easy to repair, but they should be examined closely, particularly if they are near a stress area, such as where the keel attaches to the hull, a rudder bearing, or the rudder shaft tube.

Does the fiberglass mat show through the gel coat? This is cosmetic, but it shows poor attention to quality during construction. Gel coat bubbling below the waterline is a common problem. This is usually not serious, but it should be repaired at every haul-out. The problem can only be completely eliminated by sealing the hull below the waterline with an epoxy sealant, a task we have scheduled for our own boat on the next haul-out.
All hulls should have a strong stand-out rub rail with a stainless steel, heavy rubber, or bronze cap. The plastic rub rail typically used on some of the cheaper production boats will last only a couple of seasons and offers little protection for the hull.

Through-hull fittings are the weakest point in the hull. They probably result in more boat sinkings than all other causes combined. The best number of through-hulls is the fewest possible. A quality installation puts the fitting flush with the hull. This reduces hull friction and turbulence, as well as slightly reducing the chances of damage to the fitting. All through-hulls that will be below the waterline when the boat is at anchor or sailing hard on either tack should be backed by a sea cock or a good ball valve. Unfortunately, this is rarely done. We had to add ball valves to the cockpit drain and exhaust through-hulls on our boat.
Gate valves, which look like garden faucets, are an invitation to disaster. It is difficult to tell when they are completely closed, they jam, they are easily damaged, and they are not always made of a marine grade bronze. Hoses that attach to any type of valve on the inside of the hull should be double-hose clamped.
Read also: Boat Performance Factors Explained: Key Metrics and Analysis Guide
On used boats, always check the through-hull fittings for signs of corrosion, such as pitting. A good through-hull fitting should easily withstand a light tap from a ball-peen hammer.
Decks
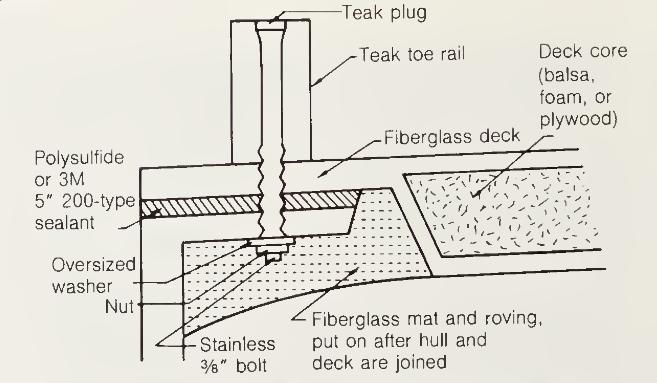
On fiberglass boats, the hull deck joint should be an overlapping flange, sealed with a flexible bedding compound such as polysulfide or 3M’s 5200. It should be through-bolted every five to nine inches (3/8″ bolts preferred) with fiberglass taping of the entire joint. Highly stressed areas such as the stemhead and chain plates should be further reinforced.
The deck itself should be stiff, not springy. All through-deck fittings should be sealed (preferably with resin) and should have a backing plate or oversize washers. Standard practice is to use plywood as a core in highly stressed areas, such as around chain plates, under cleats and winches, and the like. Gel coat crazing near deck fittings may indicate stress problems and should be investigated thoroughly.
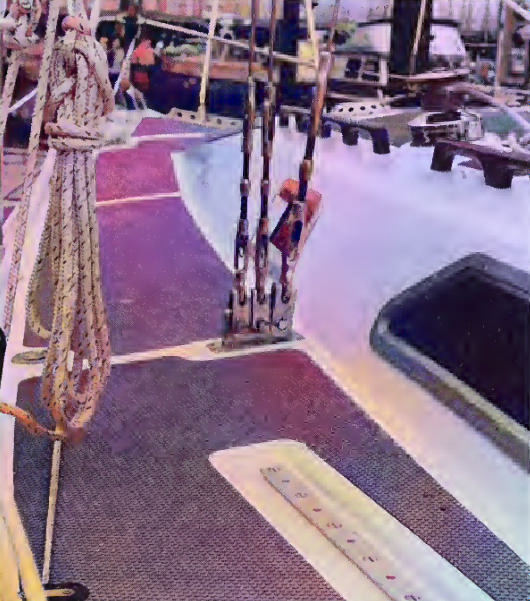
Nonskid can be a sheeting (such as Treadmaster), a pattern molded into the gel coat, or an abrasive in paint. It must provide secure footing when the deck is wet or severely angled. It should be used extensively on every surface where an individual will walk or crawl.
Teak decks make an excellent and attractive nonskid surface. In traditional construction, teak decks were laid on bedding compound and all the fasteners were bunged. In a new technique that avoids the use of screws, the teak is laid in sheets on an adhesive bedding compound.
Unfortunately, teak is expensive, adds considerable weight above the waterline, gets hot to the touch in the sun, acts as a passive heat sink, is more difficult to maintain, and significantly increases the possibility of deck leaks if fastened with screws.
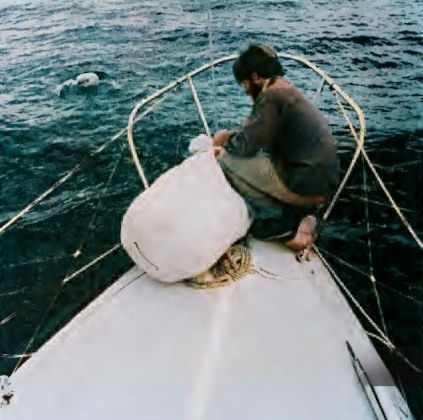
The foredeck should be large enough to work on, with few items to stub toes or catch sheets. Side decks should permit the easy fore-and-aft movement of crew and gear such as sail bags.
Toe rails or bulwarks make the deck a much more secure and safe place to work. Toe rails should be deep to be effective and should be through-bolted (normally this is the same bolt that also joins the deck and hull). Although they increase windage and topside weight, bulwarks make the decks drier and provide additional buoyancy, at least until the bow is buried by a large wave.

Lifelines should be double, with the top line well above knee height. Larger boats should have gates in the lifelines to permit easy side-deck access without having to slack the entire lifeline system.
Stanchions should be at least one inch in diameter and fastened to heavy, through-bolted bases with backing plates.
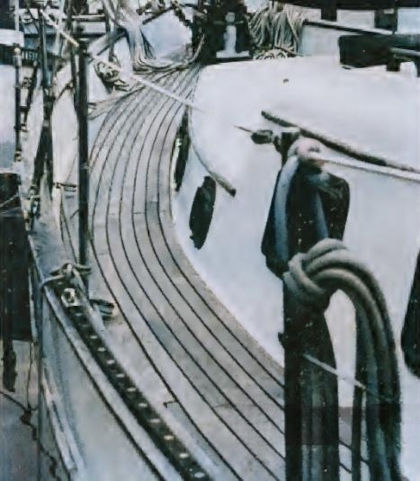
Stern (pushpits) and bow pulpits should be similarly fastened. The bow pulpit should include eyes for halyards and should comfortably and safely hold a crew member working at the forestay.
Cabin Trunks and Pilothouses
Visibility forward from the cockpit and the helm is critical. It depends upon your height, the cockpit layout, and the height of the sail clews and cabin trunk. Towering cabin trunks or pilothouses that obstruct visibility are difficult to correct without major structural changes. I find that two seat cushions work best on our boat to give me good visibility forward (I’m 5’8″).
The cabin trunk must be a workable area for:
- reefing,
- leading running rigging,
- stowing equipment,
- and carrying a dinghy on deck.
Handholds should be plentiful and accessible from the cockpit to the foredeck. All handholds should be through-bolted.

Hatches should be well scuppered and have gaskets. Liberal use of strategically placed hatches, such as over berths and the galley, greatly improves ventilation.
Ideally, hatches should open in four directions, but those that open fore and aft are still superior to the typical hatch that only opens forward. Foredeck hatches should be large enough for passing sail bags to the deck. Hinges and latches should be of substantial construction to prevent the loss of a hatch in a storm.

Skylights are beautiful, provide good athwartship ventilation, allow light into a dark cabin, and may be the only place to stand in a small boat.
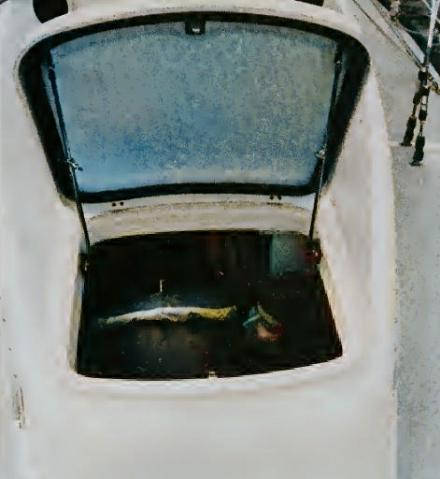
However, they are vulnerable to damage, take up valuable deck space, and are a constant maintenance headache and source of leaks.
Ports and windows must be heavily framed and sealed with a silicone sealant. Safety glass, Plexiglas, or Lexan is typically used. Opening ports greatly improve ventilation. Large window areas are very dangerous in storms or offshore and should be fitted with emergency storm shutters.

Pilothouses raise additional issues. Will the pilothouse interfere with sail handling and trimming, access to the side decks, or going forward? Will it significantly raise the center of gravity or increase windage? A major advantage of the pilothouse is that it allows an inside steering station. How complicated is the linkup with the cockpit steering, engine gauges, and controls? How good is visibility ahead, abeam, and astern? Consider what the extra steering station would add to cost.
Cockpit Layouts
Is the cockpit the right size? It should comfortably hold the usual crew for sailing in various conditions, as well as for an evening of conversation or for meals.
If two people normally sail the boat, don’t worry whether the cockpit will be comfortable for the eight people who go out with you once a year. If you intend to sail offshore or in heavy weather, you should have a small cockpit to minimize the effect of a boarding sea that fills the cockpit.

Cockpit drains should empty a filled cockpit quickly. Two 2-inch diameter drains are a good start for a small cockpit, with more drainage for larger ones. Cutaway transoms, transom doors, and dinghy self-bailers are other ways to drain a cockpit. Watch out for screens, strainers, and sharp bends in the outlet hoses, which will reduce the flow.
The cockpit should have a substantial coaming/splash rail to keep out boarding seas. It should be comfortable as a seat when steering from the rail and should be angled for good back support.

The cockpit well should be narrow enough to allow you to prop your feet against the opposite side when sitting to windward. This also reduces the cockpit volume. If the well is too wide, a hinged foot rest should be provided.
All boats should have a high sill above the cockpit sole at the companionway. Hatch boards must be available to raise the height of the entrance of the companionway to the level of the lowest portion of the cockpit coaming. Except in fair weather, companionway doors are never a substitute for hatchboards because they can be pushed inward by a breaking wave.

Offshore boats should have a bridgedeck at least as high as the cockpit seats. This has the added benefit of increasing space belowdecks. The safest, but most inconvenient, approach is to eliminate any access from the cockpit and position the companionway entrance on top of the cabin trunk.
Cockpit lockers and lazaret hatches must be well sealed, scuppered, and able to be securely fastened or locked. Though rarely done, the ideal locker would be sealed off from the rest of the interior to prevent flooding of the entire boat if a hatch is lost in a storm.

The helm should be comfortable and well laid out. Other boats and the trim of your sails should be easily visible. The helm seat should be comfortable to sit on and should provide good back support. Instruments and gauges, especially the compass, should be visible without strain.
Engine controls and the bilge pump handle should be easily accessible. The helm position should have the best protection possible from rain, wind, and spray. The sheets and traveler should be easily accessible so the person on the helm can make small adjustments without calling the whole crew on deck.
Dodgers increase both windage and comfort. They protect the crew and helmsperson and keep spray and rain from entering the companionway. A dodger coaming, for the attachment of the bottom forward edge of the dodger, makes installation easier and creates a better water seal. Less thoughtful builders put the traveler for the mainsheet directly over the companionway or on the bridge deck in such a way that installing a dodger is almost impossible.
Companionway hatches should be well scuppered and should slide into a seahood that is sealed forward and at the sides.
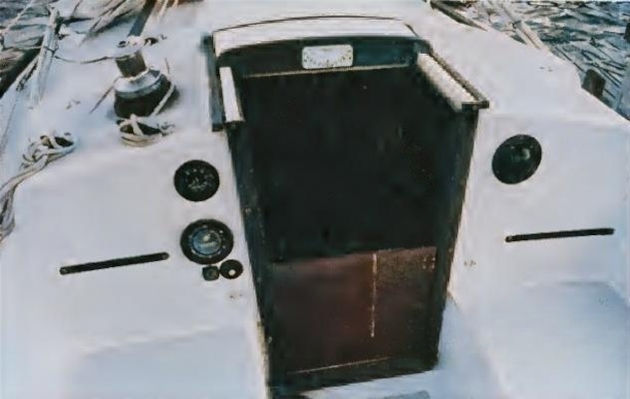
The traveler and mainsheet should be positioned to avoid being obstacles to normal movements in the cockpit. Nonskid should be plentiful throughout the cockpit.
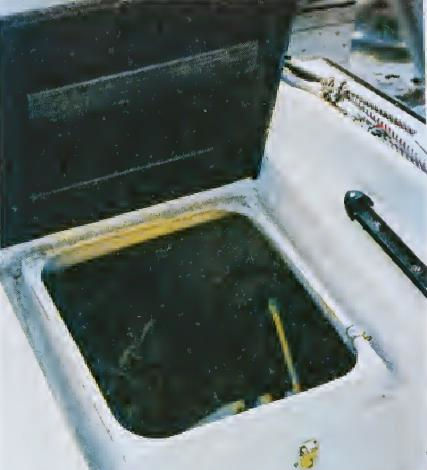
Nice additional touches you might see include teak gratings on the seats or the sole, Plexiglas viewing ports in the hatchboards, a small cockpit icebox, a porthole into the galley for serving and conversation, mountings for a cockpit table, a spot for the life raft, and nooks for winch handles and other cockpit odds and ends.
Stern and Center Cockpits
While stern cockpits seem to dominate recreational sailboats, center cockpits have characteristics that more closely fit the needs of many sailors. At about forty feet LOA, it becomes reasonable to start considering the center cockpit as an alternative to the traditional aft cockpit.
Below forty feet, the center cockpit design often results in excessive freeboard for the boat’s length and division of the boat into two small, difficult-to-use spaces.

Center cockpits are much drier in a following sea and wetter when going to windward. In addition, visibility is better when motoring and, to a lesser degree, better when sailing. Center cockpits allow a large aft-deck, handy when anchoring, docking, and sunbathing and useful for storing a dinghy.
If the center cockpit has been elevated to increase accommodations below, the sail clews will have to be raised substantially to obtain the proper leads and permit good visibility.
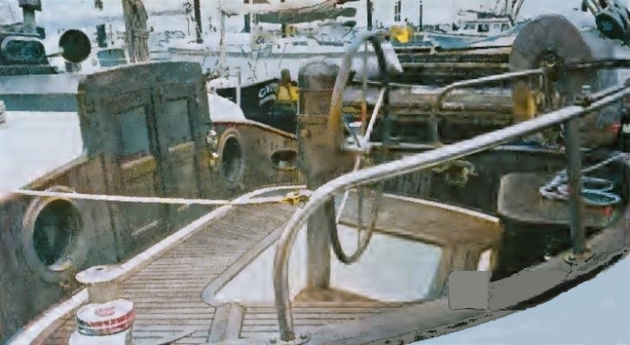
This effectively reduces the sail plan for light wind conditions. If the center cockpit has not been raised, it splits the interior accommodations into two separate sections.
On smaller boats, this usually has the effect of eliminating the inside passageway between the fore-and-aft cabins or reducing it to a four- or five-foot high passageway. Larger boats (LOA in the mid-forties or longer) can usually have a passageway with full headroom.
Steering
The primary choice on steering is between a wheel and a tiller. Day sailers, sailing dinghies, and small one-designs all use tillers. Tillers predominate up to an LOA in the mid-twenties.
Then the use of wheel steering increases until forty LOA, when it becomes generally standard, except on a few older designs and character boats.
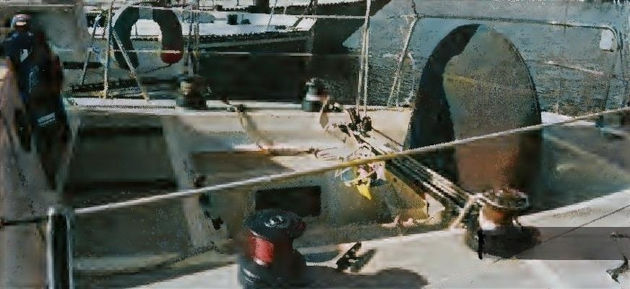
Tillers are more responsive than wheels, provide a more direct feel for the boat, and make it easy to envision the position of the rudder.
The tiller can also be steered with the knees. Wheels offer more compact mechanical advantage than tillers. Tillers on large boats have to be extremely long to gain sufficient leverage.
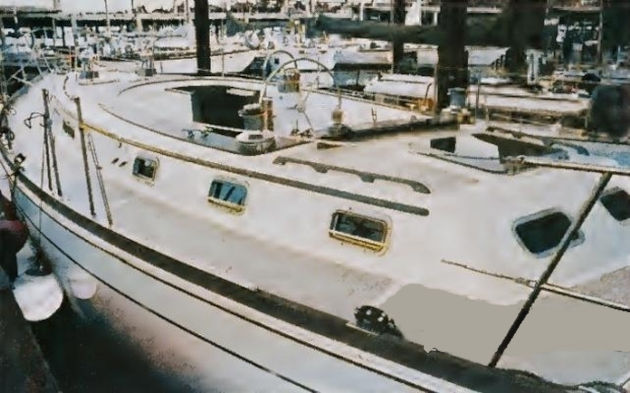
As they fill the cockpit and require a huge sweep outside it, they become impractical. As a boat approaches forty feet, these problems make even the most serious tiller devotees start considering a wheel. Under thirty feet, tillers with more than adequate mechanical advantage can almost always be fitted.

Wheel steering is easier for novices to learn, probably because the boat steers like a car – turn the wheel to the right and the boat goes to the right.
Even the simplest wheel steering system is more mechanically complicated than a tiller and will require more preventive maintenance. Wheel steering is more expensive than a tiller, running at least $1 000 to $2 000 extra.
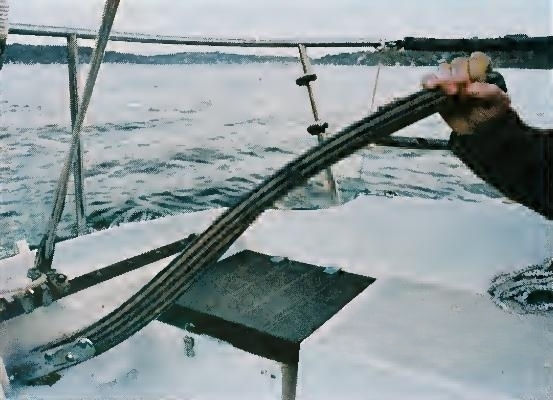
If you select tiller steering, make sure the tiller is of adequate length to provide sufficient leverage when sailing with a heavy weather helm. The tiller should also be strong and stiff, with no excess movement between it and the rudder. If you choose wheel steering, you must have an emergency tiller that meets these standards and can be quickly and easily installed.
Unlike tillers, wheels are used with different mechanical systems, which vary greatly in complexity, sensitivity, and power. Quadrant steering and other cable systems are the most popular in modern boats. Quadrant steering is light, powerful, and sensitive if properly installed. It enables the wheel to be installed at a location somewhat remote from the rudder shaft.
A variation on quadrant steering replaces the quadrant with a drive wheel, while other variations eliminate some or all of the sheaves by running the cable through a conduit. These may be “pull-pull” or “push-pull” and may permit even more flexibility in the position of the wheel in relation to the rudder shaft. Unfortunately, they also decrease sensitivity and power.
Another wheel system is hydraulic steering. It is commonly used on center cockpit and inside pilothouse helms, where the linkage between the wheel and the rudder shaft is tortuous. In addition to being excellent for these remote installations, hydraulic steering is powerful and relatively simple. Unfortunately, it eliminates almost all “feel” (steering feedback) from the helm.
Rack and pinion and “worm gearing” are the oldest, simplest, and most failure-proof of all wheel systems. They offer little flexibility in installation, however, since they must be mounted directly over or ahead of the rudder shaft. This often means that the helmsperson must sit aft with poor protection from the weather and a limited view of the instruments. Sensitivity is less than with quadrant steering, particularly in worm installations.
While each wheel system will have its own installation and maintenance peculiarities, all wheel systems should generally meet some basic criteria. Magnetic materials that would affect the compass should not be used in any part of the system. There should be guards for all pedestal mounted compasses and instruments. All parts of cable systems should be completely aligned and secured to prevent misalignment. The system should work smoothly and without any excess play or binding through a full swing of the rudder. One pound of pressure on the wheel should initiate movement through the rudder’s full range.
Binding or sloppiness in the steering system, stalling during a turn, or excessive weather helm could be the result of other problems, such as a bad shaft bearing, a bent rudder shaft, a misaligned shaft tube, a poorly shaped rudder, or a keel that just doesn’t want to turn.
