Learn how to prepare the yacht for sale with our comprehensive guide. Covering cleaning, repairs, maintenance tips, electrical systems, upholstery, and more to ensure your yacht shines and sells quickly.
- Clean it out
- Fix it up
- 12-Volt Primer
- Circuits
- Battery Basics
- Reconnecting the Battery
- Electrical Accessories
- Fuses
- Lights
- Switches
- Horn
- Engine and Outdrive
- Ignition
- Diesel Engines
- Repairs
- Upholstery and Trim
- Clean it up
- Engine and Bilge
- Storage Lockers
- Fiberglass, Upholstery and Carpets
- Galley
- Head
- Smoke Odors
- Make It Shine
- Rust
- Windows
- Water Stains
- Teak
- Trailer
- Get Some Fresh Eyes
- Decide What You Are Selling
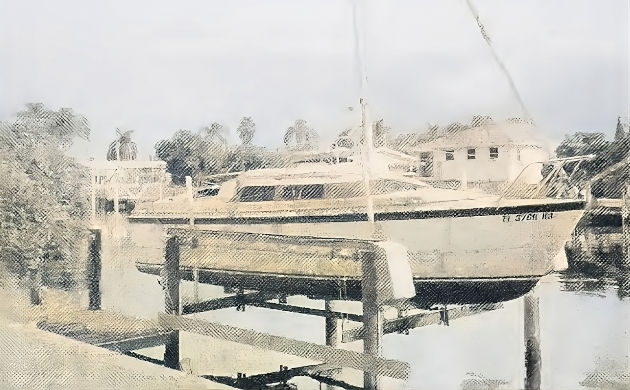
Suppose you could take your boat and transport it onto the lot of the biggest boat dealership in town. Would it attract the interest of the buyers visiting the dealership? Would it look like a boat that a buyer would like to own? Would it look like it could be taken to the lake and enjoyed next weekend? If not, you need to do some work to prepare your boat for its new owner.
What you need to do now is transform your boat from its current condition into an object of desire. It has to look like a boat someone will be proud to own, proud to be seen with. It has to look as though it will deliver plenty of fun, reliable hours on the water to the new owner. Upon examination, everything on the boat needs to operate as designed. The engine has to start easily and rev up with pep and energy. The lights must light, brightly. The horn must honk. The trim tabs must trim, etc.
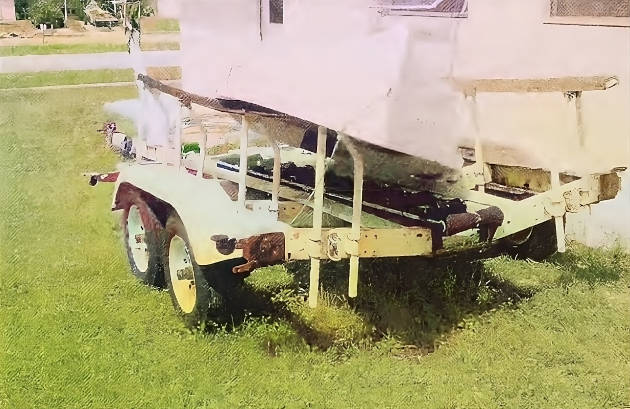
The trailer also needs to look good. In fact, neglecting the trailer can cost you a sale. Using the power of the Internet, you may draw a buyer from several hours away. But if your trailer doesn’t look roadworthy, the buyer may have to pass on the deal, even though he loves your boat. Even if you are selling to a local buyer, the trailer must not evoke premonitions of a spectacular, news-making highway incident involving a failed trailer and an overturned boat during the short trip home. You do not want the buyer to experience this sort of anxiety during the sales process.
Here then is your plan to get your boat ready to sell quickly and command a premium price:
- Clean it out.
- Fix it up.
- Clean it up.
It sounds simple because it is. It’s just going to take a little effort on your part, along with some cleaning and restoration supplies, and maybe a few replacement accessories.
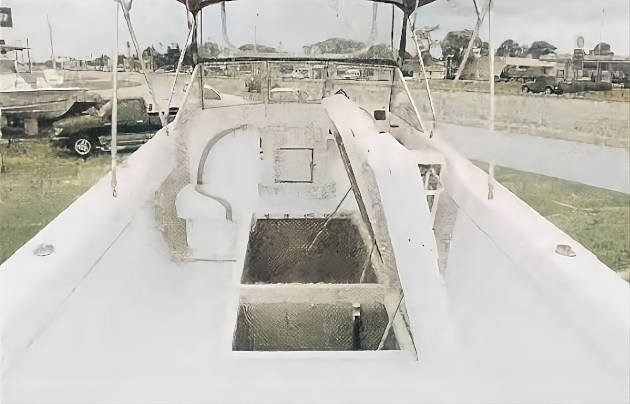
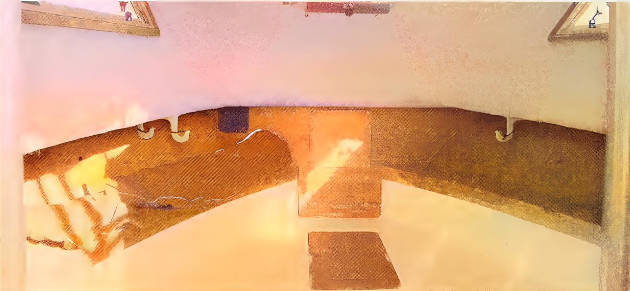
Clean it out
Remove everything from the boat that isn’t screwed, bolted or glued down. Empty the side pockets, lockers, glove box, coolers, bilges, battery compartment (although at this point leave the battery in place, even if it isn’t firmly attached to the boat), engine compartment, everything. Put this stuff in three piles as you take it out of the boat.
Pile number one will consist of the stuff that will be sold with the boat. Usually this will be everything you received with the boat when you purchased it, along with any other essential or useful accessories you purchased later. This stuff should be in fairly good condition so that it does not detract from the boat.
If the PFDs are rotten or dirty, discard them and put a couple of new ones. If the fire extinguisher is empty, rusted or broken, replace it with a new one instead of apologizing for it to the prospective buyer. In short, as you go through the accessories you will be selling with the boat, be sure the stuff you include is not only functional and serviceable but looks functional and serviceable.
While on the topic, always be sure to include basic safety equipment in good condition when you sell your boat. It won’t cost much to make sure there are a few good PFDs, a throwable PFD and a serviceable fire extinguisher on board. And it may let you sleep better at night. Unfortunately, there are a lot of people out there who cannot swim a stroke and have feet of stone, but will nevertheless buy a boat and take it out on the lake the same day they buy it. If there is an accident, at least you can take comfort in the knowledge that you sent the new owner out with adequate safety equipment.
Pile number two is for the boat accessories that you do not want to sell with the boat; your personal property that you wish to keep after your boat has changed hands. Store this stuff out of sight so there will be no question as to what it is you are offering for sale. Some buyers may try to claim that every desirable boating accessory they can see anywhere near the boat is included in the deal. Then again, it’s possible a buyer may feel resentment at the fact that you removed some particularly desirable accessory.
To avoid these kinds of misunderstandings, store all the stuff you are going to keep in an area where the buyer will not see it at any time during the deal. This includes wherever it is that you will actually be sitting down to do the transaction, i. e., fill out the paperwork, with the buyer. You don’t want to waltz the buyer past a really nice pair of water skis or a nice plotting GPS sitting in the corner at the same time you are leading him to the dining room table to relieve him of his money.
Finally, there is pile number three, the trash heap. Go ahead and discard any rotten PFDs, rusted up fishing gear, ruined tools, old radios, empty beverage cans, old diving gear, unmatched bikini parts, etc. You probably should have done this part years ago anyway!
Fix it up
Now that you’ve got all of the junk out of the way it’s time to make any necessary minor repairs. Again, your goal here is to get everything on the boat into working order.
If your boat was running and usable within living memory, there may only be a few minor items that need to be corrected. Otherwise, there may be a fair amount of work up ahead. The following section discusses some solutions to a few of the more common problems you may encounter if your boat has been sitting up for a while, but is otherwise in operating condition. If, on the other hand, the problems with your boat are severe or if you decide not to perform the repairs personally, you may decide to seek professional assistance to get your boat in desirable condition. With this in mind, a few tips for dealing with marine professionals are included at the end of the section.
12-Volt Primer
Boats use a 12-volt electrical system, and it is not unusual for electrical devices to fail to operate after a few years on the water. Usually the problems are fairly easy to diagnose and correct. To do so you will need to assemble the following tools and materials to help you do the job.
| Digital Readout Volt Meter | $ 20 |
| Battery Terminal Spray Protector | $ 3 |
| Battery Tester – Hydrometer | $ 6 |
| 3 in 1 Oil | $ 2 |
| WD-40 Spray Lubricant | $ 3 |
| Emory Paper | $ 3 |
These items are all available at most discount auto parts stores, as well as the local Wal Mart or Home Depot.
Circuits
All electrical circuits operate by making a continuous loop from one terminal on the battery to the other by way of some wire, hopefully a fuse or circuit breaker, a switch and the device being powered by the electricity; say, a reading lamp or a VHF radio. For the purposes of convenience, we will say that the electricity flows from the positive terminal of the battery (+) though the circuit to the negative terminal (-). The electrical energy must have an uninterrupted path from the positive battery terminal, through the electrical device and back to the negative terminal, or the electricity will not flow and the device will not work.
By convention, wires running from the device to the positive terminal of the battery are red. Wires leading from the device to the negative battery terminal are traditionally black, although the new standard color for the negative side of DC circuits is yellow to avoid confusion with the black wire used in AC circuits. Frequently, all of the negative wires for all of the circuits will be fastened to a ground buss, which is simply a large metal bar with convenient multiple attachment points. A single, heavy ground wire then runs from the ground buss to the battery’s negative terminal to complete the circuit for all of the devices.
12-volt systems have their own types of danger you need to be aware of as you proceed to find and fix problems. While it is true that 12 volts will rarely be enough to shock you due to the resistance of your own skin, under the right circumstance 12-volt systems can still deliver enough current to cause serious burns and start disastrous fires. Specifically, in the event of a “short circuit”, i. e., an electrical circuit that carries electricity directly from one battery terminal to the other with no device in between, the battery will deliver its full energy capacity to that one circuit.
It will heat the wire carrying the current until it melts and interrupts the circuit, in the process creating more than enough heat to either injure you or set your boat on fire or both. In fact, should an electrical short circuit ignite your fiberglass boat, the resulting fire is likely to grow so rapidly and vigorously that you will be unable to extinguish it without professional assistance. Therefore, always be careful not to energize a circuit that has a short.
Battery Basics
To sell your boat, you need it to appear ready and able to deliver fun on the water, which in turn means having a fully charged and powerful battery. In fact, this is vital to a successful sale, since a weak battery makes everything else on the boat look bad as well. When you turn the starting key, for example, the starter groans and the motor turns over slowly, threatening to stop at each compression stroke. When you press the horn button, low voltage can make the tone weak and quavering. When you turn on the lights, they will appear dim and yellow. The electronic devices may not work at all due to the low voltage from a weak battery.
With a powerful, healthy battery, on the other hand, everything looks that much better to the buyer. The engine spins over willingly and easily when you press the starter. The lights light up brightly with a nice white hue, the horn toots strongly and the electronics all operate at their best. It is for this reason that many professional dealers routinely install new batteries in their boats before they sell them since this a relatively low-cost way to perk them up and insure that they look their best during sales demos.
Personally, I like Wal Mart for marine batteries. They give you a lot for your money. And if there is a problem, Wal Mart customer service is fast and efficient.
Of course, if you think your battery still has some life left in it, you can try getting out a charger to see what you can do. Before you start though, please heed a few cautions.
First, whenever you are working on the battery, be sure not to allow any metal object to contact both battery terminals simultaneously, since that will create a short circuit as described above, with very unpleasant and dangerous results. Second, if the battery is not adequately secured to the boat, take the time to remedy that situation before doing anything else. For only a few bucks you can purchase a plastic battery tray or a battery box, which you can install in your boat to secure the battery. An unsecured battery in a boat is a tip-off to a prospective buyer that things have been done to the boat in a haphazard manner over the years. It can also constitute a serious hazard in rough seas.
In terms of putting in a fresh charge, start off by removing both battery cables and giving the battery a good cleaning. Brush off the battery posts and abrade them with a little emery paper or a plastic scouring pad (not steel wool!). Go ahead and clean up the cable ends while you are at it, abrading the inside of the post connectors with the same abrasive. After that, brush and wipe any debris off the top of the battery so nothing will fall into the battery when you remove the caps to look inside.
Next, remove the caps to expose the liquid that allows the battery to generate its power. There will be six chambers in a 12-volt battery. The liquid inside the battery is called an electrolyte and be¬ gins life as sulfuric acid. As the battery is discharged the sulfur combines with the lead in the battery so that the liquid that remains is mostly water. When the battery is recharged, the sulfur is made to recombine with the water to turn it back into sulfuric acid. During this operation, some of the water evaporates, which means it needs to be replaced periodically.
Fill each cell chamber with distilled water until the liquid covers the top of the lead plates inside by at least a quarter to half an inch. Do not fill any higher than the level where the liquid touches the recessed bottom of the fill spouts. Usually the bottom of the spout is split and you can see the surface of the liquid curl into the split circle when it reaches that level. When you are finished, replace the caps covering the cells.
Once this is done, you are ready to test the state of charge of your battery. There are two different ways of doing this. This first involves setting your voltmeter to the 0 to 20-volt DC range and measuring the voltage between the positive and negative battery terminals. A reading of 12,7 volts is what you would expect when measuring a brand-new fully charged battery. A reading of 10,5 volts or less indicates that the battery is dead.
You can also use a liquid battery tester known as a hydrometer to measure the specific gravity, or SG, of the electrolyte in each of the cells. To use a hydrometer, insert the tip of the tester into the electrolyte in one of the open cells. Use the squeeze bulb on the tester to draw some of the fluid from the cell into the tester, orient the tester according to the directions and look to see what the float indicator says about the charge of each cell. Afterward, carefully squirt the electrolyte from the tester back into the cell you withdrew it from. If you’ve just added water to the battery, use the squeeze bulb on the tester to swoosh the fluid in the battery around to mix the water in with the acid before you draw a sample to test.
Each cell should test about the same. If one cell is markedly different from the others, the battery is bad and will need to be replaced. When you are finished it is a good idea to rinse out the battery tester to keep battery acid from dripping out and ruining something.
If your battery needs to be revived, attach your charger cables to the positive and negative battery posts and charge it for a while. The slower you charge a deep-cycle marine battery, the better it is for the battery and the more charge it will ultimately hold. Calculate the maximum charge time by dividing the amp-hour rating of your battery by the amp-hour rate of your charger (on a low setting in order to get the best charge). If you can’t find the amp-hour rating of your battery, use an estimate of 75 for a regular-sized group 24 battery or 105 for a larger group 27 battery.
But be careful. If you set the charger on high and go off and forget about it for too long, the charger will boil off the electrolyte, expose the plates to the air and ruin the battery. Also note that many automotive battery chargers will never bring a deep-cycle battery up to a fully charged state. If you cannot seem to get your battery to charge higher than 80 percent of capacity, it may be due to your charger.
After you remove the charger, you can test the battery again to see if it has been revived or “resurrected” as the case may be. If you want you can use the hydrometer battery tester right away to see the results. But if you are using a voltmeter to measure the state of charge, you will need to let the battery rest for an hour or two, since if you test the voltage right after removing the charger you will get an artificially high voltage reading.
If after trying all of this the battery isn’t at least 80 percent charged, go out and buy a new battery. Basically, your battery is shot. You don’t want it jeopardizing a prospective sale.
Reconnecting the Battery
Before putting things back together, coat the battery posts and the battery cable connectors with a light film of oil or spray-on battery terminal protector (available at auto parts stores). It will both inhibit the formation of new corrosion and make it a little easier to clean them up again in the future. Also make sure there is nothing draining your now perky battery and that you do not have any kind of dangerous short circuit fault in your boat. Remember, a short circuit will not only quickly drain your nice hot battery, it could also start a fire.
To check for shorts, first connect the negative battery cable to the battery’s negative post, the one with a (-) beside it, being sure to tighten the bolt so that the cable is firmly attached. Next, set your voltmeter to the 0 to 20-volt DC range, touch one test lead of the meter to the positive battery post and touch the other test lead of the meter to the positive battery cable that is not yet attached to the battery.
Read also: Top 7 Secrets to Successfully Sell Your Used Boat
If you read 12 volts, something is turned on, or there is a short circuit. Turn off all accessories or locate the circuit fault (using techniques described in this chapter) before attaching the red battery cable to the battery. If the meter reads zero or a very low number, everything is fine.
Note that a battery will give maximum service life if it is kept fully charged at all times, and that it will slowly discharge itself, even if you do not forget and leave something running on the boat. A battery can lose 2 to 10 percent of its charge each month while merely sitting around. Therefore, keep the battery’s state of charge topped up with a periodic maintenance charge.
Electrical Accessories
All 12-volt circuits have some characteristics that you should be aware of if you are going to repair a non-working device. First, 12 volts is not enough to overcome very much resistance and still carry sufficient current to power most electrical devices. Therefore, in the humid and sometimes salty environment of a boat, corrosion can occur at each point of connection in the electrical circuit to the point where the circuit is seriously blocked. In fact, simple corrosion is the source of most 12-volt electrical problems in boats.
Corrosion problems are solved simply by cleaning and abrading the contact points in the circuit, then coating them with a little light oil to impede the formation of new corrosion. The cleaning and abrading can be done with fine emery paper or one of those plastic kitchen scouring pads. Again, do not use steel wool on your boat since it makes for a terrible mess, scattering particles of iron wool everywhere, which soon turn to rust and stain whatever they are touching. Be sure and get each contact point in a circuit, beginning with the battery and continuing on through the dashboard switches, each wire splice and even each light bulb socket. Remember, it doesn’t take a big ugly mass of corrosion to spoil a 12-volt electrical connection.
Fuses
Each electrical device on the boat should have a fuse or a circuit breaker located somewhere in the circuit. That way if a short circuit or other current overload develops, the fuse or circuit breaker will open up and interrupt the flow of electricity to the device before it can be damaged. Fuses incorporate a piece of metal that is a weak conductor and has a low melting point so that if too much current flows through the fuse, the conductor in the fuse will melt, breaking the circuit. When a 12-volt fuse opens up it is said to “blow”. You can actually see the melted conductor in a blown fuse, a clear signal that a fuse is bad.
Circuit breakers serve the same purpose as fuses, but don’t have to be replaced each time there is a short circuit or power surge. Basically, if too much current flows to a device, the circuit breaker will switch off, in what is called a “trip”, interrupting the current flowing to the device and protecting it from being damaged. The circuit breaker can be reset by turning the breaker to the fully off position and then back on again. Pop-up-type breakers are reset by pressing them back down until they click. If the problem that caused the breaker to trip is not solved, it will simply trip again and again after you reset it.
If you cannot get a device to operate, first locate and check the fuse or circuit breaker for the device and either reset the breaker or replace the fuse if it is bad with another fuse of the same size to re¬ store the circuit.
Never use a larger fuse than the size for which the circuit is designed.
Fuses are sized according to a number of amps they can carry, and using the wrong size fuse will not properly protect your electrical system from damage. The old fuse will have a size number printed or stamped on its side. Auto parts stores stock a variety of replacement fuses.
If your boat comes with a modern electrical panel, then finding the fuses and circuit breakers for the various electrical devices in your boat will be a snap since they should all be carefully arranged and identified within. If, however, your boat does not have an electrical panel, the job will be a bit more challenging, although not impossible. Basically, to locate an in-line fuse for a device, follow the red wire from the device back toward the battery. You will discover the fuse somewhere along the line.
There are several different styles of 12-volt, in-line fuses, the most common of which is an in-line barrel type, consisting of a glass, cylindrical case with a wire entering each end. It can be opened by holding each end and pressing them toward one another while rotating them a half turn counter-clockwise. The glass tube is usually about a quarter inch in diameter and 1 % inches long with a metal cap at each end and a filament visible inside. The amp rating of the fuse will be stamped on one of the metal end caps. There will also be a voltage rating on the end cap. Any value of at least 12 volts is acceptable.
In addition to these barrel types, there is also a newer type of fuse called a blade style fuse, which is available in size designations called ATO/ATC or ATM. These fuses are shaped like an abbreviated “M”, with metal contact prongs at the bottom on each side. Across the top is an inspection window where the fuse filament is visible. To remove this kind of fuse, grasp it firmly and pull it out of the fuse holder.
Keep in mind that whenever a fuse has blown, you have to figure out why it did so, or you will soon be replacing it yet again. The problem could be due to water getting into the device, or corrosion. Or it could be caused by damage to the wires leading to the device. When electronic devices such as radios and depth sounders fail, they sometimes cause the fuse to blow. Horns, subject as they are to the punishing ravages of the weather, sometimes undergo such extensive corrosion that they develop an internal short circuit and have to be replaced.
To determine exactly why a fuse is blowing, temporarily disconnect the wiring at the device, either by unplugging the power cord, if it has one, or removing its wires. If the fuse still blows with the device disconnected, the wiring to the device is bad and will have to be replaced. If the fuse remains intact with the device disconnected, the device itself is at fault and will need to be repaired or replaced.
Lights
If a light on the boat will not operate, you can diagnose the problem in the following manner.
First, remove the lens covering the light. Then remove the bulb itself. Hold the bulb up to the light and look at the little curly wire filament in the bulb. If it is missing or broken, you need to replace the bulb.
If the filament appears to be intact, test to see if electricity is getting to the bulb socket by turning the switch for the light on and using your tester to test the bulb socket. Sometimes you can test at the wires connected to the socket if there is a wire junction within 12 inches of the light. If not, you will have to test the socket itself. If two contacts are present in the socket, measure for voltage be¬ tween them. Otherwise, take the voltage measurement between the single contact and the socket that holds the cylindrical base of the bulb. Take care not to touch your two test leads together or you will blow the fuse or trip the breaker. If there are 12 volts present then the circuit is good and you need only to clean the bulb base or replace the bulb with a new one.
If you cannot find 12 volts in the socket with the switch turned on, there is a problem in the circuit. If you are unsure about the bulb, swap it with a bulb from a working light on the boat of the same type to test it. Before replacing the bulb, clean the bulb base with a piece of fine sandpaper or a plastic scouring pad. You can also apply a light coating of oil to the base.
The bulb type is stamped on the side of the metal base on the bulb. It is called a GE number and will be a two- to four-digit number like 89, 164 or 194. Replacement bulbs can be found at marine suppliers or your local auto parts store.
Another way to test a bulb is by using the continuity-checking feature of your digital voltmeter. To do so, set the meter to the lowest resistance range and touch the meter’s test leads to the contacts on the bulb’s base. A reading of zero ohms or only slightly higher means the bulb is good. Many meters have an audible buzzer that will sound if the bulb is good.
Switches
The switch itself may have corrosion inside preventing the flow of electricity, particularly if the switch has been exposed to weather. To determine if the switch is the problem, perform the following tests.
First, to determine whether electricity is getting from the battery to the switch, turn the switch to the off position, set the voltmeter to the 0 to 20-volt DC range, touch the black test lead from your meter to a ground point conveniently near the switch, i. e., any black or yellow wire going back to the negative battery terminal, then touch the red test lead from the meter to each of the switch terminals. You should find 12 volts present on one side of the switch and zero volt on the other. If this is indeed the case then the electricity is getting to the switch.
Next turn the switch on. Now you should be able to measure 12 volts on both sides of the switch as opposed to just one. If you can’t, the switch is not closing when it is turned on, and it will need to be repaired or replaced. Sometimes you can squirt a little WD-40 into the switch housing and operate it a few times to clean minor corrosion and restore it to operation. Otherwise, it will have to be replaced.
Horn
Due to their constant exposure to the weather, boat horns do not seem to last as long as the other electrical accessories on most boats. If yours is not working, first check to see if it is getting electricity. Locate the wire connections leading to the horn and with your voltmeter set to the 0 to 20-volt range, hold the test leads on the wires while an assistant presses the horn button. Is electricity is making its way to the horn? If so, the horn is broken and you will need a new one.
If there is no electricity at the horn, the problem may be a bad switch, a bad fuse or a bad connection somewhere in the circuit from the battery to the horn and back. Test the switch and the circuit as previously described to locate the problem.
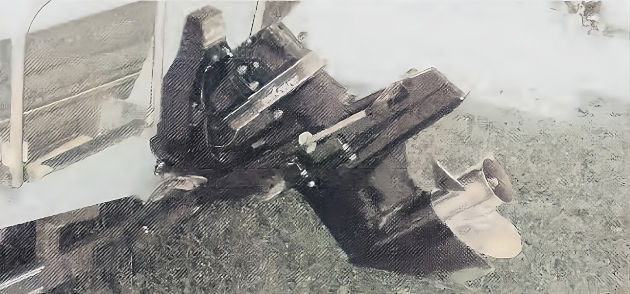
Engine and Outdrive
Now that your battery, lights, radio and horn are working, it’s time to move on to your boat’s engine. For obvious reasons you want this to be performing at its very best whenever a prospective buyer comes to look at your boat. Nothing turns off a customer faster than an engine that appears weak or unreliable.
When testing or demonstrating your engine with the boat out of the water, always attach a source of cooling water before you try to start it. Although the engine will not overheat while cranking or within the first few seconds of starting, the water pump will immediately begin to self-destruct since there is no lubricant for the impeller other than the water that it pumps.

When you are testing your engine, trying to start it or figure out why it will not start, please don’t just keep leaning on the starter in the vain hope that it’s going to heal itself. If the engine doesn’t fire and try to start on the first four or five tries, it’s time to turn off the key and put on your thinking cap. All you will accomplish by leaning on the starter is wearing down your nice, energetic battery, and possibly overheating and damaging the starter. This is called compounding the problem.
As you begin your troubleshooting, be aware that old gasoline is bad news for boat engines, particularly for two-cycle outboards. So if the gasoline has been around for more than a few months, get rid of it (in an EPA approved manner, of course; for what it’s worth, lawn-mowers seem to be able to burn just about anything) and put a few gallons of fresh, mid-grade gasoline in the tank. Be sure to add the required TCW-III oil for your two-cycle outboard. Fresh gasoline is an easy and cheap way to make sure your engine starts quickly and runs smoothly.
If the engine has been sitting around a while without being run, there may also be dried up gasoline and oil residue in the carburetor, which can sometimes be dissolved with the use of Fuel Injector and Carburetor Cleaner, available from your local auto parts dealer. Add about one ounce of cleaner to each gallon of fresh gasoline in the fuel tank. After mixing this well, feed some of the fresh gas-cleaner mixture into the carburetor. Sometimes it helps to choke off the air intake of the carburetor to make the engine pull the gas mixture through and be sure that the fresh gas is displacing the old stuff in the carburetor bowl. Let this sit for a while, a day or two if necessary, and retry the engine. If this doesn’t work, the carburetor will need to be removed and cleaned.
Ignition
If you have fresh gasoline and a good battery, but the engine still won’t start and run, it may be due to a lack of ignition. Fortunately, you can test the ignition fairly easily.
To do so, remove one of the plug wires from the top of the spark plug. Then, carefully seat a spark plug wrench on the plug and unscrew it. Attach the plug wire to the top of the now free spark plug and hold the base of the plug where the threads are located firmly against the metal of the engine. Have a helper press the starter for a second or two and observe the spark at the tip of the spark plug, or lack thereof as the case may be. If there is no spark at all, or if the spark is just a tiny, weak, yellow spark then you have an ignition problem that will have to be remedied before the engine will run. If you have a nice blue spark, your ignition is operating just fine.
While you have the spark plug out, look at the tip and decide whether it needs to be replaced. If it is corroded or pitted, go ahead and replace all of the plugs — another easy way to make your engine run better. Be sure not to over tighten the plugs in the engine as you replace them. Usually you just screw them until they are hand tight, then tighten them about half or three-quarter turn more until they are firm and snug. If you tighten them as hard as you can, you are likely to strip out the threads in the engine creating a huge repair bill. If you have a torque wrench, use it to tighten the plugs to the engine manufacturer’s recommended specification.
Diesel Engines
If your diesel engine doesn’t want to start and run smoothly, chances are that you have a fuel delivery problem. It’s true that diesels, which do not need spark plugs, are relatively maintenance free. But that does not mean they can be neglected. In fact, a number of undesirable things can happen to a diesel engine fuel system as a simple result of it not being used regularly.
For example, there may be air in the fuel lines. This can cause the engine to run rough and emit white smoke, or it can prevent the engine from starting at all. To remove the air from the system you have to “bleed” the system using the bleeder screws provided for that purpose at the secondary fuel filter and on the injector pump housing. Open the bleeder screw on the secondary filter about a quarter turn and pump the manual primer on the transfer pump to feed some fuel through the bleeder screw.
If air is present, it will bubble out at the bleeder screw. Continue to pump until the fuel runs out without any more air bubbles. Then hold the pump down on the last stroke and tighten the bleeder screw shut. There are usually two bleeder screws on the body of the injector pump and you need to bleed each one in turn. Begin with the screw closest to the secondary filter. Again, open the bleeder screw a little and operate the pump handle until clear fuel flows out, holding the pump handle down after the last stroke as you tighten the bleeder screw. Repeat the procedure for the other injector housing bleeder screw.
Once the system is bled, try to start the engine again. If it still doesn’t run properly, you may have to repeat the procedure once or twice to get rid of all the air. Otherwise, if you tried to bleed the fuel system and discovered that the fuel was not flowing freely you probably have an obstruction in the system. Open and inspect the primary fuel filter, i. e., the one closest to the tank. If it is old and clogged, you may be able to restore the flow of fuel by replacing the filter. Note that after you install the replacement filter, the system will once again have to be bled free of air.
If the fuel filter is clogged with black gooey sludge, that indicates that there is bacteria growing in your tank and you need to get rid of the accumulated sludge. You can hire a dockside marine service company to come and “polish” the fuel, which consists of pumping it out of the tank through a series of filters and then back into the tank. Or you can have the tank removed, steam cleaned and replaced. You may also consider simply replacing the fuel tank with a new one. With the latter two options the existing fuel will have to be removed from the tank and polished before it is replaced, or it can be disposed of as hazardous waste. You can start again with a few gallons of fresh fuel, treated with a diesel biocide and fuel stabilizer. The way to prevent this problem from occurring again in the future is to add biocide to the diesel fuel in the tank according to the recommendations on the label of the bottle of biocide.
Another problem that can occur in diesels is that the fuel can deteriorate with age. It can actually do so in a couple of ways.
For example, the fuel can begin to break down and congeal into a gel-like substance containing particles of precipitated paraffin wax.
This occurs most often to fuel after it has been exposed to temperatures below freezing. The fuel can also begin to discolor and turn brown as it gets old. If your fuel is exhibiting either of these symptoms, you need to pump out your tank and start again with fresh fuel.
Repairs
Whenever you take you boat in for professional help, always be sure and get a written estimate before permitting repair work to be done. Otherwise, the repair shop can fix what it decides needs fixing and charge you just about whatever it wants to charge. What you expected to be a simple tune-up can be fluffed up to a $2 000 bill. What should have been a straightforward request to reseal your outdrive can mushroom to $3 500.
Some businessmen see boats as a luxury item, and they may become quite aggressive with their repair charges. Therefore, a written estimate is important because it limits what the shop can charge. The written estimate may be exceeded by a small amount in certain circumstances, usually about 10 percent to cover things like unexpected increases in parts prices, or relatively minor escalation in the scope of the repair due to the discovery of concealed problems. But if a shop wants to exceed a written estimate by a substantial amount, it will have to contact you and get permission from you first. It may ask for payment, but cannot demand it. Your contract is limited to the amount of the written estimate, and once you pay that amount, your boat cannot legally be encumbered for any additional amounts.
That having been said, it is not unusual for the marine mechanic to want to investigate the problem before a written estimate can be created. That’s okay, as long as there is an agreed limit on the fees you will pay for the investigation. As part of this investigation, the shop will have to create a work order and have a mechanic spend time investigating the problem and making notes. Then it will have to look up the parts and materials costs, and the labor estimates for the job. Finally the mechanic will take all the information and compile an estimate for you.
All that work takes time, and it is fair for a shop to require you to pay for it. Just get a figure ahead of time for how much you will be charged for the estimate. Be aware that repair shops know all about the rules for getting paid, and if your repair shop seems reluctant to issue a written estimate, or especially if it tries to talk you out of one, be on your guard, particularly if you are alone. Getting a written estimate is your right, and you should stick to it no matter how friendly the repairman acts when he is trying to talk you out of it.
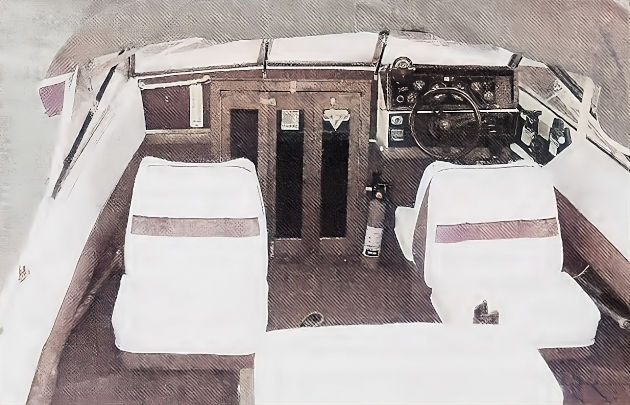
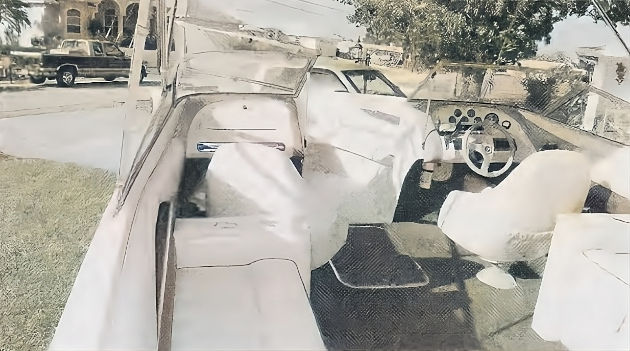
Upholstery and Trim
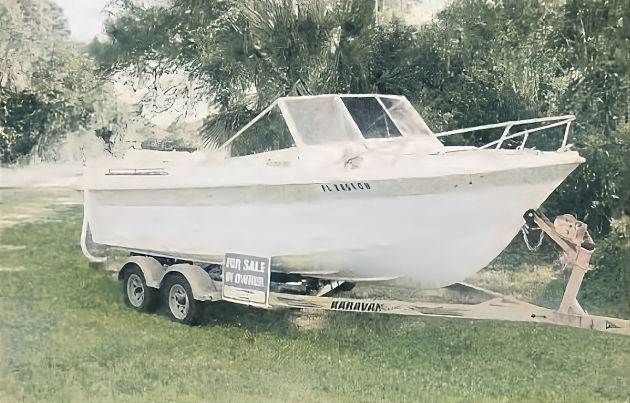
If your boat is more than 10 years old and is not stored under cover, chances are that the upholstery, carpet and trim have deteriorated from exposure to the weather. This is a routine maintenance item on boats as they age.
To make your boat really appealing to buyers, have the deteriorated upholstery and carpets replaced or replace them yourself. It makes a world of difference in terms of your boat’s visual appeal, and you may be surprised at how little it costs. Dollar for dollar, it’s one of the best things you can do to make your boat disqualify the competition.
Stock replacement seats are available from marine catalog dealers to fit most smaller boats. There is even a line of replacement seats and furniture for pontoon boats. Marine carpet is fairly inexpensive, and it doesn’t take very much carpet to do a boat.
If there is some damage to your seats or trim, rips or tears caused by accidents rather than age, definitely get it taken care of before your try to sell your boat. Most people overestimate the cost of getting a ripped seat repaired, and it will seem like a bigger problem to a buyer than it really is.
There are a number of different vinyl repair kits on the market, but don’t plan on using them for anything other than little holes or the smallest rips, and even then only in non-stressed areas. If you have a seat that’s ripped or split, get a price to have it recovered and check the price of a stock replacement if it is available. Choose the best option you can find and take care of it.
Clean it up
The next step is to clean and shine that old boat until it looks like new. This may sound basic. But it’s amazing how many people try to sell their boats with grunge still sitting in the corners.
Engine and Bilge
If the engine or bilge is filthy, you can take this opportunity to clean it up. Use a degreaser spray of the kind sold at auto parts stores to break up the grease and oil. Regular old 409 or Fantastik-type cleaners work fairly well at this job too. Just spray down the greasy areas with the cleaner, let it sit for five or 10 minutes to dissolve the grease, then hose it down and repeat as necessary. Of course, if your boat isn’t stored on dry land, you will need to mop up any oil-contaminated water to keep it from contaminating the water.
Storage Lockers
Open up the storage compartments and clean them out – thoroughly. Hose out any trapped dirt and dust, remove old plastic fishing worms stuck here and there, and get rid of those old six-pack rings. If there is any mold or mildew present, use a bleach solution to both kill it and wash it off.
Fiberglass, Upholstery and Carpets
A good product to use to wash your boat inside and out is a solution of warm water and liquid dish soap like Joy or Dawn. Put a few ounces of soap in a bucket and add a gallon or two of warm water.
Then use a nice heavy sponge to soap up the entire boat in sections. Note that this soap solution works best when it is applied to the boat when it is dry. Otherwise, if you wet your boat down beforehand, the water clinging to the surface of the decks, bulkheads and cockpit will further dilute the soap solution as soon as you apply it, diminishing its ability to loosen and dissolve dirt. In addition, be sure and rinse the soapy areas before the soap can begin to dry. The last thing you want is to cement the dirt back on the boat with dried soap.
Mildew stains can be removed with a bleach solution. If the stains aren’t too bad, try a solution of 1/2 cup of household bleach per gallon of water. Wipe this on the affected areas and let it sit and work for up to 10 minutes. Really bad mildew stains on upholstery can be lightened with a 1:2 mixture of household bleach to water (1 ounce bleach added to 2 ounces of water).
Dab this on the mildewed areas and rinse promptly, within two minutes. Be aware that bleach will degrade the carpet and upholstery, and can ruin it if used repeatedly, or if the bleach is left on for a long time. While modern marine textiles are quite colorfast, the prudent boat seller will test an inconspicuous area with the bleach solution before dousing all of the carpet and upholstery of the boat. Be sure to thoroughly rinse the treated areas free of any trace of bleach before you move on to something else.
After the boat has been allowed to dry completely, wipe down the upholstery and all plastic parts with a protect and shine product like Armor All. Spray the stuff on a soft cloth and wipe a thin coat onto the dash and upholstery. Then get out of the boat and let it dry.
Galley
If the boat has a cabin, it is important that it not only looks clean and spotless, but smells nice too. A nice smell conveys a sense of cleanliness, while unpleasant odors denote filth. Odors are a major turn-off to buyers. Our olfactory senses are very powerful and are strongly linked to our emotions. If a buyer is revolted by the odors in your boat, you will rarely be able to get him to come back for a second sniff, even after you’ve decided to solve the problem. In that buyer’s mind your boat will always be that disgusting, smelly old boat.
First, get rid of any old food: that means all food scraps, crumbs, and the bits and pieces that have accumulated in the food preparation and serving areas over the years. These kinds of scraps are food for the bacteria that emit unpleasant odors as they live and breathe and reproduce. While you’re at it, get rid of all the old bits of paper on your boat since they can serve as food for insects and mildew too.
Old grease in the galley can be cleaned up using an ammonia-based cleaner. Really hard cases of old grease and cooking oil can be removed with spray-on type oven cleaners, although you have to be very careful with these powerful products, since they contain alkali cleaning chemicals, which are even more corrosive than acids. They will corrode almost all metals and also remove paint. Do not allow the oven cleaner to remain on any surface more than a few minutes, and make sure to control the over spray with towels and rags draped over any adjacent surfaces.
Better still, while standing outside of the boat, spray the oven cleaner into a plastic bowl, then take the bowl of corrosive cleaner into the boat and use a sponge or rag to dab it onto the grease to be removed. After it has had a few minutes to soften things up, wipe it off. Then reapply as needed on stubborn or thickly coated areas. Afterward, if you need to neutralize the oven cleaner, you can wipe the area down with a weak vinegar-and-water solution. Then, wipe that off with window cleaner and paper towels. Always wear protective gloves when using oven cleaners.
Once the galley is all cleaned up, spray the whole thing down with a disinfecting spray like Lysol. It will help the galley to smell nice. If it is really clean, it will stay that way.
Head
No one wants to buy someone else’s used potty. Therefore, if your boat is equipped with a porta potty that has seen some use, the solution is simple. Get rid of the old porta potty and buy a new one. Leave the new one in the box, tape the receipt to the outside and leave it sitting in the boat. Voila! No problem.
If on the other hand your boat has a built-in Marine Sanitation Device (MSD), your goal will be to get the thing so clean, shiny and new-smelling the buyer will get the impression it has never been used.
The first thing you must do – and I really regret that this even has to be put into print, but it does – is to empty the thing. As unbelievable as this may sounds, there are plenty of people out there who will spend money to advertise their boat for sale with a system full of old poop.
Forget about it! One way or another, get the thing emptied, rinsed out and emptied again so that there is no trace of you-know-what left in the system. If you don’t want to mess with the mess, hire the job out. Just make sure it gets done.
Back to the bathroom side:
- Clean the room and everything in it until it looks like the bathroom in a luxury suite at The Ritz.
- After the usual cleaning, wipe the mirror, sink and all fixtures with window cleaner. Then wipe them all down again with tissues and isopropyl alcohol to really make them shine.
- While you’re at it, clean the floor with window cleaner too, being sure there is absolutely nothing in the corners.
The problem with the bathroom is that if a buyer sees a spot of anything anywhere he will tend to assume the worst. Clean, clean, clean! When you are done, spray a little disinfectant in there, something with an antiseptic odor that tells any and all prospective buyers that this room has been sanitized for your protection!
Smoke Odors
Smoke odor is another problem. Experts agree that smoke odor is impossible to completely eradicate because it so perfectly permeates everything. Still do the best you can.
Clean all the upholstery and carpets, and wipe all of the hard surfaces with a strong spray-on cleaner like 409 or Fantastik, being sure to wipe and wipe until your paper towels aren’t picking up any more residue. After you’ve done your best, you can use a deodorizer to mask the remaining odor. Get something light like “Rain Forest” or “Neutralizer”, as opposed to “Vanilla Train Wreck”.
Make It Shine
Fiberglass is a remarkably durable boat construction material, but its appearance will degrade over time. One common problem is chalking, sometimes called oxidation. This is an inevitable degradation of the surface layer of the fiberglass, known as the gelcoat, as a result of exposure to the sun. A fiberglass boat that is stored in the shade will remain shiny for years and years.
But exposure to the sun will cause any exposed surface to become dull and faded. As the gel-coat degrades, microscopic pits develop in the surface, which hold water and trap dust, allowing algae and mildew to grow and cause further damage to the surface. The gelcoat layer is tough, but only about 0,020-inch thick (0,5 mm) on most production boats, although there are usually variations on a boat where it will be found to be significantly thicker.
The surface of the gelcoat can be restored with a special fiberglass polish that actually grinds off the damaged top layer of the gelcoat, revealing the shiny fresh material below. Unfortunately, it takes an incredible amount of arduous, fatiguing, backbreaking, shoulder-aching, arm-wearying physical work to do an entire boat. Note that these kinds of polish are much heavier than what is used on automobiles with their delicate clear-coat paint finishes. In fact, using fiberglass restorer on your automobile will ruin the finish.
Should you decide to polish your boat to restore its original luster, I recommend buying an electric polisher to help you out with the job.
Choose an orbital action polisher, the less power the better. You want a polisher that will bog down and stop if you get too heavy handed with it as you get tired. A more powerful polisher will keep grinding away, imprinting swirls and loops into the surface of the fiberglass.
Once the surface of the gelcoat has been renewed by the polish, you can protect it by applying a coat of durable wax to protect it from the elements. Your local marine store will have a plethora of products to choose from. Pick one with UV inhibitors. Liquid waxes go on easier than paste, but they are prone to more runs, drips and splashes, and thus should be avoided by the weary boat-waxer.
Using paste wax products you may miss a few small spots here and there, but you will not end up with gobs of dried white wax where the liquid ran and slopped into seams and under fixtures, eventually drying and turning white in the days and weeks following application. If you want to put a really fine finish on your boat, look at the line of boat finish restoration cleaners, polishes and waxes made by Meguiar’s. This company has a superb reputation in the automotive finish world.
For those who don’t have the energy for a full-fledged polish job, there are a number of products, variously called sealants or fiberglass restoration systems. They will restore the appearance of your boat, making it glossy and restoring the deep color it had when new, without all that rubbing and polishing. These products work by creating a thin, smooth layer of clear plastic over the dam¬ aged gelcoat, usually consisting of some form of acrylic-urethane formulation. A lot of them make liberal use of such terms as “polymer”, “Space Age”, and “miracle” in their promotional material.
One boat-show pitchman described his restoration system as being akin to “industrial-strength Mop-and-Glow”!
Each product will come with detailed surface preparation instructions, and some have their own specially formulated surface pre-treatment products. In either case, working a section at a time, the fiberglass is meticulously cleaned and prepared. Then the liquid product is applied with a sponge-like applicator and allowed to dry. It goes on easily and effortlessly and several coats are applied to build up a thicker, more uniform and more durable coating. Once completed, the surface of the fiberglass will once again be nice and shiny, with the colors restored to their original, deeper hues.
On the down side, this effect is only temporary and the fiberglass will need to be re-coated within a year or so to maintain the finish (depending on climate and how well protected the boat is from the elements). Still, this is not a bad solution for restoring the appearance of older boats, especially when you consider the more laborious alternatives. I’ve included the names and contact information of distributors of some of these products in the appendix.
In the process of all this polishing, you will probably find areas where little spider web-like cracks called stress cracks have formed in the gelcoat. The fiberglass that makes up the structure of your boat – a composite of glass matting, glass cloth, and roving bound up with resin – is a relatively flexible material designed to absorb tremendous impacts and rebound to its original shape, but your gel-coat is not. Therefore in areas of the boat that have flexed significantly, the surface cracks develop. Fortunately, these do not represent any kind of structural weakness, and unless they are especially unsightly, I recommend that you leave them alone. Merely repairing the cracked gelcoat is pointless because the fiberglass underneath will just flex again and crack the repair in the same manner that the original gelcoat was cracked.
Therefore, to affect a truly permanent repair, you must first reinforce the area underneath so that it will no longer flex enough to crack the gelcoat again – an often difficult task. If you do decide to try and repair the cracks, you might try a product called Seafit Quick Fix Gelcoat Patch.
Rust
Rust stains can be removed quickly with products containing phosphoric and/or oxalic acid, available from marine stores and occasionally auto parts stores. Boeshield has an excellent line of products that both remove the rust and seal the surface of the metal to inhibit further corrosion. You may also be able to find some inexpensive rust removers in the specialty cleaner section of your grocery store.
There is a product sold here in Florida called The Works, which is a mild solution of phosphoric acid, water and other cleansing agents. It does a pretty good job of dissolving light rust and scale from stainless steel and fiberglass. No matter what you use, once you have removed the rust from any stainless steel on your boat, it is a good idea to polish it with a metal polish made especially for stainless and then apply some wax to protect the surface. Boeshield T-9 is a tough, spray-on wax that is ideal for protecting metal from corrosion.
Windows
If your boat has glass windows you can use some fine automobile polish and wax to make them sparkle. The polish will remove minute particles of dirt and smooth out some fine scratches.
The result will be glass that looks like new again and really catches the light. Whatever you do, though, be sure not to try this treatment on plastic, acrylic, Plexiglass or Lexan. Otherwise you will permanently scratch the surface of the window.
Water Stains
Water stains on the inside of a boat can be trouble when it comes time to sell. Personally, I find that leaks are a major turn-off when I am looking at a boat. Fortunately, leaks can usually be stopped by sealing the outside of the leaking fixture with a suitable material like mildew-resistant silicone.
To get a good seal between the sealant and the fixture, you need to prepare the area to be sealed by cleaning off all dirt and debris. Then you need to wipe the fiberglass where the sealant will be applied with acetone or nail-polish remover, since there is a residual coating of wax on most fiberglass boats, even after years of use, that will prevent it from sticking. Use plenty of rags to pick up the wax, so you aren’t just pushing around the dissolved wax and letting it dry again in the same place.
Once the leaks are stopped, the water stains are merely a cleaning issue. Try cleaning the soiled areas with window cleaner or ammonia. These products are nice because they leave no residue. Remove tough stains with a carpet or upholstery spot cleaner. A couple of useful products available locally in South Florida are Folex and Incredible, both of which have removed apparently hopeless stains for me in the past. Check the specialty cleaner shelves in your local stores, or call a local carpet company and ask for recommendations.
Teak
Teak wood trim on a boat tends to get covered with mildew, turning it dark. The easiest way to clean teak is with a moderately powered pressure washer of 1 200 to 1 600 psi. As the pressure washer blows off the mildew and dirt, the attractive amber color of the wood is revealed.
Don’t use the more powerful 3 000-psi pressure washers, as they can damage your boat.
There are also a variety of different teak cleansers available at any marine store that do a good job of cleaning and brightening your woodwork. Once the teak is clean and dry, rub in a little teak oil to help protect it from the elements.
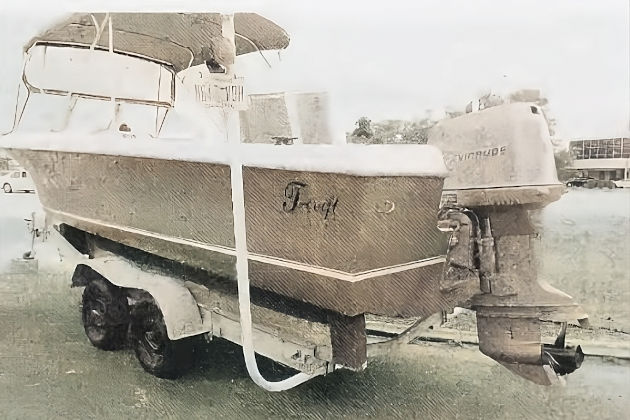
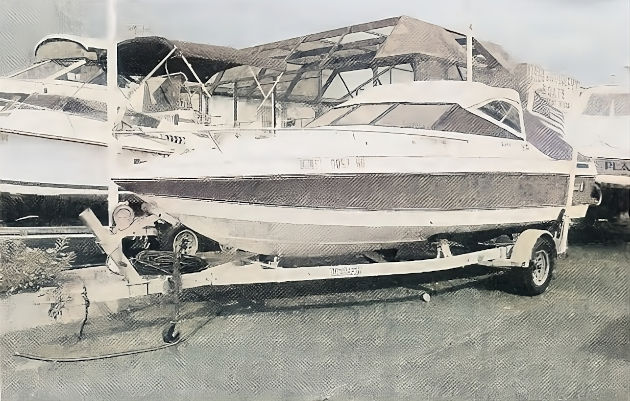
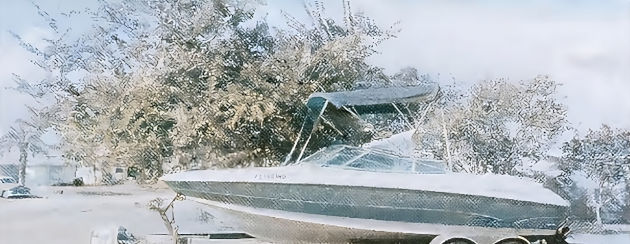
Trailer
As stated earlier, the condition of the trailer that came with your boat is vitally important when it comes time to sell. If your trailer has been abandoned and neglected to the point where it is no longer roadworthy, it can trip up a sale just when the buyer is starting to think about taking the boat home with him. As a general rule then, your trailer must be ready to hit the road for a three-hour trip home without any problems before you even think about advertising the fact that it’s for sale. Not only that, it must look like it is ready to hit the road for a three-hour trip home without any problems so it won’t scare off any prospective buyers.
With this as your objective, first clean off any loose rust with a wire brush. Then apply a coat of rust-stop paint. After that, check the wiring connector and trailer lights, and correct any problems that you find. Replacement trailer light kits are both inexpensive and readily available at pretty much any marine or discount store.
If the trailer has brakes, make sure they are functioning. If not, do what is required to be sure the trailer will stop when the brakes are applied. Sometimes this can be accomplished with just some cleaning and lubrication. Along these same lines, if the tires are all cracked and split, replace them. Ditto for the wheels if they are displaying significant rust.
Unfortunately, there is always the possibility that you may have received a budget trailer with your boat and that while it was sitting out in the weather, it deteriorated to the point where it is unusable and could cost more to repair than to replace. If this is the case, you may want consider offering the boat for sale without a trailer, or buying a new trailer to sell with the boat.
Locate a convenient local source for a replacement trailer and have the price and delivery information in hand in case it becomes an issue with an out-of-town buyer. Having this information readily available will allow you to settle the trailer issue that much more quickly if and when it comes up.
Get Some Fresh Eyes
Okay, things are definitely looking up! Before you call it a day, though, here’s a tip you don’t want to skip: Get some fresh eyes to come take a look at your boat and point out all those things you’ve missed. Your boat has deficiencies that you have become accustomed to seeing. A ding here, a scrape there:
You get so used to them, you don’t see them anymore, and you don’t think about them either. It’s just human nature.
What you need is someone to look over your boat as though he was a buyer, someone who will be brutally honest with you about each and every little thing that he doesn’t like. Bear in mind that you need to have the correct attitude about this process. When your helper starts telling you all the things that are wrong with your precious boat, don’t take it personally. Remember, this person is doing you a tremendous favor. Hide your face in your legal pad while you take notes. Write down each and every little thing that he or she mentions, and just keep nodding your head up and down and muttering,
“Yes … okay … I see … uh huh … anything else I need to look at?”
Whatever you do, don’t start arguing with your friendly boat critic. That would defeat the purpose of the exercise. If you have trouble controlling your feelings, try to get someone else to compile a list of items that need your attention.
Once you’ve got your list, sit down and consider each item. Try to figure out a way to make it go away. There’s a good chance you already knew about most of them. Be careful, though, that you don’t let yourself try to explain them away or dismiss them as unimportant – you’ve already done that while you owned the boat. The items on your list are things that the buyer is going to see. Therefore, you need to make them go away, either by fixing them, camouflaging them, covering them up or converting them into a useful feature that you can use to help sell the boat.
Decide What You Are Selling
As the final step in preparing your boat for sale, make sure all the items to be sold with the boat are together and in the boat if possible. Make a detailed list of all of these items. This will help you write the advertisements.
As stated earlier, take the boat accessories that you do not want to sell with the boat and store them completely out of sight. Put them away somewhere so that buyers cannot possibly see them, even if they should come into your home to use the telephone or whatever.
When you show the boat to a buyer, plan to have your boat and everything that goes with it on display so that the buyers can easily see what they are getting. Be sure that any new items are prominently displayed, leaving the protective packaging and tags in place as evidence of recent purchase.

- Baber, Michael. How Champions Sell. New York: AMACOM, 1997.
- Carter, Rita, and Christopher Frith. Mapping the Mind. Berkeley, CA: University of California Press, 1999.
- Farber, Barry J. State of the Art Selling. Piawthorne, NJ: Career Press 1994.
- Lawhon,John F., Sherwood Harris, ed. The Selling Bible: For People in the Business of Selling. Tulsa, OK:J Franklin Publishers, 1995.
- Thorson, Esther. Advertising Age: The Principles of Advertising At Work. Lincolnwood, IL: NTC Business Books, 1989.
- Wechsler, Warren, Kristine Ellis ed. The Six Steps of Excellence in Selling: The Step-By-Step Guide to Effective Selling. Edina, MN: Better Books, 1995.
- Willingham , Ron. Integrity Selling: How to Succeed in Selling in the Competitive Tears Ahead. New York: Doubleday, 1989.
- National Marine Manufacturers Association. “Pre-Owned Boat Market Analysis”. Chicago: NMMA, 1999.
- “Boat Buyers Stay Loyal in Cooling Economy”. Press Release. Chicago: NMMA, December 29, 2000.
- “Boating 2001 — Facts and Figures at a Glance”. Chicago: NMMA, 2002.
- The Sailing Company. “The Sailing Market: State of the Industry 2001”. Chicago: The Sailing Company 2002.
- “The Sailing Market: State of the Industry 2002”. Chicago: The Sailing Company 2003.