The deck and super structure are key components in the construction of bridges and ships, each serving distinct yet complementary roles. The deck, in both contexts, functions as the primary surface for traffic or activities. In bridges, the deck is the part you drive or walk on, supported by the underlying structure, and can be made from materials like concrete or steel. On ships, the deck refers to the horizontal platform that serves as the floor, with multiple decks often stacked in larger vessels, and the main deck being the uppermost, typically exposed surface.
The super structure, on the other hand, includes all the elements that rise above the deck. In bridge construction, the superstructure encompasses the girders, arches, or cables that support the deck and distribute its load to the piers or supports. This part of the structure is crucial for maintaining the integrity and stability of the bridge. For ships, the superstructure consists of all the structures built above the main deck, such as the bridge (command center), masts, and any additional cabins or operational areas. The superstructure plays a vital role in both the functionality and aerodynamics of a ship, housing essential operations and crew accommodations.
WHILE MUCH OF the survey tends to be focused on the hull because of its critical role in keeping the boat afloat, the superstructure has an arguably equally important role and needs careful assessment. Many of the techniques used for surveying the hull apply to surveying the deck and superstructure.
On a composite boat you are likely to find more areas with a foam core in the deck and superstructure, while the framing on metal and wooden boats is likely to be lighter but more complex because of the different shapes it has to accommodate. You’ll also need to consider windows and a multitude of other fixtures and fittings.
The entire deck and superstructure area should be self-draining, either through washing over the side or scuppers and drains, and water should not be able to collect in any area. That is the theory, but in practice you are likely to find that water can collect, perhaps just inside the toe rail amidships or in cockpit areas, depending on the angle of the boat when it is stored ashore. Even if they are dry during the survey, you can usually detect water collection areas by staining on the deck and it pays to look at such areas a bit more closely. Any water almost permanently on deck can start corrosion on a steel hull or rot on a wooden boat, or it could permeate through cracks in the gel coat on a composite boat.
Gaining Access
WHILE THE INTERIOR of the hull on both power and sailboats is usually reasonably accessible, designers tend to overlook this when it comes to the inside of the superstructure and fit linings. You may be able to get some sort of access by removing lights and other fittings, but it may be difficult to get to the likely problem areas in the corners and angles of the structure. Many modern boats have the lining panels attached by means of Velcro, so they can be removed but it’s not always easy to refit them as they were. Therefore, you’ll need to rely on what you can see from the outside, although any area in which you can see staining on the interior linings should be explored in depth.
A lot will depend on how the superstructure and deck have been constructed and, as always, older boats tend to have better access than modern ones where interior mouldings are often used in addition to decorative linings. One ray of hope can come when the interior lining is attached in panels, which allows them to be easily pulled off and then re-attached. However if it’s not your boat, you’ll need permission to do this and then you’ll need to take great care not to damage the panels and return them to the right spot (number the panels or make a note of where each one is located).
Even when you can get access in this way you may well find that you come across insulation, and on metal structures this may take the form of sprayed-on rigid foam which is virtually impossible to remove; if you do remove it, it will need to be sprayed on again. Therefore, all you can really do is check for cracks or broken areas, which could indicate undue movement of the structure hidden behind.
Electrolysis
You need to be extra vigilant when examining the deck and superstructure on aluminium boats. Electrolysis could be a problem, particularly in areas of the superstructure where no anodes are fitted. Stainless steel and aluminium are reasonably compatible and their proximity should not cause major problems but if aluminium is in contact with normal steel, copper, brass and bronze and the area gets a regular soaking of sea water you could be facing significant corrosion, and the aluminium is always the one to suffer.
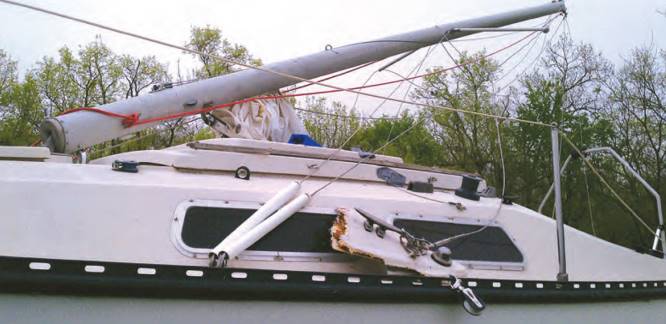
The boat builder would hopefully have addressed this potential problem, but additions to the boat may not have been subject to the same scrutiny and could start a reaction. Check deck fittings for a white powder or crystalline substance, which could signal aluminium electrolytic corrosion. If you do discover it, there are solutions; you could insulate the two metals, although securing bolts are very difficult to insulate so, even better, replace the offending metal fixture with one made from a more compatible material.
Areas of stress
THE DECK AND Professional Advice Consultations on the Marine Boat Surveysuperstructure of a sailboat is a high stress area of the boat; on sailboats, the mast, winches, stanchions supporting the rails are all attached to the deck, and all of these can generate heavy local loads. On motorboats, the windlass in the bow and the various mooring fittings, capstans, stanchions and davits can generate load, while even people walking about on the deck may create stress. Therefore, designers have to create a structure that can handle all of these stresses without too much distortion.

One of the quickest ways to check the structural integrity of the deck and superstructure is to walk around the deck, cockpit and coachroof and try bouncing; the structures should be rigid enough to take this sort of loading, so if you detect movement under your feet it’s time to investigate. It might be that the structure is simply not as strong as it could be, but you won’t want to let it go unchecked. On a composite boat, movement could indicate that the bond between the laminates of a sandwich moulding is breaking apart and has lost some of its rigidity. On metal and wooden boats, there could be inadequate framing or support for the deck or coachroof structure, while any movement is likely to open up gaps which could lead to nasty leaks.
Panelling and decks: sharp edges, joins and corners
Panelling
EXAMINE THE INTERIOR for signs of leaks in the joins around the edges of the panelling on wood and metal boats, while on a composite look for gel coat cracks around the edges of the flexing panels. Light tapping with a hammer might indicate a problem in a laminate; the sound will change from a ring to a softer thud, although you’ll have to take into account that rigidity changes across the panel structure and hard points vary (making it much harder to get meaningful information using this method than it is when examining the hull).
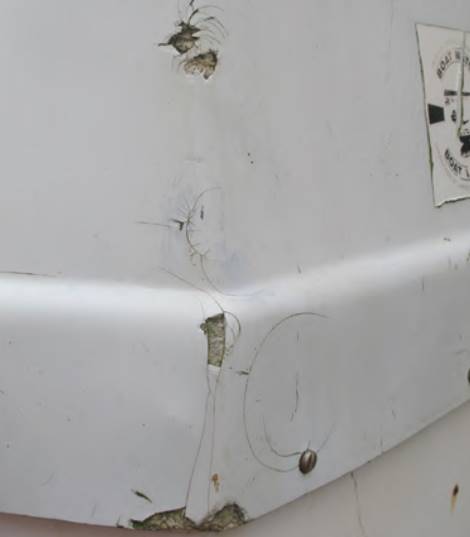
On a motorboat you may find some movement in the large panel areas of the flybridge deck or the superstructure top. These can be quite large unsupported areas because the designers want a clear space below, but the structure also has to be rigid enough to support the large areas of glass that are often incorporated into the superstructure side panel.
Pay particular attention to the edges and corners of mouldings and structures. This is where you’re most likely to find problems, since these can be the focus of stress. Composite mouldings in particular do not like sharp edges and corners because, on the one hand, it can be harder for the laminator to get the glass mat and the resin into these corners while on the other, composite mouldings tend to rely on a smooth transition around bends and corners for strength. A panel with a double curve is a lot more rigid than a flat panel because it has less scope for flexing. You’re most likely to find sharp edges and corners in the cockpit and coachroof on a sailboat and around the Technical Advice on the Boat Inspection Process and Why Survey Your Own Boatsuperstructure on a motorboat. Check for any cracking in the gel coat, which could indicate undue stress. It may not be a major problem and the gel coat can be ground out and replaced, but the problem won’t go away without a change in the shape of the moulding. Moreover, it reflects bad design in general, meaning you may want to walk away now.
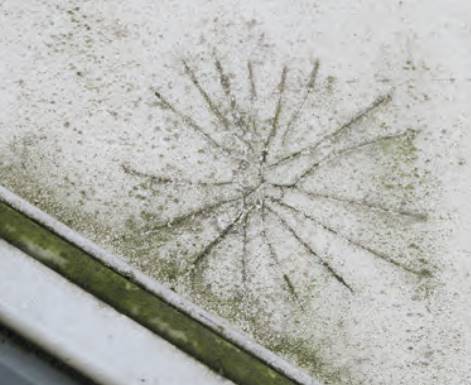
On a wooden boat, sharp corners and edges are more acceptable because the material is structured that way and will only bend in one direction, but look closely for any signs of movement at the edges which could indicate that the structure is not rigid enough. Such movement would also allow water to enter the small gaps, which could of course set off rot.
Decks and Trim
Wooden boat decks and coachroofs are large flat areas, hence they are often constructed from large plywood panes. Here you need to look closely at where they attach to the rest of the structure; you’re looking for signs of wrinkling or small undulations in the surface that could indicate water has got into the joint and started to cause delamination. While the signs may be small, the problem is a big one because you’ll usually need to replace the entire panel. You may find that a fillet with a rounded edge has been added to the joint at the corners of the coachroof in order to help smooth the transition between two panels (one nearly horizontal and one nearly vertical), and such joints are prone to letting water in if there has been any small movement in the structure.
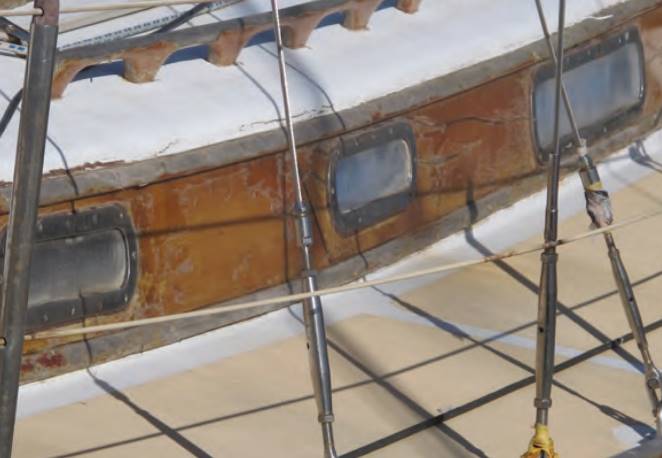
The decks of older wooden boats may be constructed from wooden strips laid over the supporting timbers, much in the same way that a hull is planked. as with the hull, the planks depend on good sealing of the joints for water tightness so you need to look closely at the seams to ensure that the caulking and the sealer or pitch over it remains intact. Any signs of leaking are usually evident below in the form of staining on the lining or paintwork. Bear in mind that the water may have tracked along the seam before it finds its way out in the form of a leak, so you’ll need to search for its source.
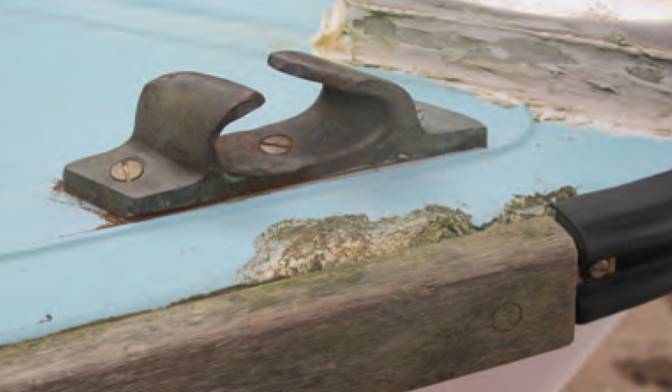
Metal structures will almost always have sharp edges and corners because this is the way that the structure is put together when welded. These hard edges are often softened with wood trim to improve the appearance, so you’ll need to look closely at the join between wood and metal to detect whether or not water has entered and started rot in the wood or corrosion in the metal. In fact, problems often present where two materials have been used in the construction of the deck and superstructure, since they can have different rates of expansion and contraction and/or reactions to slight flexing of the structure, all of which can open up small gaps, allowing water in to do its worst. Trouble like this is likely to be most evident around the securing points.
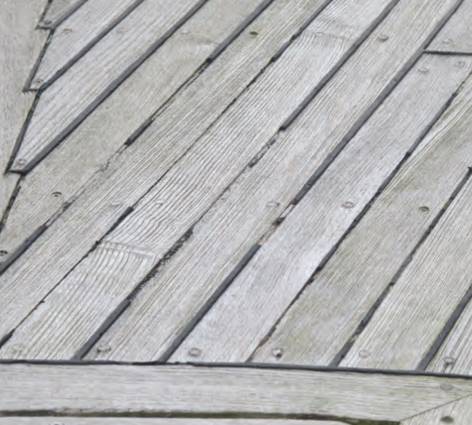
Composite boats may also include a wooden trim, so be sure to examine the join between a wooden rubbing strip and the moulding underneath. The join was probably filled with sealer when new, which may have since hardened or even dropped out; the gap can hold water and start to rot the wood.
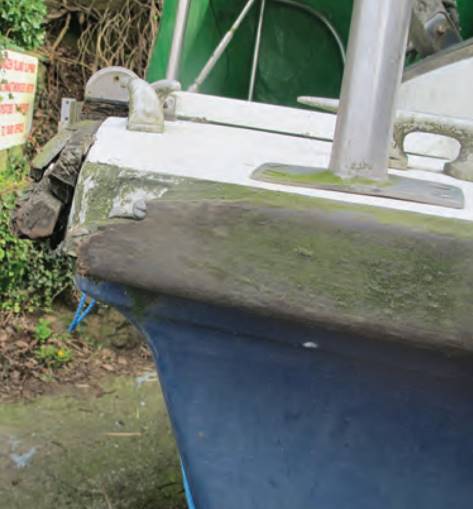
You can get the same problem in window frame trims and indeed anywhere in the joins between the wood and mouldings. Green moss in the join is always a giveaway, but it isn’t necessarily a serious problem because the wood can quite easily be replaced or even just the seam raked out and resealed. It could be more serious on a steel hull, since there could be deeper corrosion (look for rust streaks).
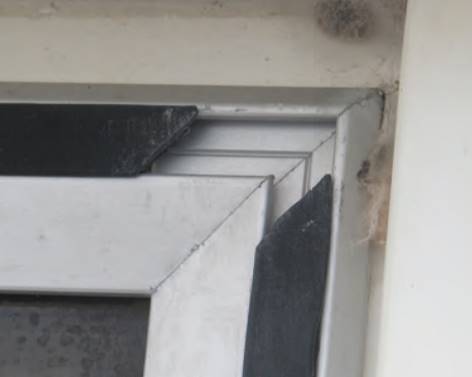
Teak decking or a substitute material improves the look of the boat and makes for a good anti-skid surface, but if the deck is strips of wood look carefully at the seams and edges for signs of water ingress. On a composite moulding, water getting in via these seams may not be a particularly serious problem except that it could eventually cause the wood and the moulding to separate, but this could cause corrosion on a steel structure.
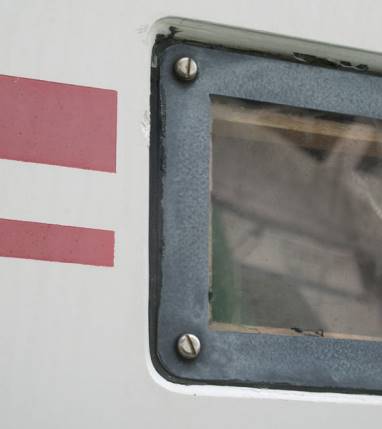
The teak used for decking is usually very durable and resistant to rot; however, today there are several substitute materials in use which have the look of teak but are applied in cut sheets. Provided there are no lifting edges and the sheets don’t move when walked on or have a hollow sound when tapped, all should be well. If such wear is found, it will need re-gluing at the very least.
Windows, doors and hatches
Windows
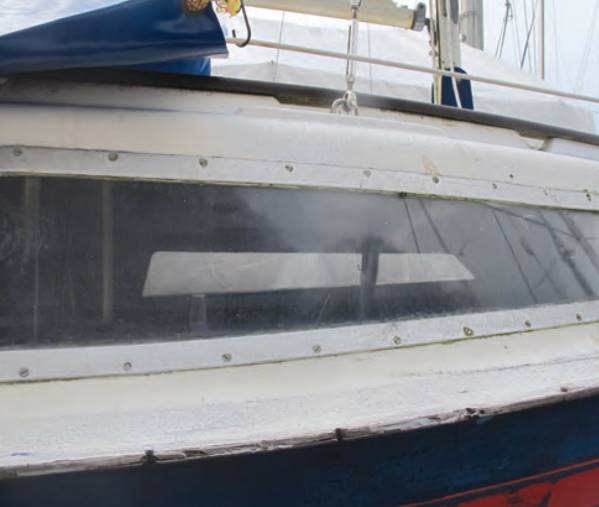
Windows should always be considered a potential source of trouble. The windows on earlier boats were set in frames, either wood or metal, and over time the seals would deteriorate and start to let water in. This will show in staining, usually around the bottom of the frame. You would almost expect to find this on windows that open, and short of replacing the entire window there’s probably not a lot you can do about it. On fixed windows you’ll often see evidence of an application of new sealant; this should be a concern because it can be notoriously difficult to seal windows adequately once they start to leak. The only real solution is to take the window out and start from scratch to seal it back in place. You may also find these issues on older motorboat windscreens (the modern technique, similar to that used on cars, is to glue the glass panels into place).
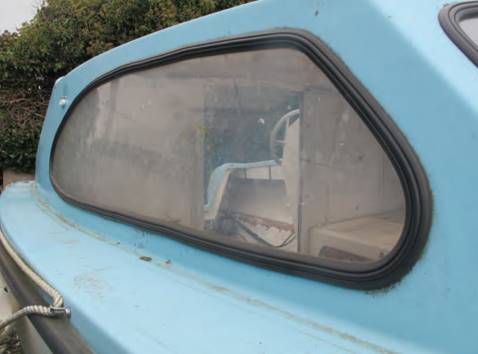
Most composite modern boats include windows that are sealed directly against the composite moulding. Here the sealant also acts as a glue to hold the window in place, just as modern car windows are glued to the steel structure. This method appears to be very durable and you may find the glue/sealant backed up with screws or bolts to hold plastic (Lexan) windows securely in place, particularly those set into the hull topsides on a sailboat. Hull windows were very definitely frowned upon in the past because of the difficulties involved in adequately securing and sealing them, but modern motorboats not only have hull windows, they can be quite large in size. Many of these have become «picture» windows that form part of the design styling and they need surveying with particular care because they can face considerable stress. Excepting small apertures, sailboat designers have largely resisted this trend, with windows confined mainly to the sides of the superstructure. Leaking in both hull and superstructure windows can be caused by flexing of the structure and all windows should be examined for any signs of deterioration in both the sealing and securing.
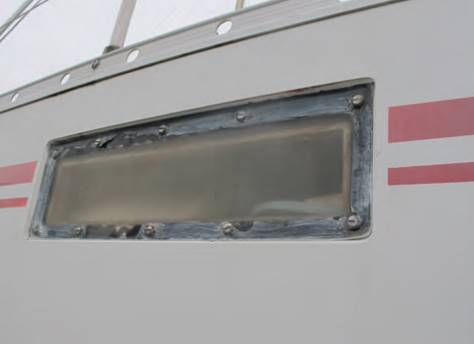
In addition to large hull windows, motorboats have increasing amounts of glass in the superstructure in order to create a light and airy interior, but the modern sealed and glued-in windows have a good track record so far provided that they are fitted into a suitably rigid structure.
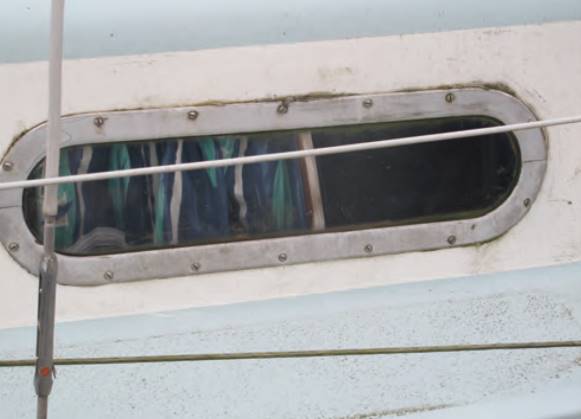
The glass itself should be fairly resistant to scratching and crazing, but you may find evidence of this on the earlier plastic windows. Although it doesn’t look pretty, it rarely seriously weakens the window.
Doors
Doors in the superstructure can be another source of trouble for much the same reasons. Traditionally wooden doors have been used to give a welcoming look to the boat, but they are rarely fully waterproof. Sealing methods transferred from the vehicle industry have made the doors on modern boats much more weather- and watertight, which is a great safety feature. Apart from checking that doors open and close easily, examine all around the seals to ensure the door is adequately bedded and free of damage which could cause leaks.
On sailboats traditional access to the interior is through an opening that can be fully or partially closed by shaped plywood boards. The object here is to be able to leave part of the opening open for ventilation and access but to prevent solid water finding its way below. Check that the boards are sound and well fitted.
Hatches
Hatches are widely used on both motor- and sailboats to provide an alternative escape route from below in the event of fire and to allow sails to be shoved below during a sail change. Since they are let directly into the deck, are subject to solid water and have a low profile to prevent the crew tripping over them, they can have a hard life. Since a hatch is normally hinged at one end and clamped down at the other it’s not always easy to get an even seal all round the hatch edge, so check the seal carefully. There may be some adjustment in the hinges on good quality hatches which can help you to even up the pressure on the seal. To really check watertightness, carry out a hose test (you could also do this for windows and doors). Any leakage through hatch seals is usually evident in staining or lining distortion in the vicinity of the opening.
Motorboats usually have hatches that give access to the engine compartment and on smaller boats these are often hinged flap hatches which open from the centreline outwards. It’s difficult to get a good seal here, but since they are at the stern they are less subject to solid water. If they do leak, you are likely to see signs of corrosion on the engine fittings below or possibly stains in the bilges where the water has dripped down. Again, examine the seal for continuity and damage and mark it for renewal if necessary. Finally, check the closing arrangement to ensure it is closing and locking properly.
Many modern motorboats usually have the engine compartment access as a hatch let into the cockpit deck. It’s a convenient arrangement as far as using the boat is concerned but the hatch has to be well sealed if it is to prevent water getting below in rough seas, rain or when washing down. The usual arrangement is to have the seal let into the hatch itself, so that it doesn’t get damaged as crew go below, and then a channel is let in around the edge of the hatch opening, which is fitted with drains to drain off any standing water. The system works wonderfully well when the boat is new but damaged or worn seals and/or blocked drains can lead to leakage and you will see evidence of this in staining or corrosion below. I have seen boats in which electrical circuits, such as battery chargers, are installed on a bulkhead just below the hatch edge and even when the hatch is sealing properly, these can be vulnerable if the hatch has to be opened at sea or when it is raining. If you see such a set-up on your survey, carefully examine the connections and installations of the electrical system. You can check that the drains are clear with a hose test, but do this with care as you obviously want to avoid spraying water around the engine compartment.
Cockpit
THE COCKPIT ON a sailboat needs careful scrutiny because it can hold any water that might come on board in the form of spray or rain. The drains in the cockpit corners that remove any water are a vital safety feature, and they’re a great place for muck, rope ends and debris to collect. Therefore, they must be clear and should be fitted with grids.
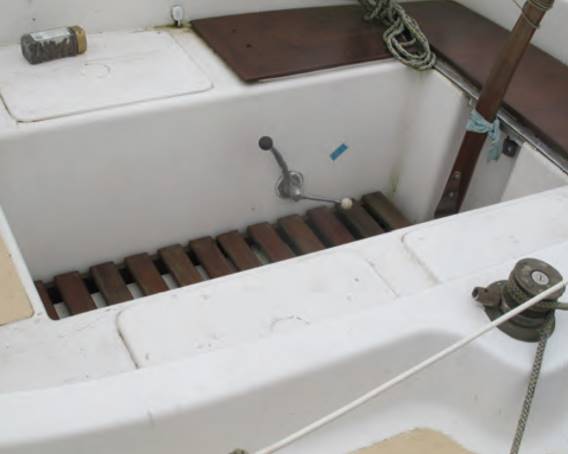
Moreover, crew standing on the sole of the cockpit can cause flexing of the panels so be alert to any signs of the gel coat cracking on composite boats or rot or corrosion on wood and steel boats.
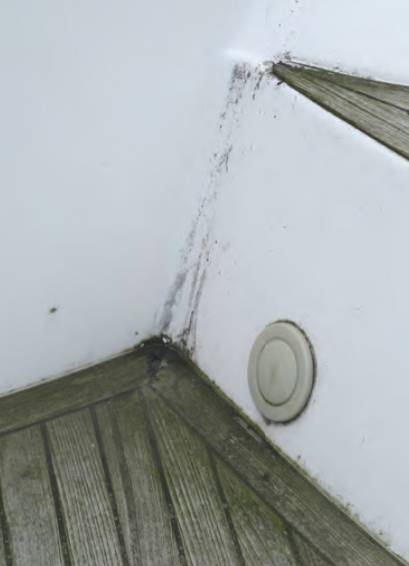
Finally, check around those drain holes because if the drain is not fully sealed, water may find its way into the wood or laminate.
Fixtures and fittings
ALL OF THE fittings around the deck should come in for careful scrutiny. As we have already discussed, these can be subject to considerable stress. Therefore you are looking for any signs of movement or undue stress. On a composite these are revealed in cracking and/or crazing in the gel around the fitting, signs of wear in the wood surface on a wood boat and a sort of cocoa-looking powder on a steel boat. The latter is a form of rust that is created by movement between the two surfaces when there is a very slight slackness. In more extreme cases in both steel and aluminium hulls there could be distortion of the metal, while milder cases of stress or movement in the fitting will probably be revealed by a shiny surface on the aluminium where the parts rub together.
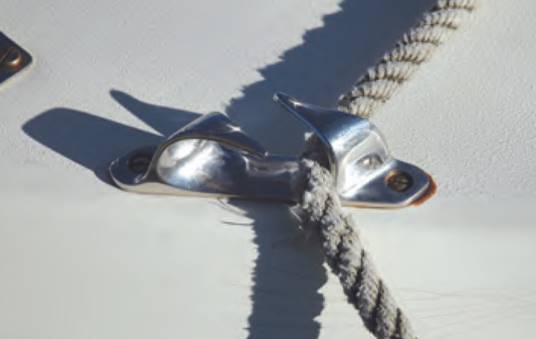
The problem may be caused by slackness in the fastenings of the fixture, in which case it can be hardened up. However, it would be better to remove the fitting and re-bed it in sealer, then harden up the securing bolts. Check the bolts too – if the fitting has come loose they may need lock washers or nuts to prevent a recurrence. In any case, wherever there is slack or slight movement in a fitting take a closer look inside (if you can get access) to ensure there is adequate reinforcement to support the fitting. Doubling plates or internal wood pads in the moulding should always back up the securing bolts for high stress items on deck, such as block attachment points or winches.
Guard Rail Stanchions
One type of fixture that always seems to be under stress, particularly on sailboats where the crew work on deck, is the guard rail stanchions. People grab them when boarding from the dinghy or a low pontoon and hold on to them when moving about the deck at sea. It all adds up to heavy stress in the stanchion, which tends to be attached to the deck with just a small plate and two or three bolts. The leverage on the stanchion is high and on a composite deck it’s not unusual to find stress cracks around its base. As this lies in the deck edge where water can collect there’s a good chance of water permeating into the laminate below the gel coat. If this water then freezes in winter, delamination can start to occur. If you find such cracks, the only solution is to remove the stanchion base, grind out the gel coat and renew it, then replace the stanchion, perhaps with a wider backing plate underneath to help spread the load. On boats with a laid wooden teak deck an indication of any movement in the stanchion base might be indicated by splitting in the teak and possibly slight lifting.
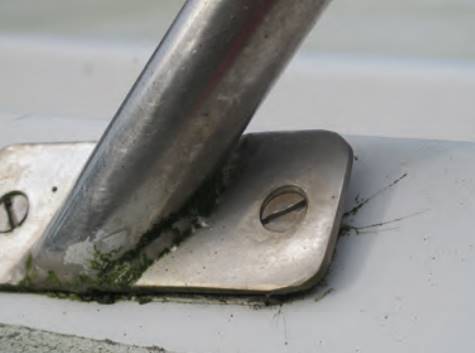
On some sailboats the stanchion is bolted to a metal toe rail which is then bolted to the deck edge. This arrangement helps to spread the load, but check the fastening area of the toe rail because the stress leverage on the stanchion is still present. On wooden boats you’ll be looking at whether the securing bolts have moved and if there is any sign of stress in the backing plate below.
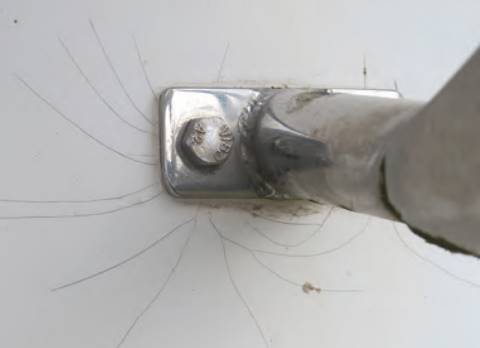
It may be possible to just harden up the bolts to re-secure the stanchion. There shouldn’t be a problem on steel boats, since the stanchions are likely to give way before the metal deck, although you may find some distortion in the deck plating on an aluminium boat if the plate is relatively thin.
Read also: More Sailing Knowledge and Skills
Older motorboats may be fitted with the wire and stanchion method of guard rails, so you’ll need to check these in the same way. The more modern method is to use tubular stainless steel for both the stanchions and the rails themselves, which creates a much more rigid structure that spreads the load and reduces stress at the deck attachment points. The pushpits and pulpits on sailboats are often constructed from stainless steel tubing, which usually stands quite a lot of stress and strain since these are integral structures that are intrinsically stiff, but check the deck mountings just to be sure.
Drainage
Where bulwarks are fitted, usually on work and fishing boats, there has to be some means of draining water from the deck. The usual method is to have scuppers let into the lower sections and these may be fitted with hinged flaps that only open when there is water on the deck but stay closed to stop water coming on board. Check the hinges to ensure the flaps are free to move because large amounts of water on deck can lead to instability.
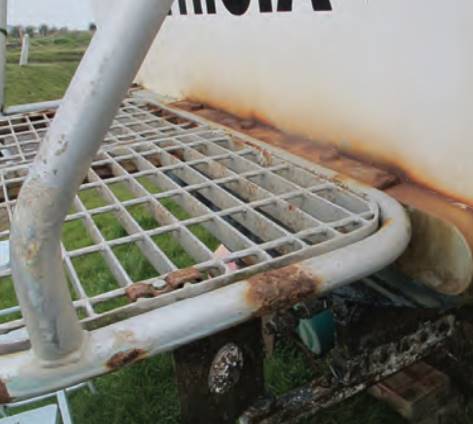
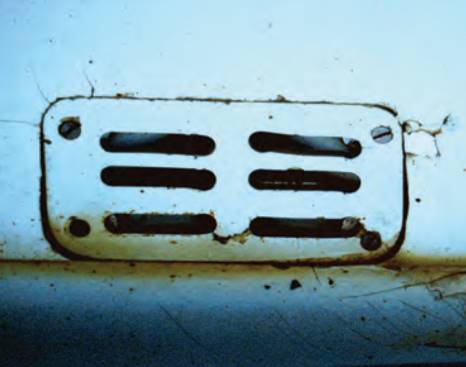
Deck drains may be fitted to take water away from some areas, such as the cockpit on a sailboat or similar areas on a motorboat. These tend to exit below the waterline in order to prevent stains on the gleaming topsides, so check that these are clear and that the seacock, which should be fitted at the exit point, is working properly.
Handrails
Rigid handrails along the tops of the coachroof and superstructure are often subject to the same type of stresses, especially as in rolling seas they may be all that is preventing the crew from going overboard. Handrails come in various forms: earlier boats may have wooden handrails, while in modern boats they are almost always constructed from stainless steel tubing. The securing fitting on stainless rails is welded into the supporting studs and here you need to grab the rail and exert pressure to determine whether there are any signs of movement. If there are, it may be a case of tightening up the securing nuts, provided that you can access them, although you may need to apply sealant into the joint first. You can use the same technique with wooden handrails but also look closely at the wooden plugs which are fitted over the securing bolt head in the handrail.
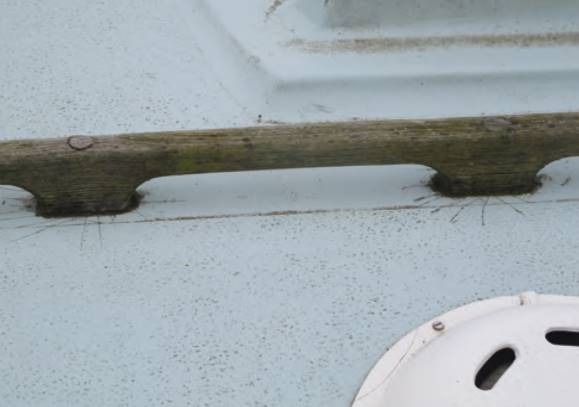
The plugs are designed to hide the securing bolt heads but they may work loose and allow water into the hole where it can lie and start up corrosion in the bolts (unless they are stainless or bronze). At the very least, dig out the old plug and check the bolt head underneath before fitting a new plug and sealing the hole. Moreover, check the join where the wooden fitting meets the composite moulding to ensure there is no movement and a good seal, and the securing points below if you can get access to them. Finally, the handrail may be a simple wooden strip laid between and secured to raised points in the moulding: once again, check that these are secure.
Davits
Like stanchions, davits have a high leverage factor, with the tender suspended from the extremities of the davit, and they tend to be attached through base plates bolted to the hull or deck.
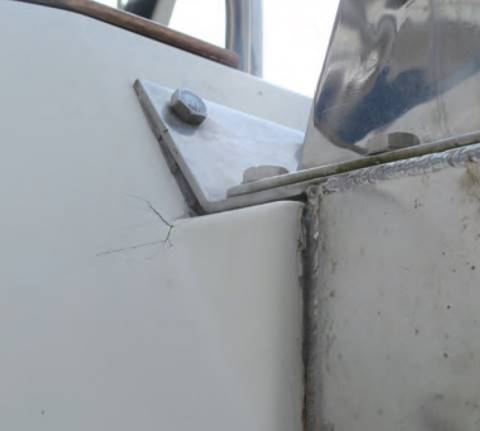
They are designed with stress in mind and each davit should take on equal strain, but this is where problems can occur.
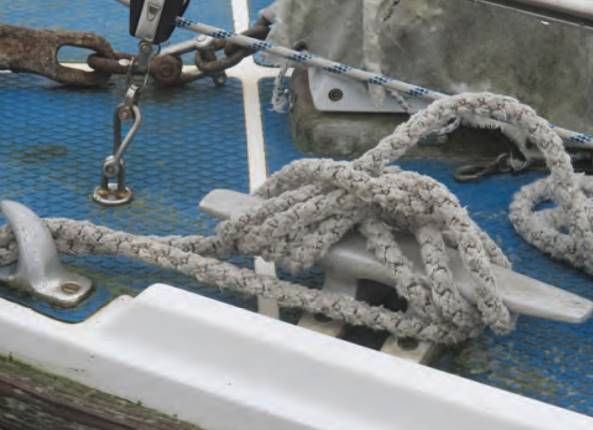
For example, if davits are imbalanced on a tender outboard motor it can cause unequal loads, so be alert to stress cracks and strains around the attachment plates, both inside and out.
Bow Fittings
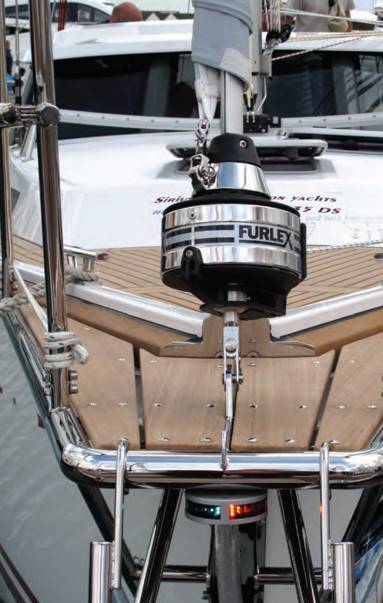
In your survey of the deck and superstructure you’ll want to spend some time examining the fittings at the bow. The bow rollers that provide the lead for the anchor chain and sometimes the mooring ropes can be under considerable stress. Check that the bow rollers move freely and are not worn, but that they are free from too much play, which could indicate wear in the spindle bearings.
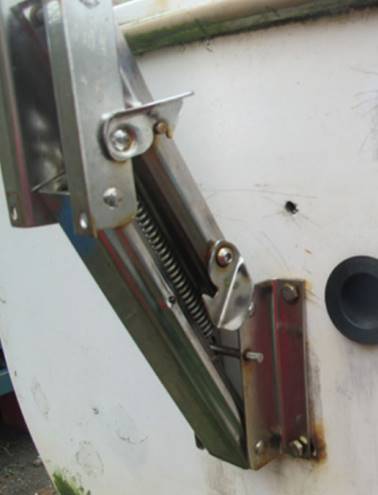
You might want to knock this spindle pin out occasionally to examine it more closely. There is rarely any way to lubricate this spindle when installed so it needs to be fairly free running otherwise it could seize up if left unused for lengthy periods. This bow fitting will also be the anchorage for the forestay on sailboats, which can add to the stress, so you want to ensure it is in good condition.
Anchor Capstan
The anchor capstan is usually a separate installation from the bow fitting and as this is the primary mooring point of the boat when at anchor, it needs careful examination. You may not be able to see the fixing bolts from the outside, so you’ll have to dismantle the fitting or check it out from the inside. Any signs of movement should be examined in more detail and, at the very least, the bolts hardened up.
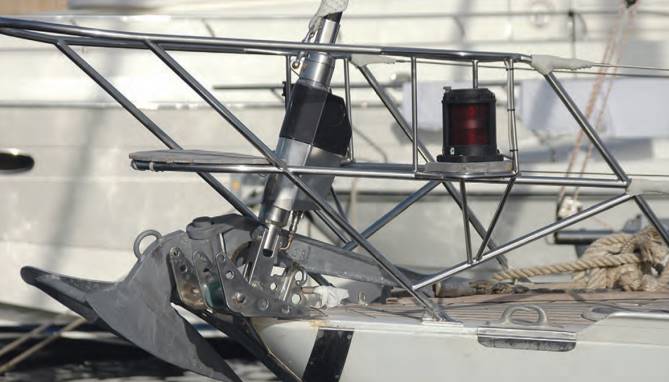
Unless it is the hand operated type of capstan found on smaller boats, the capstan is usually operated by an electric motor located in the chain locker. This chain locker can be a breeding ground for damp conditions, so examine the electric motor and its connections for any signs of corrosion (see below).
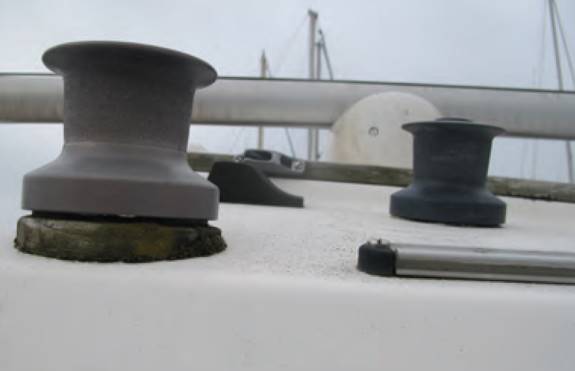
At the same time check the cable entries through the bulkhead where the electric cable comes into the chain locker. The wiring for this is quite substantial because of the heavy current it carries, so the cable entry should be fully watertight and sealed.

A survey is a good time to remove the entire anchor chain from the locker and check it for wear. This will give you a chance to clear any muck or debris that always accumulates in the chain locker and to check that the drain hole(s) at the bottom are clear.

Doing this will also give you access to a part of the hull interior for a further visual check on the hull structure. Also, check the chain carefully, since this can be vital to your survival (see chapter 11* for further advice on checking the anchor and its chain).

