Explore the essential components of sailboat rigging in this comprehensive guide. Learn about standing rigging, running rigging, and sails to enhance your sailing knowledge and experience.
After examining the keel, hull, deck and cockpit, the rigging and sail plan are the next most important areas. After all, you are buying a sailboat. The quality and condition of the standing rigging are determined by its design, installation, and past use and maintenance.
Losing any part of the standing rigging may result in loss of the mast. Loss of the mast can result in extensive damage to the boat or even sinking.
The running rig and sail plan drive the boat. Again, their design, installation, and past use and maintenance have a direct and noticeable impact on a number of factors, including the level of physical effort required, personal and boat safety, ease and convenience of sail handling and sail adjustments, boat speed, ability to point into the wind, balance of the helm, future maintenance, and sailing enjoyment.
By putting the emphasis on the “sail” in sailboat, you will find that you can sail when other sailboats are at the dock or under power.
Standing Rigging
The keel-stepped mast is a strong arrangement that can save the rig in a knockdown or if a shroud or spreader is lost. It usually enables the backstay to be completely slack when hauling the boat without resorting to temporary runners. It requires a crane to step and unstep the mast, may interfere with the interior arrangement of the boat, and is slightly more expensive than a deck-stepped mast.
If the mast heel comes out of the mast step because of damaged rigging, the lower portion of the mast could seriously damage the interior of the boat.
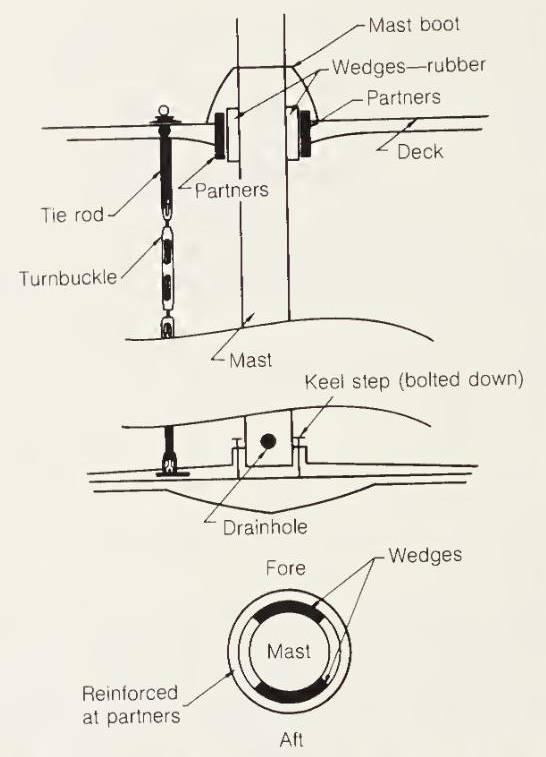
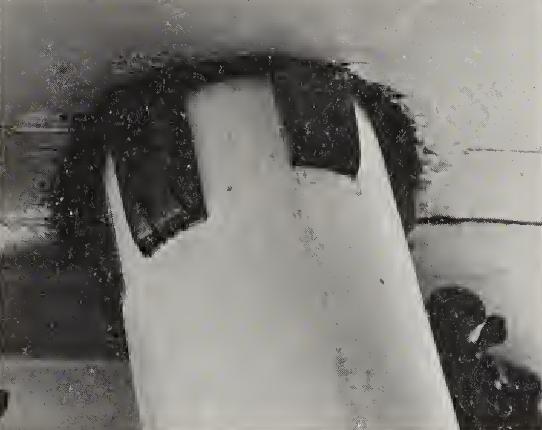
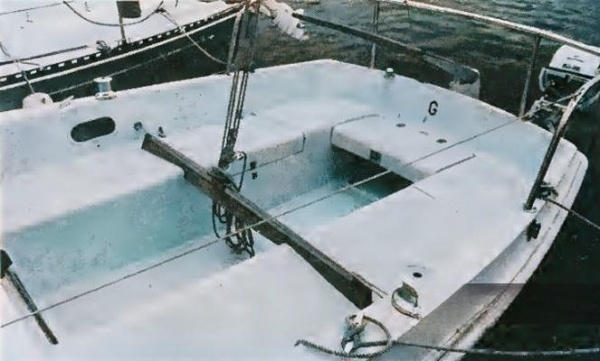
Keel-stepped masts should be aligned and properly wedged at the partners (the opening where the mast passes through the deck). They should be stepped on a reinforced floor, and never directly on the keel (if you want to keep your keel). The heel should be out of the bilge water and should be bolted to a substantial step.
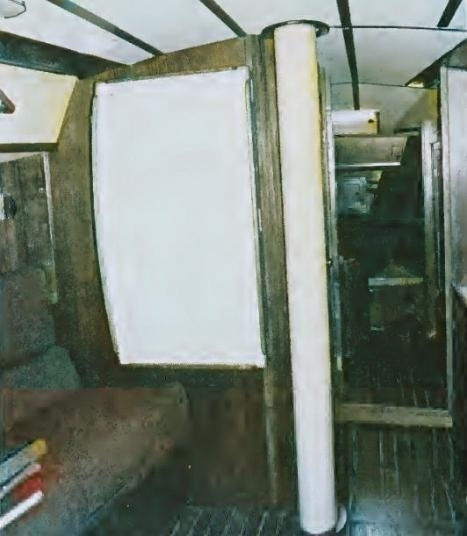
A tie-rod should be installed parallel and close to the mast to prevent the coach roof from hinging or rising. The mast should be sealed off at the partners with a good waterproof seal and mast boot.
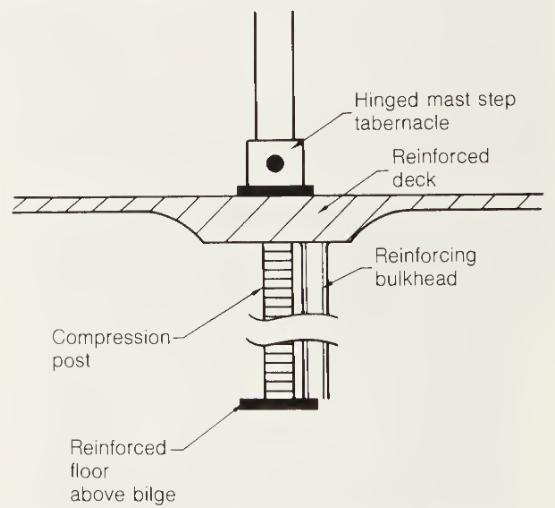
In contrast to keel-stepped masts, deck-stepped masts are much easier to put up and take down, especially if they are attached to a hinged tabernacle (a hinged bracket that acts as a step). This is an important factor if a crane will not always be available, or if the skipper and crew intend to step the mast themselves. A deck-stepped mast should rest on a substantial step fitting that distributes the vertical thrust of the mast.
The heel of the mast should be bolted to the step or pinned through a tabernacle. The coach roof in the area of the mast should be heavily reinforced and supported from below with bulkheads or other reinforcement, including a compression bar directly under the step. On a field trip with my students, we came upon the results of inadequate mast support. A mast had compressed a coach roof so much that it looked like a saucer in the area around the step.
However stepped, the mast should be evaluated for strength, stiffness, and windage. Racers generally want a narrow mast section to minimize drag and increase the flexibility for tuning for different sails and wind conditions. For sloops, this usually requires double, triple, or even quadruple spreaders, struts, baby stays, and running backstays.
While this approach definitely Boat Performance Factors Explained: Key Metrics and Analysis Guideimproves the boat’s performance, it also is more complicated to set up and tune and has a much lower margin for error. Cruisers generally forgo some of the performance edge for a stronger, stiffer, less complicated, and more forgiving rig, such as the masthead Marconi rig with a single set of spreaders and an oversize mast section.
Larger cruising boats may have to resort to using double spreaders and running backstays for heavy weather work. Whether the rig is for racing or cruising, a tapered mast is an advantage. Although it costs more, it reduces weight aloft and windage with little corresponding reduction in strength.
A recent development is the use of unstayed freestanding masts. These are usually keel stepped and tapered. While they are not taken seriously by many racers, these masts are of great interest to cruisers.
They radically reduce the complexity of the rig by eliminating the stays and chain plates (and the stresses these generate), some of the winches, many feet of line, and most of the foresails. While initially available from only a few builders, a variety of boats with unstayed masts are now appearing.

Spreaders are a critical part of the system to keep any stayed mast in column. Aluminum spreaders are preferable to wood because they are stronger and impervious to the rot that can plague the out-of-sight, out-of-mind wooden spreader. Spreaders should have an airfoil shape to reduce windage and provide lift. They must be correctly aligned to avoid premature failure and through-bolted to the mast. The tips should be wired or clamped to prevent movement on the shroud, then taped and booted or covered with baggywrinkle to prevent sail chafe.
The mainsail boom should be a substantial spar section, with room for all the fittings required for the running rigging, including blocks for the reefing clew lines, topping lift, outhaul, and the like. All bronze and stainless hardware used on aluminum booms and masts must be well bedded and/or mounted on plastic or rubber pads to prevent galvanic corrosion of the spar. The gooseneck that fastens the boom to the mast should be a strong universal joint with reefing tack hooks.
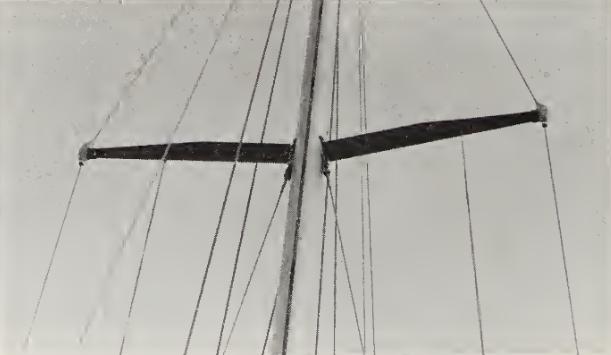
Check for standing and sitting headroom under the boom. A low boom and mainsail with a long full hoist makes a good light-air combination but may knock a few heads on a jibe. A boom gallows on a cruising boat is a good safety and convenience feature.
It provides a secure place to store the boom, will prevent injuries to the crew if the topping lift breaks, provides additional handholds, and can be used to help support an awning or dodger.
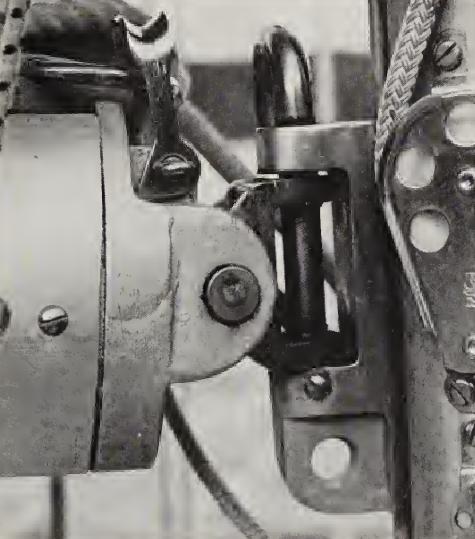
Staysail booms are found on some cutters. Their primary advantage is that they hold the foot of the staysail tight for slightly closer sheeting. A single sheet can be led to a fore-deck track, making the staysail self-tending. The boom and its hardware, however, add to the cost, complexity, and weight of the boat, as well as creating a hazard for any foredeck crew within range of the boom’s sweep.
The shrouds and stays are critical components of the stayed mast. Wire should be 1×19 preformed stainless of adequate diameter to ensure a large safety margin. Keep in mind that the working load of wire is only 20 percent of its ultimate breaking strength. At 60 percent of its breaking strength, wire is permanently deformed. All tangs (fittings on the mast to which shrouds are fastened) should be through-bolted and correctly aligned with the shrouds.
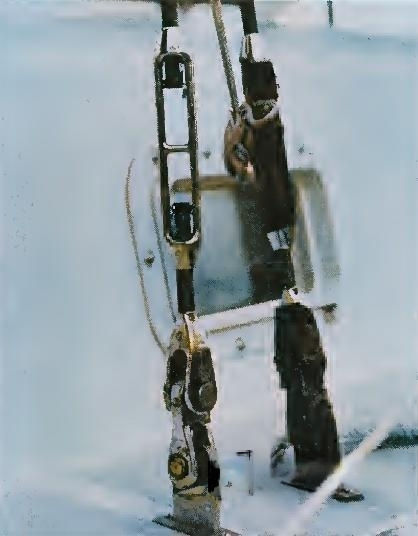
Toggles (which create a universal joint for movement of the wire athwartships and fore and aft while maintaining correct alignment) should be on the deck end of all standing-wire rigging and on both ends of all sail-carrying stays. All wire should end in a terminal rated for marine use. Turn-buckles should be oversize and open so that the threads can be cleaned, lubricated, and inspected. There should be no excessive spaces between:
- terminals,
- toggles,
- tangs,
- clevis pins,
- and chain plates.
A backstay adjuster should be installed. These vary from a simple turnbuckle to a hydraulic pump.
Rod rigging, popular with racers, is starting to appear on cruising boats. It has several advantages. Rod of any given diameter will be stronger and have less stretch than comparably sized wire. As a result the size of shrouds and stays can be reduced, with a corresponding decrease in windage.

Bonding at the terminal end of the rod is exceptionally good, and if kept properly aligned with toggles in both ends of the rod, it is almost failure-proof. In comparison, the most common reason for rigging failure is wire failure at or in the lower terminal.
Unfortunately, rod rigging costs substantially more than wire, and it cannot be easily replaced in remote areas.
Chain plates should be securely through-bolted and fastened to reinforced structural portions of the boat, such as the hull and major bulkheads. A wider chain plate stance provides more support for the mast, with external hull-mounted chain plates providing the maximum.

By widening the shroud stance, the rest of the standing rigging may be simplified without losing support for the mast.
The farther outboard the chain plates are located, however, the less closely the jib can be sheeted in and the less high the boat can point. External chain plates are also more prone to corrosion and damage.
Stemheads should be substantial fittings, through-bolted to backing plates and reinforced at the stem. They should have at least two tack points.
The best stemheads on larger boats are usually custom castings.

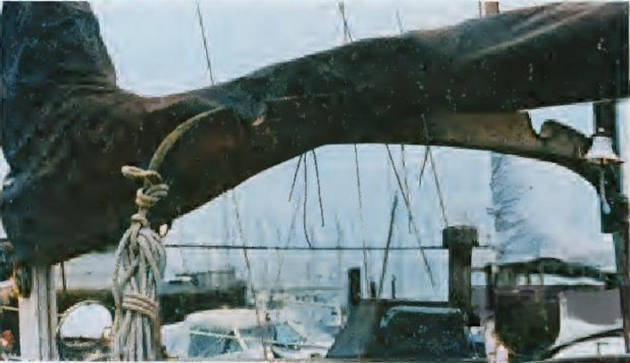
Bowsprits are used to extend the foot of the sail plan so that larger sails and more sails can be carried. This may be done on a heavy boat that needs extra working sail area for light wind conditions without having to resort to a spinnaker. It can also be used to balance the boat’s helm or to increase stability by lowering the aspect ratio of the sail plan. Some designers also add bowsprits because they make a boat look more like a traditional ship, and that sells boats.
Bowsprits serve secondarily as anchor platforms on which rollers can be mounted and anchors stored. In terms of weight distribution, this is a poor location to hang anchors while passage making. The really long bowsprits used to be called “widow makers” because they were such dangerous areas to work. Even with a good pulpit platform and netting, they are still nasty places to be in heavy weather.
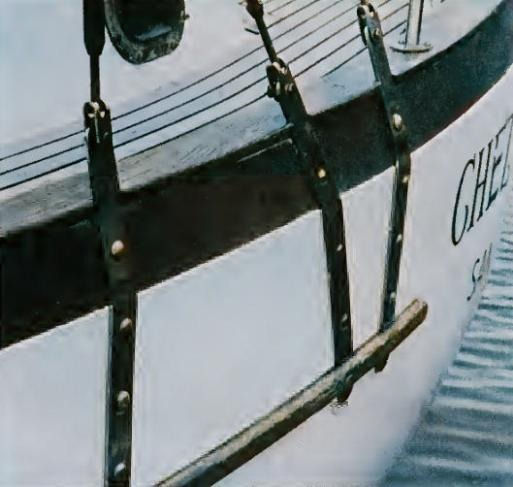
The bowsprit is also prone to damage during docking, when it can spear other boats or collide with the dock. It is a highly stressed and complicated arrangement for supporting the forestay, and the bobstay always seems to chafe the anchor rode or twang the anchor chain.
Boomkins are used at the stern to bring the backstay farther aft and outboard so that a longer boom and larger mainsail can be fitted.
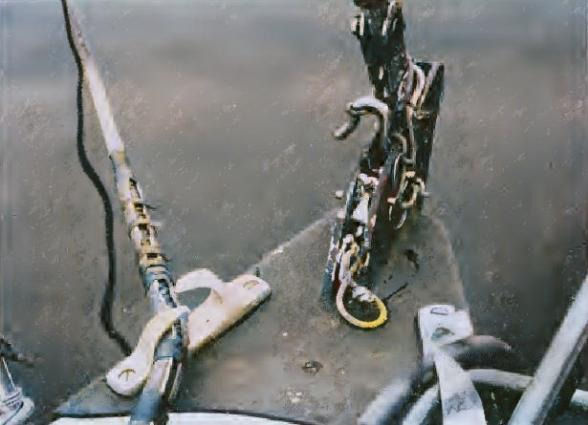
Their advantages and disadvantages are similar to those of bowsprits, though on a smaller scale.
Running Rigging
Halyards can either be wire rope or low-stretch synthetic line. Wire halyards (almost exclusively 7×19 wire) have very low stretch and windage compared with even the best low-stretch lines. They require a rope tail, and thus an expensive and difficult splice.
By adding enough extra rope tail so that the wire doesn’t reach the winch, line stoppers can be used. This reduces the strength of the halyard, however, since the splice is now being loaded, and it adds a small amount of additional stretch.
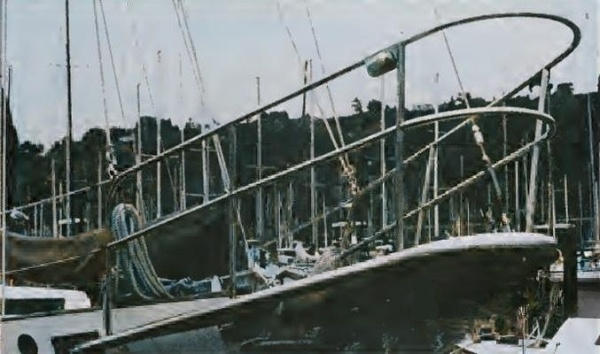
Wire halyards can inflict nasty wounds to the hands and, if they come loose, to the face.
Low-stretch rope halyards require no wire-rope splice, are easier to handle, and can be easily used with line stoppers and self-tailing winches. They do, however, stretch more and create more windage. Depending upon the manufacturer, they may be difficult or impossible to splice.
Halyards may be run either inside or outside the mast. External halyards are commonly used on day sailers and almost exclusively by cruisers. Compared with internal halyards, they are cheaper and easier to rig, can be led away from the mast to stop “halyard chatter”, and are easy to inspect and re-reeve.
Internal halyards are favored by racers and some cruisers because they offer another increment of improved performance. They reduce windage and mast-induced turbulence that interferes with a clean air flow to the mainsail’s luff. They must be carefully installed to avoid weakening the mast and chafing on fittings that protrude into the mast column. Even with these precautions, internal halyards are more prone to chafe. They are difficult to inspect and replace and can convert a mast into a constantly clanging bell.
All halyard leads should be checked for fairness to be sure there is no unnecessary friction or chafing. Ideally, turning blocks mounted on the coach roof should be fastened to a collar attached directly to the mast. As a minimum, they should be bolted to large backing plates. All blocks should turn easily, have large unworn sheaves, and be strong enough for their maximum potential loads.
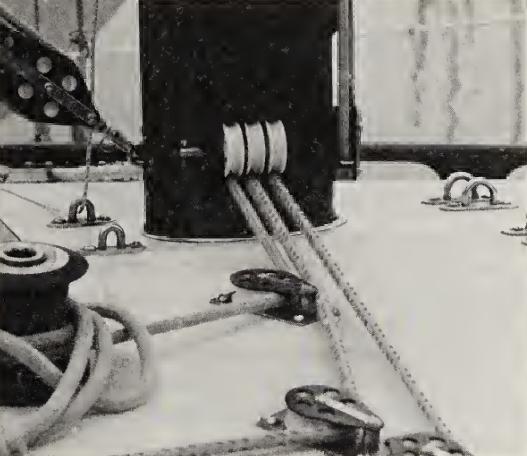
Sheet leads should be closely examined. If the boat has chain plates mounted inside the hull, an inboard track with a block on a sliding car provides the close sheeting angles that enhance windward performance. Pad eyes with snatch blocks or fixed turning blocks may also be used, but they don’t permit adjustment of the sheet angle for different sails and wind speeds.
All boats should have sheet leads on the rail outside of the lifelines for heavy wind work and for sailing off the wind. These leads, which will be the only ones for overlapping headsails on boats with external chain plates, may be a track with a block on a car or a perforated aluminum toe rail to which a snatch block is attached.
Read also: Comprehensive Collection of Common Sailboat Rig Types and Designs
Check the length of the track and the placement of pad eyes on a fore-and-aft axis. Production boats often don’t have the proper leads for sails at the extremes of a possible sail inventory, such as a 180 percent genoa or a storm jib. If you are ordering or building a new boat, have the extra track and/or pad eyes put on while the boat is being constructed. It will be infinitely easier and cheaper than ripping out the interior later to fasten down and back the bolts.
Two years after purchasing our boat, we found that we required a five-foot extension of our inside track forward to accommodate the correct leads for a heavy weather jib. Rather than face tearing up our boat, we compromised and installed single pad eyes on each side. All tracks, pad eyes, and deck blocks used for sheet leads should be through-bolted to backing plates. Track should be true and unwarped. Blocks should be large enough to easily withstand the maximum loads they may bear since overstressed blocks can deform or even explode, sending shrapnel across the deck.
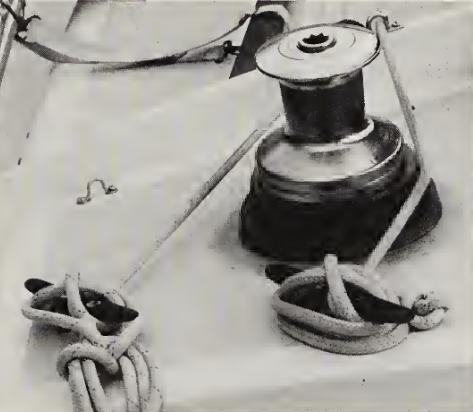
Winches are used almost exclusively on modern boats over twenty feet to control sheets and, as boats approach the mid-twenties, to raise halyards. There should be enough winches to do the allotted jobs, but not too many, since superfluous winches translate into extra money, weight, and maintenance. Line stoppers, clam and cam cleats with thoughtful line leads, and labeling can reduce the number of winches required. These alternatives have load limits and slippage problems, however, that are not shared by directly leading a line to a winch.
Winches should be powerful enough to perform their assigned function without needing a gorilla for a grinder. Winch power is a function of the gear ratio, the drum diameter, and the length of the handle. This is referred to as the “power ratio”. It should be compared for various winches to determine how easily each will work. A power ratio of 1:35 means that for every pound of effort the grinder puts into the winch, there will be a line pull of thirty-five pounds. Another way to increase the efficiency of the winch is to have a double grip on the winch handle.
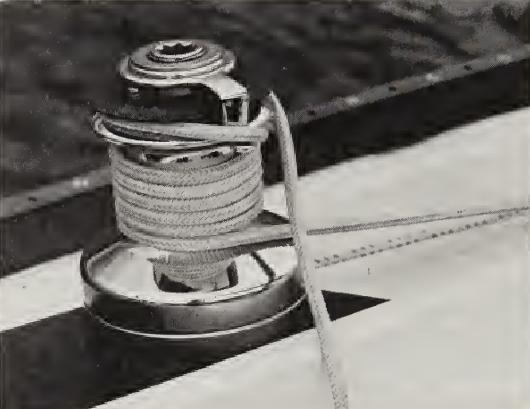
This permits the efficient use of both arms and shoulders. Unfortunately, higher power ratios mean slower winch speeds. To compensate for this, larger winches are made in two and three speed models. The smaller gear ratios are used for lower loads or when a faster action is desirable, and the higher ratios are used for higher loads. The standard winches furnished on production boats are generally not powerful enough except for small working sails at low wind speeds.
Self-tailing winches are an excellent investment for the shorthanded crew. They chafe the sheets slightly but permit two-handed operation without a tailer, are instantly available for increasing sheet tension, and are self-cleating. They are most advantageous for the genoa and mainsail sheet winches. If you really want to splurge, they can also be useful for reefing, halyard, and spinnaker winches when using all rope or wire with long rope tails.
Ease of winch maintenance is an important consideration since cruisers should break down, clean, and grease their winches once or twice each season. The serious racer may do this before every major race, at least for the sheet winches. This is a messy and laborious task that isn’t made any easier by the complexity of some winch designs.
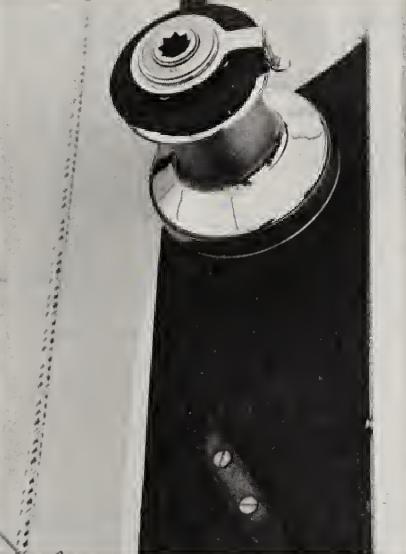
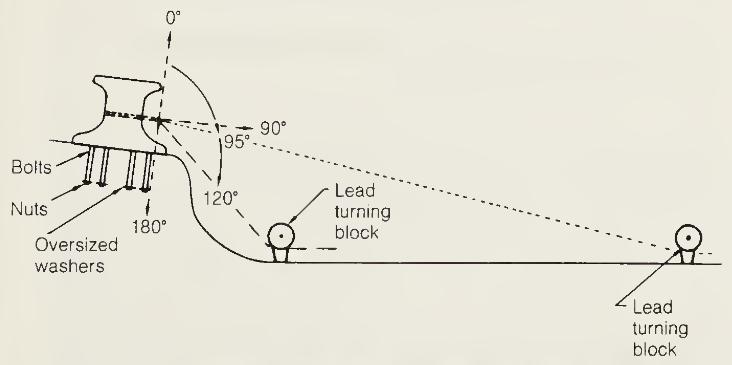
From a maintenance viewpoint, winch bases that must be completely unbolted from the boat to clean the bearings, gears, and shafts are probably the worst type since they encourage you (and me) to defer maintenance. All winches must be through-bolted with backing plates or oversize washers.
Winches should be mounted to prevent line overrides. This means that lines should approach the winch at 95 to 120 degrees, with 0 degrees being an imaginary line parallel to the winch drum and pointing directly upward. Winch cleats must be through-bolted using a backing plate or large washers, and must be aligned on a 315- to 135-degree axis with the winch at 360 degrees.
Mainsheets are subject to larger loads as boat size increases, with a corresponding increase in the power required in the block and tackle. Mainsails under approximately two hundred square feet can be easily handled with a three- or four-part tackle. A winch becomes advisable with larger mainsails, unless the main is going to be handled dinghy style, when a six- or even eight-part tackle might be used.
This size tackle, however, is less practical because much of the mechanical advantage is lost to friction and the system becomes increasingly slow. Boom failure is much less of a potential problem if the mainsheet is led to the end of the boom, where it can counter the tremendous forces that develop on the mainsail’s leach. Mid-boom sheets should be led to two or three bails in order to distribute the load on the boom.
Travelers provide versatility for the mainsail both in light and heavy weather. As the mainsail gets larger than approximately two hundred square feet, a block-and-tackle arrangement may be necessary to move the mainsheet car back and forth along its track.
Vangs, outhauls, downhauls, topping lifts, preventers, and spinnaker/whisker poles all have a place on racing boats and the well-equipped cruising boat.
All lines should be checked for size and condition. Double-braided lines are easier to hold on to, more chafe resistant, and slightly stronger than three-strand line. On the other hand, they have a tendency to knot up and tangle, are harder to splice, and more expensive. Rope-running rigging is either dacron or one of the other prestretched or low-stretch synthetics.
Generally, a 3/8 inch line is the smallest that can comfortably be handled under load, although a 5/16 inch line can be used for lightly loaded and less frequently used lines. Whenever possible, lines should be spliced rather than knotted since splices are both stronger and neater.
Running rigging and sail handling gear should be carefully evaluated in terms of the type of sailing, the size and layout of the deck, the size of the sail plan, and the size and strength of the crew. For instance, a single-hander may want to run every line into the cockpit, but this may cause needless spaghetti and complexity for a boat sailed with a large crew.
You should always consider what sail handling will be like in a blow, since difficulty increases geometrically with increases in wind speed. This is when you are sure to find problems in your system.
Regardless of the running rigging arrangement, all lines should be logically grouped, labeled, and/or color coded. There should be cleats for all the tails and, if you want to be really organized, line bags or pockets for the tails of lines that are constantly adjusted. Remember that more deck hardware means more holes and more potential leaks. Consider how the running rigging layout impacts other activities or equipment, such as mounting a dodger, walking on deck without constantly tripping on lines, stowing a dinghy, and so forth.
Main boom topping lifts are a requirement for all but the smallest of boats. The topping lift tail should be led to the same spot where the reefing lines and halyards are handled.
The lines that control the mainsail (halyard, outhaul, topping lift, and reefing clew and tack lines) can either be led to the base of the mast or back to the cockpit. They should, however, be kept together if one person is to raise, reef, and drop the main efficiently. Even if everything is led to the cockpit, someone must still go forward to tie up the excess sail after a reef or to furl when the sail is dropped.
Genoa and spinnaker halyards are typically led to the base of the mast on a standard production boat layout. By leading them aft to the cockpit, however, they can be more effectively and safely controlled. In most cases, this can be done fairly easily since only the halyards have to be brought back. Boats intending to do serious spinnaker flying may elect to bring the foreguy and topping lifts back into the cockpit, too. Shorthanded cruisers should seriously consider rigging and leading a jib or genoa downhaul back to the cockpit so that foresails can be doused without going to the foredeck.
Sails
Sails are the boat’s horsepower. High-quality, well-cut sails will have a long, useful life if properly cared for and will improve boat speed, balance, and windward ability. High quality doesn’t have to mean high price. Even though most of the well-known national lofts make excellent sails, you are paying at least in part for their reputation, advertising, and sailmakers who are world-class sailors.
Excellent sails are also available from less well-known lofts, often at lower prices. Before you shop, make a list of specifications for the construction of your sails so that you know you are comparing similar products.
Sails offered by some builders and dealers in “sail away” packages may be generic sails from a large discount loft. Construction often matches the price:
- cheap material;
- less attention to reinforcement panels and chafe protection;
- very little handwork;
- reduced sail area because of a small or nonexistent mainsail roach or a short hoist or foot;
- and failure to include reef points, cunninghams, or leach lines.
Generally, you will be ahead in money, maintenance, resale, and performance if you select your sails personally instead of accepting a standard package. Give extra consideration to local sail lofts or sailmakers. You should get better custom design and service, as well as better local resale for your boat, if they have a decent reputation. The local sail-maker can come to your boat to take the proper measurements and discuss sheet leads and use of each sail.
If there is a problem, you have the opportunity for face-to-face discussion, and repairs can be made easily and quickly, keeping your sailing “down time” to a minimum. While it may be tempting to split your sail inventory among several lofts because of price, problems with repairs, or some other reason, keep your inventory to as few sailmakers as possible.
This creates better relations with your sailmaker and will enhance the resale value of your boat. If you are considering a used boat, take its sails to a sailmaker for a professional evaluation of their condition and any repairs needed. The sailmaker’s evaluation is particularly important for a used boat with a large sail inventory since the sails can represent a substantial proportion of the value of the boat.
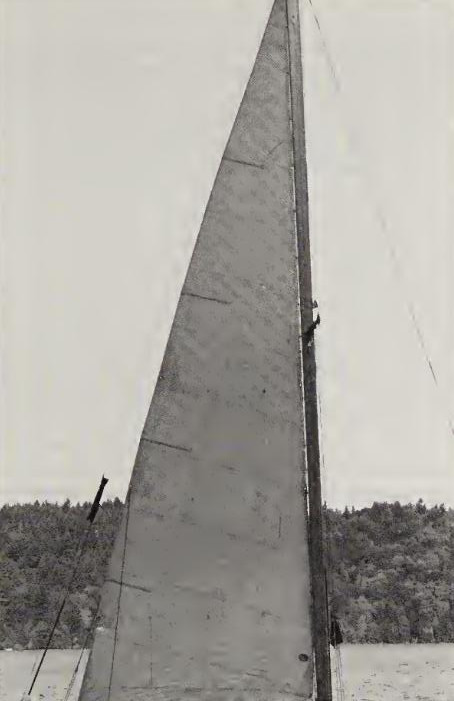
When evaluating the sail inventory of a used boat or deciding on an inventory for a new boat, your decisions are affected by cost, performance, durability, and the type of sailing you intend to do. Very competitive racers who are not seriously constrained by finances will have a large sail inventory, with each sail optimizing performance within a relatively narrow wind range. Basic Hull, Keel, and Rudder ShapesConstruction and weight of materials used are matched to the performance and wind range of each sail.
Cruisers and low-budget racers usually have a smaller sail inventory. This may be because of the cost of sails, limited stowage room, or the reluctance of many “relaxed” sailors to change sails every time the wind varies a few knots. These sails must have a long life span and a low probability of failure. They also must accommodate a wide wind range.
Sails carried at or beyond their upper wind range should not be permanently damaged by distortion or be blown out. Consequently, sails for these sailors are usually built sturdier. Cloth used is one or two weights heavier than an optimum racing sail. More reinforcement is included at the head, tack, clew, and reef points. Grommets are larger, reinforced, and hand worked. Extra chafe protection is provided at slides and lugs, tack, and clew rings. All heavy weather sails are triple stitched.
Assuming you can’t purchase your entire inventory at once, your first set of sails is usually referred to as the “working sails”. These sails will be used over a wide range of wind conditions and will probably suffer the most wear and tear. In some cases, these may be the only sails the boat will ever have. The most important criteria in selecting them should be the average wind conditions you expect in a typical sailing season.
The usual modern masthead sloop will have two working sails, a main and a jib. Flexibility in the sail plan for this rig comes primarily from choosing the foresails and free-flying sails such as spinnakers. If you expect very light winds in the summer sailing season, you will need a somewhat larger working jib (small overlapping genoa) to give the boat decent performance.
This would mean a genoa in the 115 to 130 percent range, depending upon how conservative you are. These percentages refer to a percentage of “J”, which is the distance from the mast to the forestay as measured on the deck. This is measured on the sail as a line intersecting the clew and meeting the luff at a right angle. The 115 to 130 genoa won’t be a hot performer in extremely light winds but will at least move the boat. If heavily constructed, it will also carry the boat into the middle wind ranges and, without the main, might be useful running in the 25-plus knot range. We find that our own heavy 130 is a great running sail without the main until about 35 knots.
When you get tired of languishing in light summer winds or being passed by boats with more sail area, your next sail might be the biggest genoa that will fit on your boat or that is permitted by your racing rules. Now you can really start enjoying fair-weather sailing, especially if your boat has a high sail area-wetted surface area ratio and a low displacement-length ratio.
As you gain experience, better outfit your boat, and extend your sailing season and trip lengths, your chances of being caught in heavier weather will increase. Now you should consider a heavy weather, long hoist jib of from 80 to 100 percent. This sail would keep the racer competitive in higher winds and would enable the cruiser to beat off a lee shore or punch to windward to a safe port. It would be cut flat, triple stitched, and practically bulletproof.
The next sail might be a full spinnaker or cruising spinnaker (also called gennaker) for light downwind sailing. If going offshore, a storm jib and trysail would be added. If a racer, your next acquisitions would probably fill the gaps between your No. 1 genoa, your working genoa or jib, and your heavy weather jib.
An important decision in designing your jibs and genoas will be choosing between luff foil headstays or hanks. Racers will invariably opt for the luff foil headstay, in which a grooved aluminum or plastic extrusion fits over the stay. A bolt rope or slides on the luff of the jib are fed into the extrusion when raising the sail. The luff foil is simple and reduces windage and turbulence. Cruisers, however, usually choose hanks that clip to the stay because they are easy to repair, and control and secure the luff when raising and lowering the jib.
Roller-furling headsails are another way to approach sail handling. Rolling up on their luff, they provide a convenient way to furl and unfurl headsails. They eliminate bagging and unbagging sails, the difficulties of sail stowage, and trips to the foredeck in foul weather. Because of these characteristics, they are of great interest to single-handed sailors and cruisers who are trying to reduce their sail-handling work.
Like everything else in sailing there are trade-offs that you may or may not find to be a problem. A roller-furling system is costly in comparison with simple hanks or a luff foil. It is more complex to install and maintain and more prone to failure. Two of the more serious possible problems with systems integrated with the forestay are a broken forestay and an unfurled sail that won’t roll up in a blow. Systems that are separate from the forestay are more versatile and avoid the “worst case” problems since they can be easily lowered in an emergency.
They do, however, have less luff tension, resulting in a further decrease in windward performance. The sail in any roller-furling system must be cut to roll up correctly. For a genoa this means substantially raising the clew (reducing the effective sail area) and making the sail flatter. Both of these alterations reduce the sail’s performance in light winds. Roller-furling systems also increase weight aloft and windage.
Some makers of roller-furling headsail systems claim that their headsails can be reefed by partially rolling up the sail. In reality, the headsail can be rolled up only slightly without causing distortion and possible damage to the sail. If the sail’s construction is heavy enough to be used with confidence in higher winds, its light wind performance would be poor. It is better to have several jibs, each for a specific wind range, than to try to make one genoa cover everything from 1 to 40 knots.
Nonroller-furling headsails, up to approximately a 140 percent genoa, can have reef points for slab reefing. The cost is a small fraction (about 10 percent per sail) of purchasing the additional sail sizes that the reef points provide. Headsail reef points reduce the number of sail changes and provide a backup tack and clew if the tack or clew of the full sail should rip out. They are somewhat detrimental to performance since they increase the weight of the sail and slightly distort the sail’s shape. Genoas over 140 percent usually cannot be reefed successfully because the amount of material in the rolled-up foot becomes completely unmanageable.
A further headsail decision is choosing between deck-sweeping genoas with low- or high-cut clews, with or without tack pendants. Deck-sweeping sails with low clews offer a definite plus in performance but are very difficult to see around and under. This makes for exciting sailing in tight quarters with heavy traffic. Racing boats with large crews can compensate for this by assigning a leeward spotter, but shorthanded crews may have a harder time. Another concern with low-cut clew deck-sweepers is their tendency to scoop up water in heavy seas. This puts tremendous strains on the rigging and may damage the sails. Adding a short tack pendant to any headsail helps visibility and reduces the tendency of the sails to catch waves.
With a full, large mainsail, you can always reef as the wind increases. If your main was originally cut small and flat, however, you have lost the option of increasing sail area for light wind conditions. Mainsails will perform best in light air if built with a full hoist and a maximum roach. This requires battens in the sail. A mainsail shelf adds additional sail area and a nice full shape for light wind or running in moderate conditions. The shelf can be taken out with a flattening reef by putting tension on the outhaul.
Additional reefs should be of the slab or jiffy type, in which the sail is brought down to new tack and clew points, and the excess sail in the foot is rolled or folded up and tied with reefing pendants. Day sailers don’t usually have reef points in the main, but a single deep reef would make the boat much more versatile and easy to handle in heavy weather. On a keel boat, two deep reefs are usually adequate for coastal sailing. Offshore boats will generally have three reefs in the main and/or a storm trysail to substitute for a heavily reefed main.
Roller-reefing mainsails, found on many older boats, can be quick to use but have a number of disadvantages. There are more mechanical parts — such as swivels, gears, and handles — that require maintenance and are prone to failure. The mainsail must be cut relatively flat and without a roach so that it will roll up properly. This loss of sail area and shape is a liability in light conditions. Even with the proper cut, getting the sail neatly rolled is difficult. The steps involved, which include pulling out the extra material on the leech, maintaining constant tension on the halyard, and turning the reefing gear handle, may make roller reefing a two-person job.
Roller-furling mains are a new development, using the same basic principles and equipment as roller-furling headsails. The main sail may roll up within the mast, an excellent system with no excess turbulence and good luff tension. Alternately, it may be furled on a special stay mounted behind the mast, the usual approach if modifying an existing rig.
Reefing a main sail with this system is slightly more effective than roller reefing a headsail since mains are constructed for use over a wider range of wind conditions. Some sail shape and area is usually lost since the roach must be eliminated and the sail cut relatively flat. This is also a very expensive approach to mainsail reefing.
