A ship electrical system is a complex network designed to generate, distribute, and control electrical power throughout the vessel, ensuring the smooth operation of all onboard systems. The system typically consists of power generation units such as diesel generators, which convert mechanical energy into electrical energy. This electricity is then distributed through a series of switchboards and transformers to various subsystems. These subsystems include lighting, communication systems, navigation equipment, propulsion, and essential safety systems. To manage these different demands, the electrical system is often divided into primary and secondary distribution systems, ensuring that critical systems always have a reliable power supply, even in the event of a failure.
Redundancy and reliability are key features of a ship’s electrical system, given the critical nature of maritime operations. The system often incorporates multiple generators and power sources, including emergency backup generators, to ensure continuous operation under all circumstances. Advanced control systems are used to monitor the electrical load, manage the distribution of power, and protect against overloads or faults. Additionally, modern ships are increasingly adopting integrated automation systems, which allow for centralized monitoring and control of the electrical system, enhancing efficiency and safety. The integration of renewable energy sources, such as solar panels or wind turbines, is also becoming more common, contributing to a ship’s energy efficiency and sustainability efforts.
HOW BOATS HAVE changed in the past 30 years. There was a time when the Self-Survey Criteria for the Engine and Electrical Systemselectrical system on a boat would supply the navigation lights, possibly a few interior lights, maybe some electronics and of course the engine starting system. None of this was necessarily vital to the operation of the boat once you got the engine started, whereas today virtually everything on a boat depends on the electrics. Air conditioning, cooking, lighting, sound and television systems are all reliant on electricity; even the engines are electronic, so that they will not run without an electrical supply.
We are even moving towards electric motors! In turn the whole attitude towards a boat’s electrical system has altered; a casual approach can no longer be tolerated and only the highest standards will do. Any survey of the electrics must determine the quality of the installed systems and any repairs that need to be made to bring them up to scratch.
Batteries
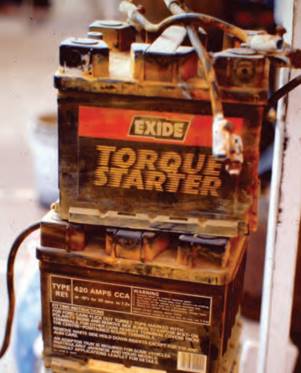
THE PLACE TO start any survey of the electrical system is the battery or, on most modern boats, the batteries. These lie at the heart of the electrical system and if they don’t perform, most of the rest of the system won’t work. Moreover, the condition of the batteries and their connections can often be a good indicator to the quality of the rest of the electrical system.
The batteries both store the electrical power and supply it on demand; levels of demand can be low and steady or heavy and short, with the latter occurring when the batteries are supplying the engine starter motor or perhaps the bow thruster. A simple system that only supplies the lighting and perhaps, as on a sailboat, the engine starting will usually have just the one battery, but more complex systems may incorporate two or more battery installations, and yet more when a generator has to be supplied with starter power.
Therefore, check around the boat to locate the various batteries. You’ll usually find them in or near the bottom of the boat, since they are heavy items and the designer generally tries to keep weight low down. While this might be a good plan as far as the centre of gravity is concerned it isn’t the best solution for safety; if the batteries are low down in the bilges and the hull starts to flood, you won’t be able to make an emergency call as the batteries (and your electricity supply) will be the first thing to go. You can’t do much to relocate the batteries but this is a point to bear in mind when assessing the overall suitability of the boat.
Secure Stowage
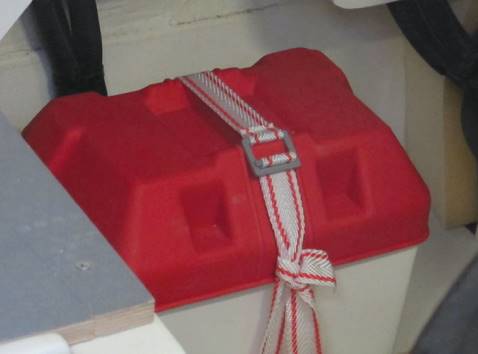
Wherever the batteries are stowed, they must be secure in their stowage because a battery that can move about, however slightly, can be a cause of future trouble. Apart from potentially damaging the batteries themselves, any movement here can place stress on the connecting wires, usually heavy duty cables designed to carry the high current loads of the engine starter. If they do move, even slightly, the strands of the cable may break or the terminals may become disconnected.
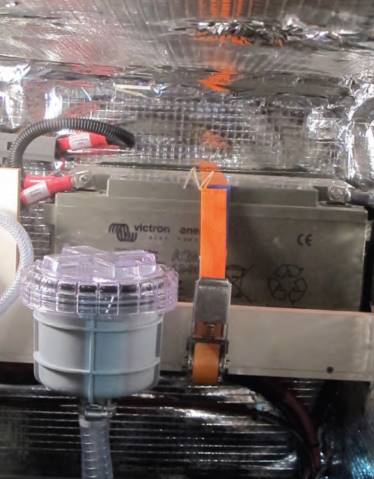
Initially, these problems are likely to put pressure on the link to the electrical users, increasing the load on the remaining strands if the wire is fraying or adding to resistance if the battery connection is poor. In either of these scenarios the wire link can heat up and in a worst-case scenario there can be sparking, which can lead to fire. Moreover, because the cables are mainly out of sight and battery units are rarely opened up for inspection, the problem may not be discovered until smoke appears.
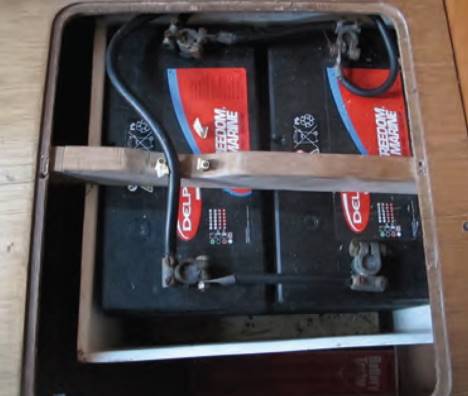
Too often batteries sit in a box that isn’t a tight fit, meaning they move about when the boat rolls or pitches. Even wedging them into position in the box may not be enough because wedges can shake loose. The only real way to secure them is through clamping across the tops of the batteries.
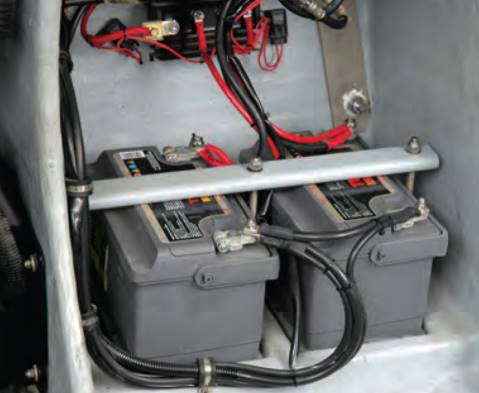
Next, check the battery terminals where the main wires connect the batteries to the system. Terminals should be tightly fitted and corrosion free (they are usually constructed from lead to reduce the risk of corrosion from dissimilar connections); they carry a very heavy current for engine starting and any corrosion is likely to cause a resistance to this current and, in a worst-case scenario, it would prevent enough voltage reaching the starter motor even when the battery is well charged.
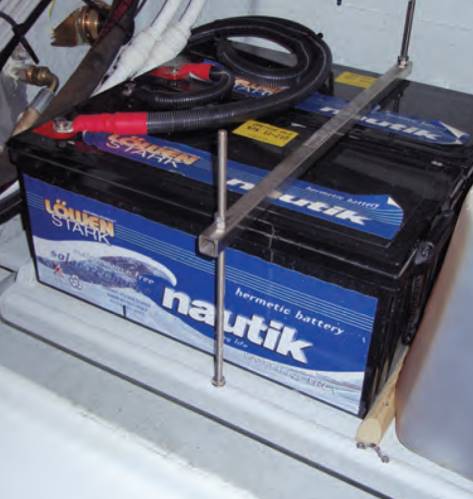
It is normal to grease these terminals in order to reduce the chances of corrosion, but with the current trend towards low or zero maintenance batteries, they may not receive the attention they deserve.
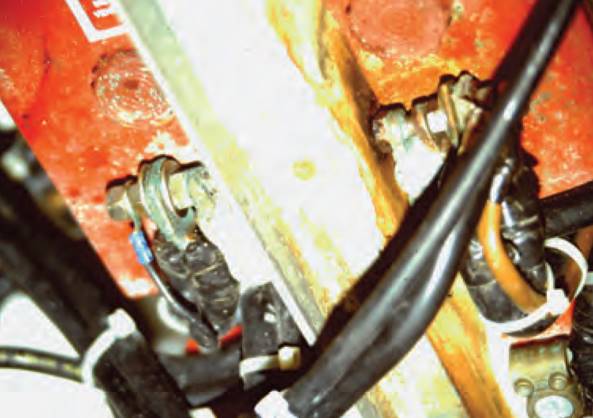
The heavy duty connecting wires should only have a short unsupported span in order to reduce the chance of any movement in the wire that could cause it to fray or strand in time. This is particularly important on a fast powerboat where there can be considerable pounding in waves.
The Isolation Switch and Heavy Duty Cables
There should be a battery isolation switch (which allows you to switch off the mains battery supply when the boat is out of use) mounted close to the batteries. This not only reduces the risk of fire but also helps to prevent any power leaks and/or possible electrolytic action on the hull fittings and stern gear. Again, the connections here need careful scrutiny for tightness and corrosion.
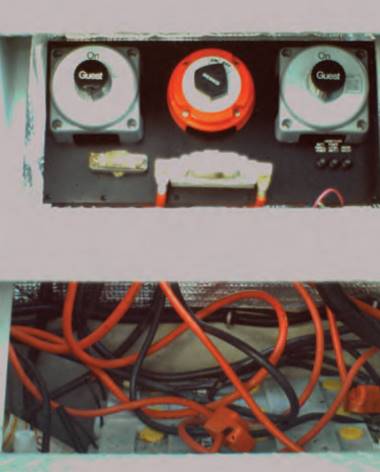
There may be a connection from the battery that bypasses this isolating switch and this feeds to the electric bilge pump(s) and possibly an alarm system, both of which need to be kept active when the boat is not in use. Because this feed is a direct connection to the batteries, the wire and its connections need careful examination, although bear in mind that the feed may go via a dedicated breaker to isolate the circuit if there is an overload on the wire or pump.
One heavy duty cable extends from the main isolation switch or switches to the starter motor switch on the engine and another, perhaps smaller size cable goes to the main electrical distribution board. Both can carry a heavy current so both the cable itself and its securing needs careful scrutiny because any current leakage here could cause severe sparking and possibly lead to a fire. These cables should be secured at frequent intervals to prevent movement and they should not pass over sharp edges that could cut into the cable insulation. However, when the engine is flexibly mounted there will have to be some movement in the part of the cable that connects to the starter motor, so check for this.
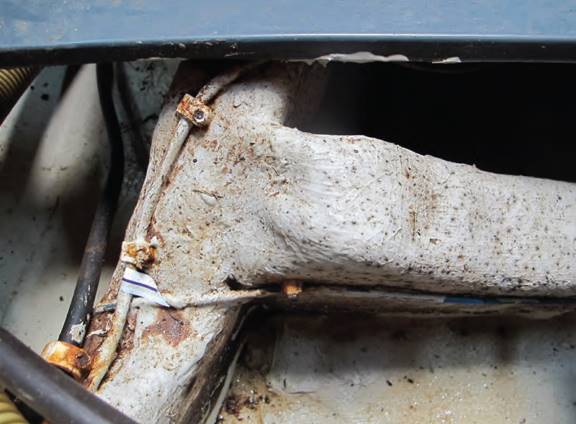
The battery and heavy duty cable installation should be located as close as possible to the starter motor to reduce the chance of cable damage and the possibility of a voltage drop if there is cable resistance. On some sailboats the heavy duty cable might lie loose in the bilges on the run between battery and engine, which could be a source of problems and possible danger; it should be secured in place with suitable cable clips.
The Distribution Board and Connections
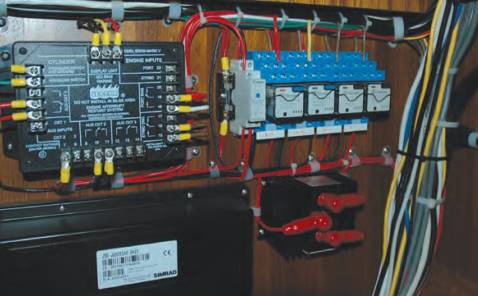
Wires run out from the main distribution board, connecting with the various components of the electrical system. You would think designers would know to place the distribution board somewhere dry, but that’s not always the case; I’ve seen them located beneath the Engines and Their Systemsengine hatch, making them susceptible to dripping water if the hatch leaks or when it is opened.
This will inevitably lead to trouble (if you can rig up protection, great, otherwise I’d suggest walking away).
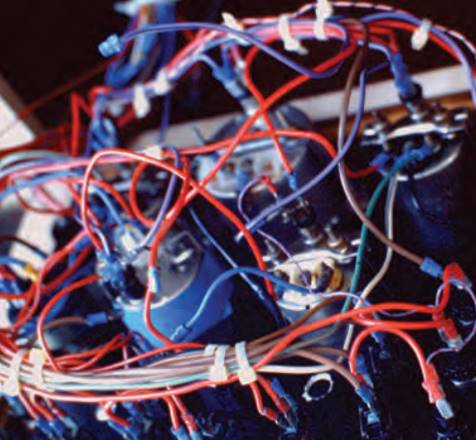
You may find that the main distribution board is located in the engine compartment and then perhaps a secondary board in the accommodation. On many sailboats you’ll find the domestic distribution behind a panel in the chart space. So often a distribution board will have a panel with switches and breakers mounted on its face with the wiring and connections fitted behind. This means that you can’t inspect the connections without unscrewing the panel, but this should be part of any survey where possible since if you’re going to find problems, they’re likely to be in the connections.
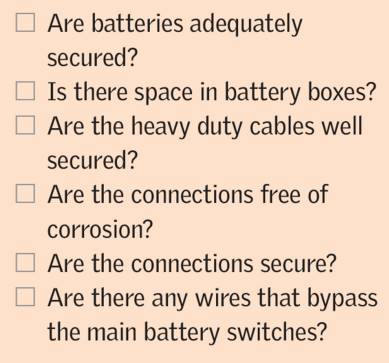
Therefore check for any signs of corrosion (a greenish crystalline deposit) in connections and that they are all tightly secured. You’ll also find a multitude of connections behind the dashboard where there is an array of switches and instruments, and if this dash is in the open, close inspection is once again necessary.
Ideally all connections should be secured by a positive nut or screw system but in practice you’ll find they’re often just push fit connectors. These should work if they are reasonable quality fittings, and they should be, but sometimes the cheaper components designed for cars are used. These are not fit for marine conditions, since they may have dissimilar metals that can allow electrolytic corrosion which will not only produce a poor connection but in time it could eat away at the copper wire and cause the link to fail.
Wiring
AS YOU GO along checking every connection you can access, examine the wiring that links them. On older boats without the complications of high voltage systems, this is likely to be a much simpler proposition. The wiring may not have been installed to the same high standards found on modern boats, but then it is likely to be more accessible for inspection. However, there is also the likelihood that it will have been considerably modified over its lifetime, and here you are likely to find deficiencies because the replacement wiring may have been installed for convenience rather than reliability.
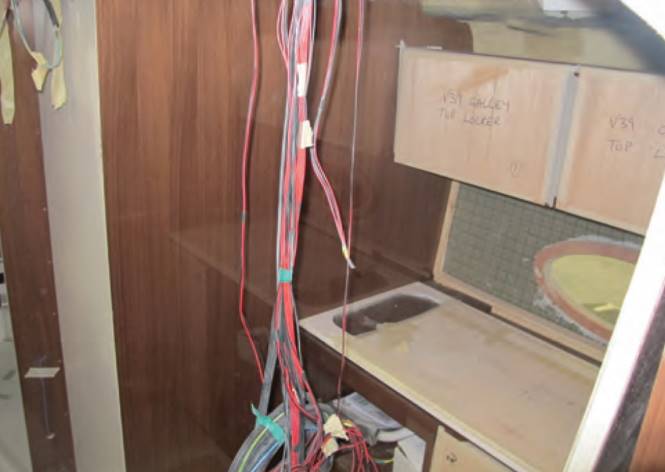
On most modern boats the wiring is installed as a loom, which has been constructed outside the boat and installed and connected as the boat is being built. This should ensure a high standard and reliability, but it does of course mean that much of the wiring will be out of sight and inaccessible. In these circumstances you have to trust the builder to have done a good job and, today, most are fully aware of the need to ensure high reliability in the electrical system. However, check wiring where you can, especially sensitive points where wires pass through a bulkhead or enter a tube or conduit. Lift the wires up to check the areas of insulation at the point of chafing for signs of wear. You could even place additional tape or other materials at the rubbing point to prevent future wear and chafe.
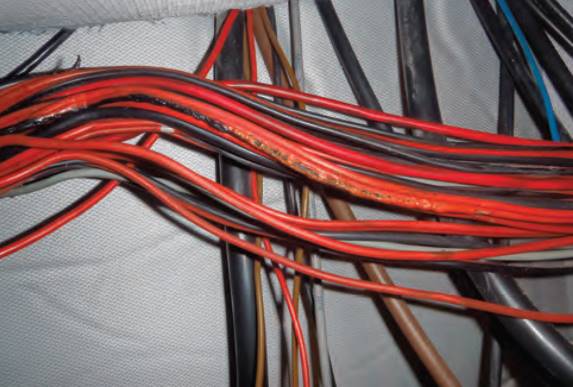
You may also find that the original wiring loom has been supplemented with additional wiring in order to take the supply to equipment fitted after the boat was built. It is tempting to take this additional wiring by the easiest route, which may not be up to the same high standard of the original. You should be able to identify additional wiring as it won’t follow the route of the main wiring loom and it may not be adequately secured. Take particular note of any additional wiring that may have been installed to bypass the main distribution boards as this may not have the same breaker and/or fuse protection.
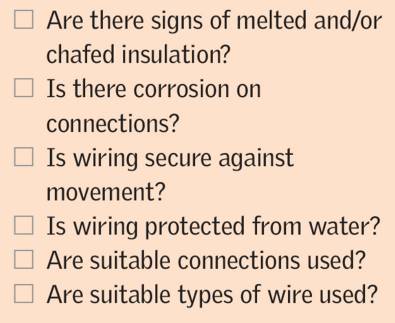
Finally, check all accessible wiring for any signs of melting of the wire insulation, which could be an indication of an earlier short circuit in the wire. The whole length of wire should be replaced if you see melted insulation, since it may also have occurred at other hidden points along the wiring.
Fuses and Breakers
Fuses that protect the electrical system break the circuit when there is an overload. This can prevent the wiring itself from becoming overloaded and getting hot and possibly burning out if there is a short circuit in the system. Fuses work fairly reliably in marine use, the disadvantage being that you can quickly run out of them when you are trying to test the circuit and find the fault. Fuses also add to the number of contacts that can corrode, so that on modern boats they have been largely replaced by breakers, a system that automatically breaks the circuit in the event of an overload.
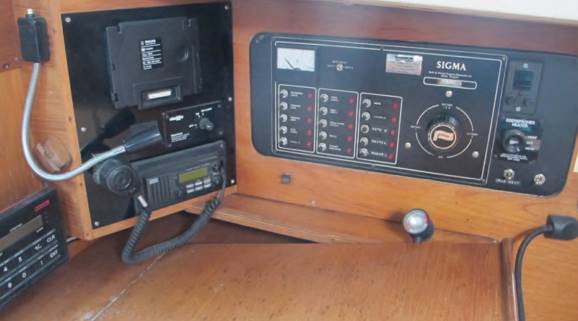
The breaker is a spring loaded device and early breaker systems were not particularly reliable because they could jump out with wave impact. Modern systems are much better, and you only need push the breaker back into position to reconnect the circuit. If it doesn’t stay in, there is a circuit fault, so during the survey check that all breakers are on and stay on when each circuit is live. Of course this test does not detect insulation that is about to break down, so a good visual examination of the wiring system is the only real solution.
Higher Voltage Systems
All of the above comments relate to the 12 or 24 volt systems installed on boats, but increasingly modern boats have a generator or a shore connection that brings higher voltages of 110 or 220 volts AC on board. This «domestic» type of supply matches that found on shore and enables the installation and running of equipment such as electric cookers and washing machines.
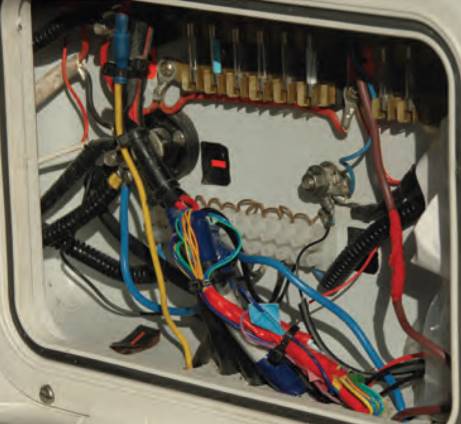
While you may now have the comforts of home aboard your boat, these higher voltages can be lethal if there are problems in the electrical systems. All modern installations are consequently fitted with an earth trip that breaks the circuit if there is any sign of electrical leakage, but the wiring also needs to be of the highest standard to ensure safety. It should be of the stranded copper wire rather than the single strand type found in domestic installations on shore because stranded wires are less prone to fatigue breakage if there is movement in the wire. Sockets should only be mounted in dry areas and a damp atmosphere should not be allowed to develop on board when the boat is out of action.
The Generator
The generator, which supplies on-board power when away from a shore supply, is generally a self-contained unit. These domestic voltage systems have their own distribution board: switch off the system before you open it then check for corrosion and any loose connections.
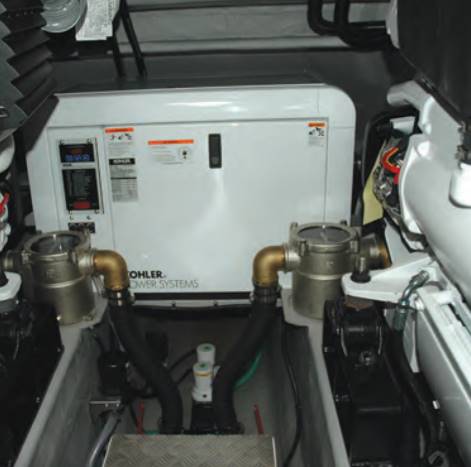
Usually there won’t be any outside connections into the High Voltage Systems and Safe Electrical Equipmenthigher voltage system except of course in the connection for the shore supply, which is usually plugged in at the transom area.

While you can carry out a visual examination for signs of corrosion, there is little else you can do except to check that the generator has been regularly serviced.
If you have any doubts about the condition of a generator, call a service engineer for their opinion.
Outside Connections on Sailboats
Lower voltage systems will have outside connections in order to take power to navigation lights, deck lighting and perhaps other fittings and fixtures. You’ll need to examine the wiring to these fittings closely: a system that was fine when installed can deteriorate with time and use.
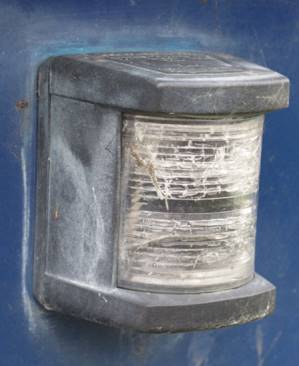
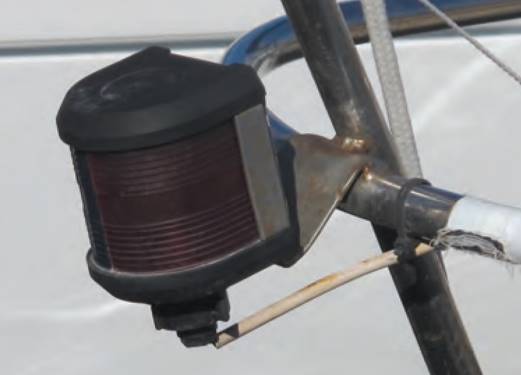
Moreover, the outside electrical systems on sailboats in particular take a lot of punishment. Port and starboard lights mounted in the bow are directly in the firing line of spray and solid water and may even be underwater in lively seas. Any exposed wiring may also fall foul of the running rigging or sails.
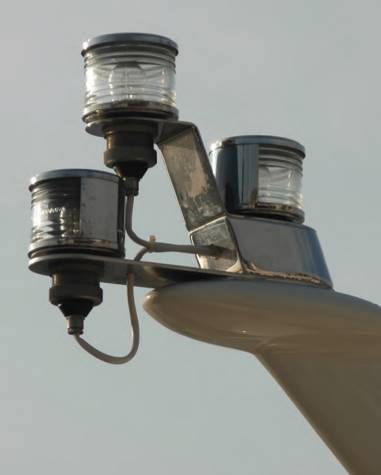
It is usual for the wires on these lights to be taken in through the bottom of the fitting through a watertight gland; there should be a downward loop in the wire before it enters the gland to discourage water from running along the wire and seeping into the fitting. Round cross-section wire is used as this seals better in the gland, but you can often see that the round outer casing of the wire has been pulled out of the gland leaving the two inner wires to make the connection. However, these don’t fit the gland opening so water can find its way in.

Therefore, examine navigation lights carefully and open up any that look suspect, such as those with poor wiring or perhaps broken glass. Any signs of internal corrosion will mean renewal of the whole fitting. If the boat is your own, this could also be a good time to replace navigation light bulbs, even if they are still working (the last thing you want in a lively sea is to have to change a bulb in the dark).
While you can only truly assess the condition of mast lights if the mast is taken down, they are less vulnerable to damage, since they are clear of the running rigging and sails (spreader lights are much the same). Mast light wiring is generally taken down inside the mast where it may have to mix with wiring for the masthead mounted wind instruments, possibly the antenna, and also the halyards, meaning it may not be a happy environment. If you can get access to each end of both the mast and wires (i. e. when the mast is down), test the resistance or voltage drop of the wires.
There should be a deck connection for these internal wires to allow for easy mast removal, but these deck sockets have a hard life. Examine them for any damage caused by people stepping on them or other heavy knocks.
Outside Connections on Motorboats
The outside electrical fittings on motorboats don’t have quite such a hard life as sailboats in most cases, but the same standards of safety should apply. Items such as the horn and searchlight can be exposed to the elements, so scrutinise the exterior for corrosion or leaks.
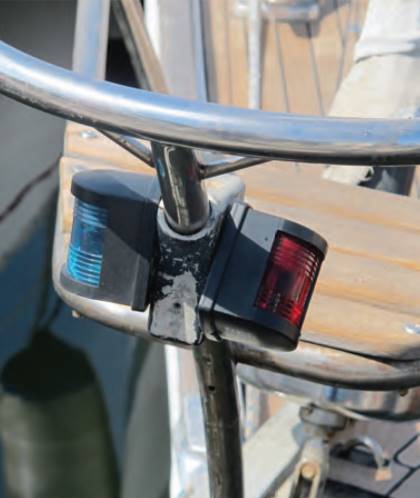
Any external lighting should be mounted in relatively protected areas but it can still be exposed to saltwater, which is one of the most corrosive elements as far as the electrical system is concerned. You’ll probably need to replace any fitting showing signs of corrosion.
The chain locker
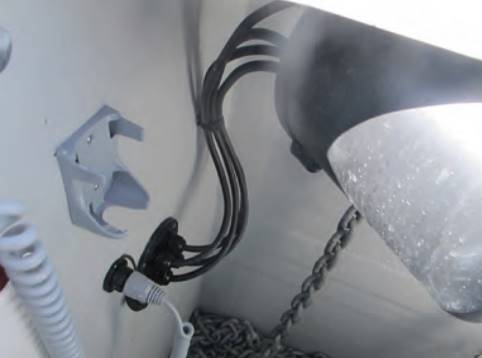
THE CHAIN LOCKER houses the motor and control box for the electric capstan, if one is fitted. Capstan manufacturers recognise that their equipment has to operate in extreme conditions, so their equipment is usually built to the highest of standards. However, the actual electrical connections can be the weak point, so you should perform a detailed examination. This can be a case for using a mirror on a stick or a digital camera, since it is a tricky area to access. Once you can see the area, check for corrosion of any sort on the motor or connecting boxes; its presence should be a cause for concern and you should consider a closer inspection (using the mirror on the stick or digital camera method).
Read also: Self-Survey Criteria for Essential Equipment
In the chain locker there is always the risk of the chain itself causing damage to the capstan motor or wiring if there is a jam in the chain as it goes out, so check that it runs smoothly. Finally, check the seals on the connecting wires where they pass through the bulkhead on their run aft for any signs of deterioration.
The alternator
SO FAR WE have looked at the electrical system from a distribution point of view, but you’ll also need to check the alternator on the engine, which supplies the electrical power to keep the batteries charged. We saw in Engines and Their Systems“Determining the Condition of the Engines and Their Systems” how to check the tension and condition of the alternator drive belt, and if you’re surveying your own boat this might be a good time to replace the belt even if there are no obvious signs of wear (on modern engines the drive belt often powers the water pumps and other engine systems meaning replacement can be quite a complex task, one that is certainly best done in the quiet of harbour rather than at sea).
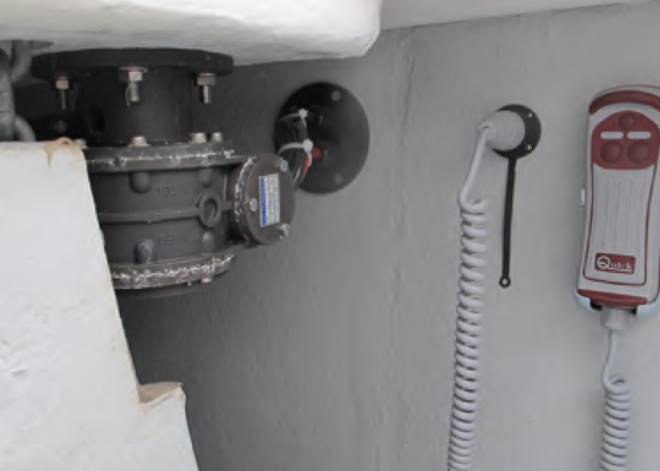
Since the alternator, and in most cases its connecting wires, are part of the engine system it should have been engineered to the same high standards of the rest of the engine. However, at some point the engine systems have to connect with the boat systems and this is where you need to examine the links to ensure that there are no signs of corrosion or chafing.
The logical place to locate the battery charger, if there’s one on board, would be the engine compartment, but they are often located elsewhere, usually around the stern, which allows for easy connection to shore power. Once again, examine the charger unit for deterioration and the connections for any signs or corrosion or damp; depending on the extent of the corrosion, it may need replacing.
Auxiliary Charging Systems
Many boats today are fitted with auxiliary charging systems that use wind or solar power to keep the batteries topped up. Solar panels are a static system that should not require any maintenance except regular cleaning, but check that the panels are intact and free from damage to the surfaces or the electrical connections.

Wind chargers have moving parts and although they are designed to require minimum maintenance, check that there is no play in the shaft, the blades are free of damage and the electrical connections are sound.
The complexity of the modern boat electrical system is enormous, probably beyond the comprehension of the average owner. In most cases, the best you can hope for is that it has been engineered to a high standard and you, as the surveyor, need only check those areas that are visible, since these are the most likely parts of the system to be exposed to a salt or damp atmosphere.
