Engines and their systems are the heart of any marine vessel, providing the necessary power to move the boat through the water. Boats use a variety of engine types, including outboard, inboard, and sterndrive engines. Outboard engines are mounted on the transom of the boat and are popular for smaller boats due to their ease of maintenance and versatility. Inboard engines are located inside the hull, typically near the center, and are connected to a drive shaft that extends out of the boat to turn the propeller. They are often found on larger boats where a more stable center of gravity is needed. Sterndrive engines, also known as inboard/outboard (I/O) engines, combine the features of both outboard and inboard engines, with the engine located inside the hull and the drive unit extending out through the stern.
Each engine type is supported by several systems that ensure efficient and safe operation. The fuel system delivers fuel from the tank to the engine, typically including components such as fuel lines, filters, and injectors. The cooling system prevents the engine from overheating by circulating water or coolant through the engine block. The exhaust system expels combustion gases, usually through a series of pipes and mufflers to reduce noise. The electrical system powers the ignition, lights, and other onboard electronics, relying on batteries and generators to maintain a charge. Additionally, the steering system provides directional control, often linked to the engine drive or rudder. Each of these systems plays an important role in maintaining engine performance and the overall safety of the boat
OPEN UP THE engine hatch on any boat and you get a pretty good idea of the state of the engine and its systems straight away. Oil leaks, dirt and corrosion should be immediately evident signs of either a poor level of maintenance or neglect, and can be a good indication of the boat’s condition as a whole. On older boats there may be an acceptable level of deterioration in the engine area but you still need to differentiate between normal wear and tear and the sort of neglect that can lead to trouble.
A survey of the actual engine(s) and its performance (or lack thereof) is beyond the scope of the average surveyor and private owner, who has to take much of it for granted. fortunately Inboard and Outboard Enginesmodern engines are incredibly reliable and the internals rarely fail. All you can really do is examine the exterior of both the engine and its systems and call in the experts if you’re concerned, of course, if it’s your own boat you should already have a pretty good idea about the internals of the engine and the standards of maintenance carried out so far.
Engine compartments
If you’re CarryIng out a survey on a boat you’re thinking of buying, opening up the engine compartment should be one of the first things you do once you have completed your outside examination. A neglected engine compartment is a depressing sight and it’s reasonable to assume that if there’s neglect here, there could well be comparable neglect around the rest of the boat, meaning you might want to walk away from this one. Here, the phrase «out of sight, out of mind» comes to mind – as long as the engine starts and runs when asked, all is well.
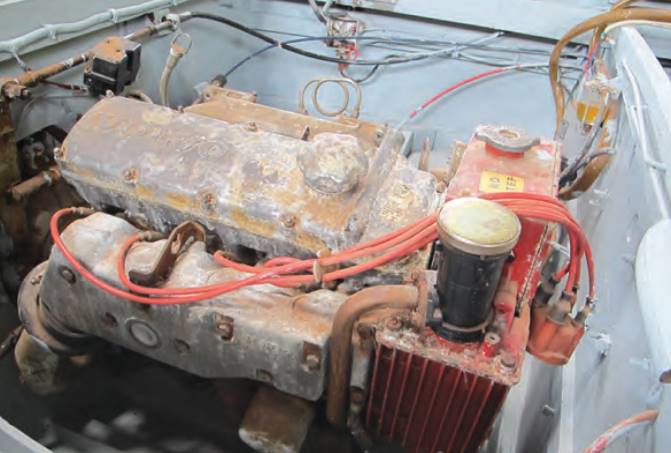
Actually, there’s more to worry about than the engine cutting out at sea: a fault or failure in the engine compartment could lead to a fire or even the boat sinking. Only a detailed examination will give you the confidence to strike out to sea while carrying highly inflammable liquids and hot exhausts.
Access
To carry out this type of detailed examination during a survey you’ll need access, which is easier said than done, since builders tend to assemble and install the engine compartment before the deck and superstructure mouldings.
Many of the auxiliary systems on modern boats, such as:
- air conditioning;
- ater makers;
- generators;
- pumps and a host of small items,
are often installed one at a time with the support systems hidden behind the later additions. It can be a complex web of pipework and wiring and it’s likely you’ll have to resort to mirrors and cameras to see what is going on. The sound proofing that is fitted in most engine compartments doesn’t help either, and it can restrict access to parts of the hull as well as to some of the system’s supporting pipes and wires. You won’t be thanked if you feel the need to disturb this soundproof lining during your survey, but fortunately you can often get a pretty good impression of the standard of maintenance and the condition of fittings and fixtures by examining those you can see. If these are in poor condition, the hidden bits are not likely to be any better.
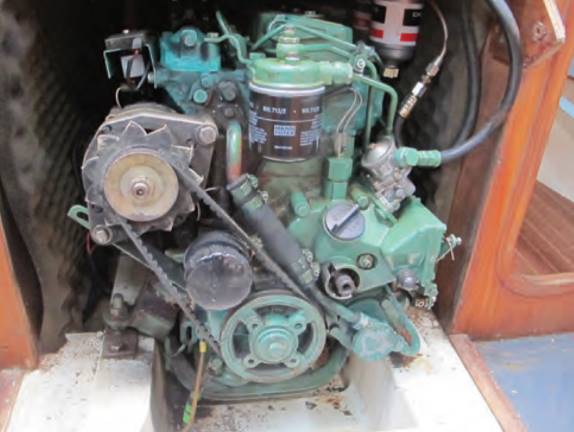
Access to the engine compartment on sailboats can be particularly bad and while the designer or builder should have created access to the parts of the engine requiring routine maintenance, he may well have ignored it altogether for certain parts of the cooling system or the exhaust. Moreover, in order to maximise space for the accommodation, the engine box has usually suffered and is tightly fitted around the engine so that access to many parts can only be achieved with some dismantling of the surrounding structure. Things get slightly better when the engine compartment extends to the full width of the hull but even then the fuel tanks may have been installed at the side, meaning access to them is even more restricted. Such is the demand for space on modern boats, I’ve even seen engines in which it is impossible to get to the fresh water cooling system cap to top up the coolant without removing sealed down sections of the engine compartment. With this in mind, you’ll need to be something of a contortionist to get into the more remote parts of the engine compartment, and while a mirror on a stick or camera may help you to see what is going on, you do lose the ability to touch and feel pipework and fittings. It goes without saying that in a situation such as this, any repairs become next to impossible without major removals.
Main Systems and Mounts
This might all seem pretty depressing, but there is one thing in your favour when it comes to modern engines and that is they are incredibly reliable and any problems are much more likely to come from the support systems rather than the engine itself. You can examine these engine support systems to a considerable degree during a survey and certainly if you are examining your own boat you’ll want to check them in as much detail as possible.

You’ll need to assess the four main systems: the oil and cooling water levels, the flexible drive belts and the outside of the engine. If you find low oil or water levels, this could be a warning sign of poor maintenance, which should make you reconsider progressing further with this boat. When you check the oil level take a close look at what is on the end of the dip stick; a sort of light coloured emulsion could be a sign of water in the engine.
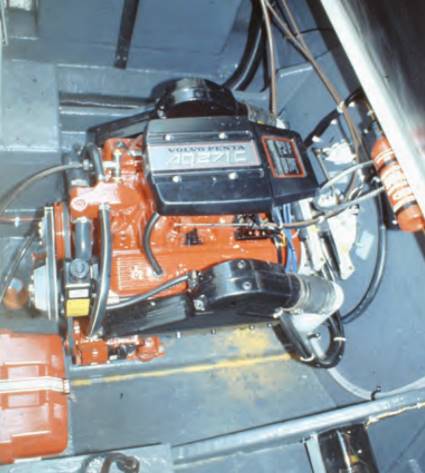
If there is oil on the outside of the engine there’s probably also oil in the bilges, which would indicate a possible oil leak. This might be acceptable on older engines, since seals were not up to the standards found on modern engines (older engines were usually painted a dark colour so oil leaks would be less obvious). However, any evidence of an oil leak on a modern engine could mean it’s time to call for an expert opinion or walk away, although do consider that the stain might have come from a spillage during topping up of the engine oil.
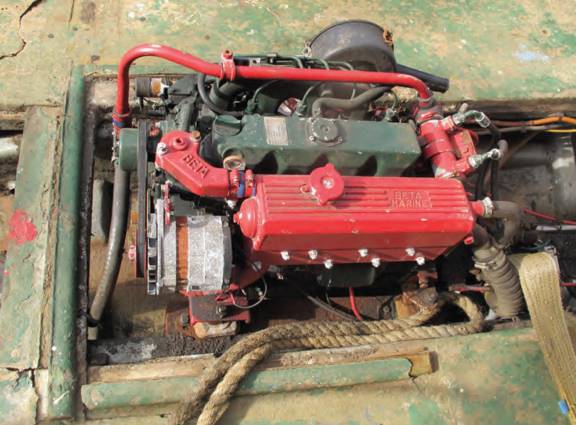
The engine drive belts, which power the water pumps and alternator, should have a small degree of play in them, perhaps 1-2 cm of up and down movement on a horizontal section of the belt. Anything more than this and the belt will need to be adjusted, which is usually achieved by adjusting the alternator mounting or a special adjusting pulley in the system.
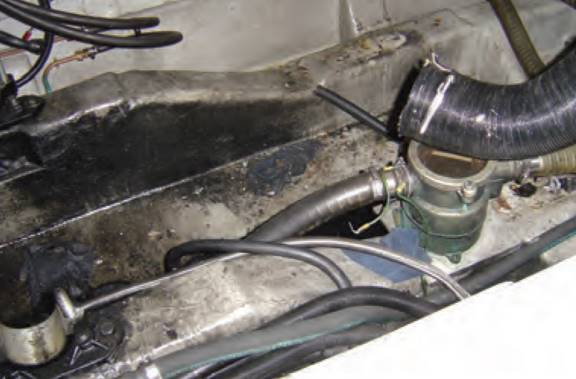
At this point you’ll also want to look at the engine mounts. Some engines, mainly in older boats and in work and fishing boats, are solidly mounted, i. e. bolted directly onto the engine beds with no flexibility. These should be checked to ensure that there are no signs of movement between the engine mounting plates and the engine beds; on a composite boat, this is indicated by minor signs of wear, while on a metal boat the engine bed will have small shiny areas.
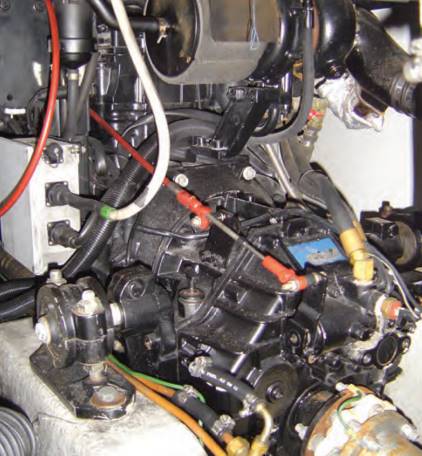
On steel engine beds there may be the giveaway sign of a cocoa-like powder, which indicates slight movement between steel sections that may be corroded to a degree. Any sign of movement is easily cured by tightening the securing nuts and bolts.
You should not see any signs of wear in the flexible mounts found on many modern installations, except perhaps in the rubber mouldings which give the mount its flexibility. These should be intact and free of deterioration such as splits or wear. If you come across these signs, then replacement is the only solution. A boat with a flexibly mounted engine should have much less vibration, but you do end up with a more complex system overall since all of the connections to the engine also require flexible sections in their pipework and wiring.
So much for the engine itself, now it’s time to look at the systems that supply and support the engine in more detail, since this is where you’re much more likely to find signs of potential problems.
Fuel systems
YOU NEED TO go back to the beginning when checking the fuel system. The main components here are the fuel tank itself, the fuel lines and valves, and the filters.
The Fuel Tank
Fuel tanks come in many shapes and sizes and may be constructed of composite, steel, stainless steel and aluminium. As we have said, composite tanks tend to be integrated into the hull moulding with perhaps only the top of the tank visible. Integral tanks look very neat and tidy but they suffer from the fact that they cannot be drained and there is unlikely to be a sump built in to the bottom of the tank where any dirt and water in the fuel can collect and possibly be drained off. Metal tanks should have this facility but a lot depends on how they’re installed and what level of access is available around the tank. If you can get to a drain tap, run off some of the fuel/ water mix from the bottom of the tank to check for contamination; small amounts of water and debris are permissible but when considerable amounts have to be run off before clean fuel comes through, this suggests a lack of basic maintenance.
A tank full of fuel is a considerable weight and the mounts do come under some stress, so you’ll need to examine the securing systems for the tanks. As with the engine mounts, you’re looking for any signs of movement and/or stress. Where metal straps secure the tanks to their mounting points, look for those same shiny metal areas.
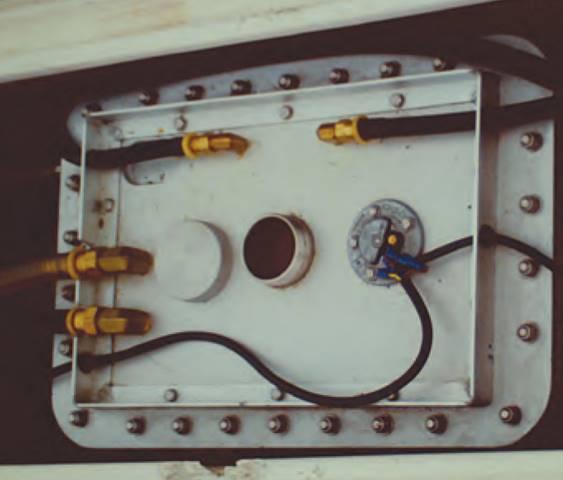
It’s likely that the connections to the tank will be made through a top plate, which can also act as a manhole cover for access to the tank’s interior. The plate will be secured with many nuts and bolts, making its removal a time consuming act, but if you have the time to spare, doing so will allow you to shine a torch into the interior to see what lies in the bottom of the tank. If you do decide to remove the manhole plate, take extra care if the tank contains petrol because there can be an explosive atmosphere in the empty part of the tank and you don’t want to cause an explosion with a spark from your tools. Diesel fuel is relatively safe but do not poke your head inside (if the hole is large enough) because it doesn’t contain breathable air. In any case, you’ll perhaps be more concerned with the connections themselves, such as the filler and suction pipe and the fuel level connection, so check these are tight and sound with no obvious leakage.
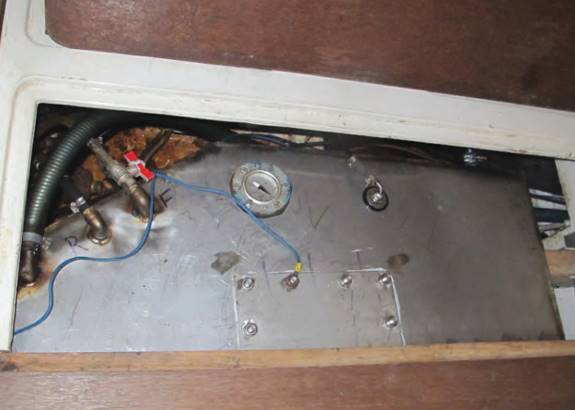
As far as you can, check the outside of the tank for signs of leakage, which is most likely to come from minute cracks in the welding (focus on the seams). With diesel, fuel leaks will be evident through staining, but leaked petrol fuel evaporates so you may not see anything. Your sense of smell can come into play here but don’t rely on it, as there’s usually always a slight smell of petrol or diesel around the engine and tank area. However, a strong smell should definitely be tracked to its source.
Lines and Pipes
The filler pipe connects the tank to the outside filler, which will usually be on one of the side decks or possibly in the cockpit on a sailboat. It may not be possible to get a view of the connection between the deck fitting and the filler, but it’s not critical since the filler spout goes into the hose. It is, however, critical that you get a look at the lower end of the tank with the hose and spigot, as any leak here will deposit fuel inside the boat. Look for staining, especially at the top joint and running down the filler pipe. This filler pipe is of generous dimensions in order to take the flow from the fuel pump nozzle, and it goes without saying that it should be made from a fuel resistant material. If there are two tanks there will often be an equalising pipe connecting the two so that both tanks can be filled from one deck connection. A valve will control the connection between the two tanks.
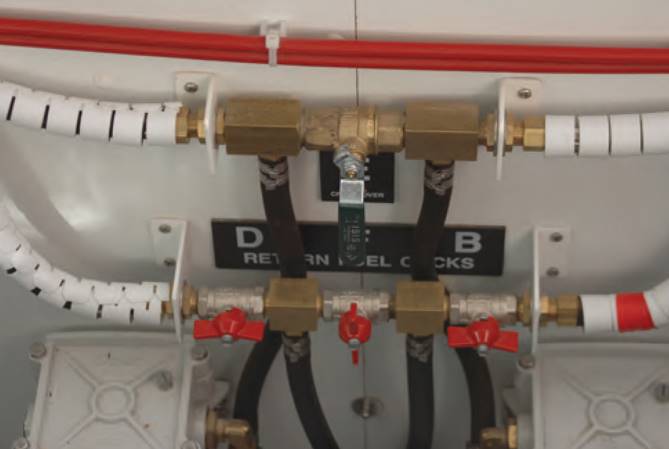
A run of piping with valves controls the volume of fuel from the tank to the engine, so check all pipework, valves and joints for leaks using sight, smell and touch; leaking diesel fuel in particular has a distinctive slippery feel. Check any sight tube fuel gauges (usually a clear pipe with valves, mounted vertically on the tank and connected to the tank top and bottom). These gauges are the most reliable indication of the tank contents.
The length of flexible pipe built into the delivery fuel pipe to the engine, which allows for the movement of flexible mounts, requires particular scrutiny. There shouldn’t be a problem with modern equipment but on older boats the well-supported stainless steel or copper piping may have been replaced with unsupported piping, perhaps with lengths of plastic tubing and corroded jubilee clips. On sailboats and smaller single-Technical Recommendations for Choosing Engines for a Boatsengine boats there can be a long run from the fuel tank to the engine and here the pipe may be unsecured and left to its own devices, possibly coming to rest in the bilges. This can be a recipe for disaster and if the pipe fractures or leaks and there is a gravity feed to the engine, it may not be noticed until the tank has run dry. These are all curable problems and should not necessarily condemn a boat but they could be indications of a casual attitude to safety, which could extend to other areas of the boat.
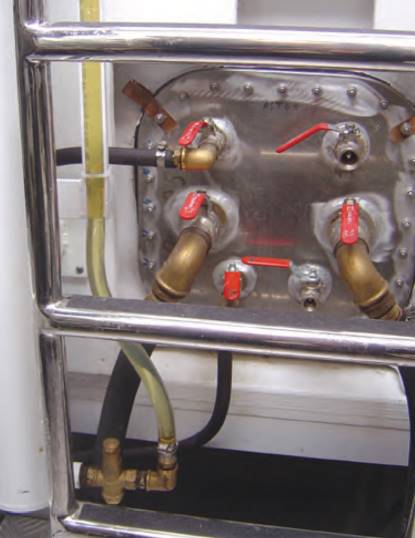
Leaks in a petrol system require immediate attention, which usually means tightening the joints. If that doesn’t solve the problem turn off the fuel at the tank and seek assistance: there may well be fuel vapour in the bilges resulting from the leak, which can be an explosive mixture.
Filters
Filters are an essential part of the Self-Survey Criteria for the Engine and Electrical Systemsfuel system and there are usually two in each fuel line, one external and one as part of the engine. Older types of external filters often had a glass bowl so that you could see any contamination or water in the fuel as it separated out. On closed filters you can open them up to check that there is no excess contamination, which would indicate that there could be a lot of dirt in the bottom of the fuel tank. Many older fuel filters were primarily designed for use on land in trucks and made from aluminium, which tends to corrode in the marine environment. While this type of corrosion may not be serious, it does need to be checked.
One very modern problem is the growth of «diesel bug», a microbiological growth that infests diesel and can cause considerable trouble if it is allowed to develop.
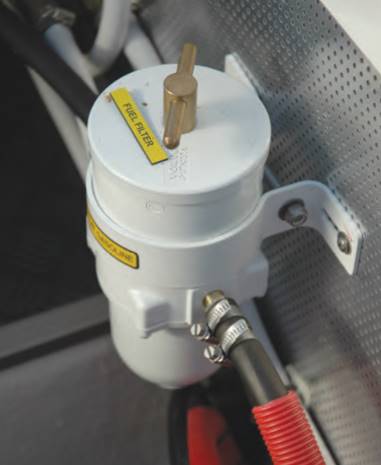
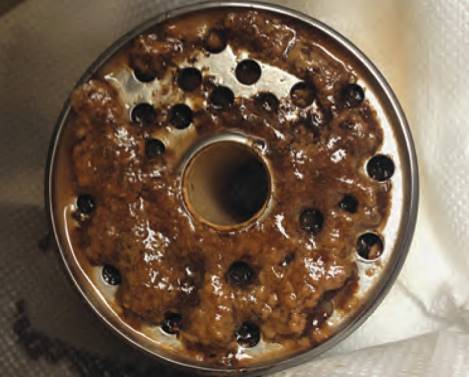
Modern diesel fuel has a reduced amount of sulphur, a chemical addition which was used to deter the bug, and we are also seeing increased amounts of bio-diesel entering modern fuel supplies, so while these might be «greener», there is a penalty to pay as diesel bug can clog up fuel pipes and filters and, if it gets as far as the engine itself, the injectors. It manifests itself as a sort of dark jelly-like growth, although it can be difficult to find as it tends to accumulate in the areas that are not visible.
So where should you be looking? The bug tends to start at the interface between the diesel fuel and any water in the fuel. All diesel contains a certain amount of water and this usually settles out in the tank where it can be drained off, which should be a routine part of the boat’s maintenance.
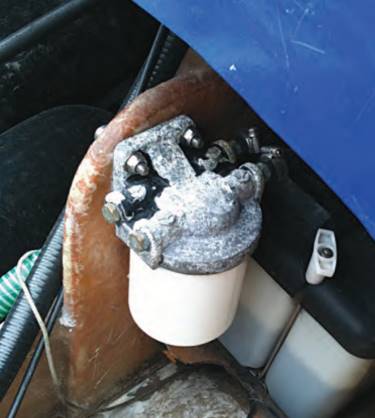
The problems start when there are no drain cocks on the tank, since the tank is in the bottom of the boat so there is no access to a drain even if one is fitted. Draining the water should prevent the bug developing, but you’re not here to perform maintenance, you’re here to find defects, so the best place to look for a diesel bug infestation is in the fuel filter. The jelly-like substance may be fluid enough to flow through the early stages of the fuel pipe, but then it hits the filter and gets another chance to develop, since the chances are that there will be a fuel/water interface in this filter. If you spot diesel bug here, you’re in with a chance of solving the problem before it gets any worse by either draining the fuel tank and cleaning it or using one of the proprietary fuel additives that are designed to eradicate the bug. If the bug has had a chance to get into the engine, you’ll want to think carefully about buying the boat as it’s a tricky problem to eradicate. If you’re surveying your own boat you’ll know if the bug has reached the engine because it will either be running erratically or stop altogether.
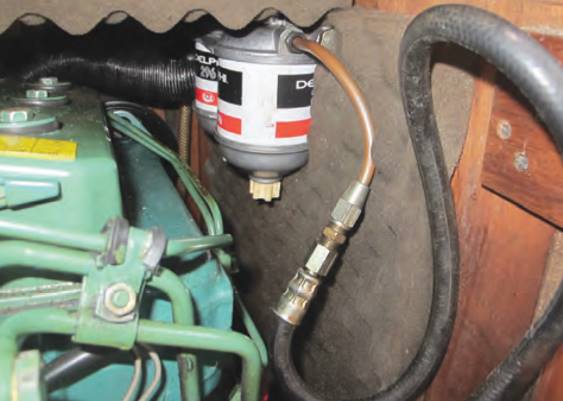
All modern engines feature a second stage prevention system, the fine particle filters fitted to the engine itself. If you find evidence of the bug here and the engine is still running, you have probably caught the problem in time and you should dismantle and clean the fuel system back to the tank from here. If the problem has reached the engine, be prepared for considerable dismantling, not to mention expense.
While the fuel system is a vital part of the boat’s systems the only part that could present a major concern is the fuel tank; otherwise, it can be a relatively simple job to bring a poor fuel system up to date. If the boat is fuelled by petrol, it is a requirement of both insurance companies and official rules and regulations that you have a high quality fuel system installed.
Cooling systems
THE ENGINE COOLING system is another vital part of the boat; not only could a failure cause the engine to stop or become damaged, but since the whole of the sea water part of the cooling system is directly connected to the sea, if a hose fails or there is some other leak it could cause a flood and the boat could sink! This is why only the highest standard is permissible.
There is yet one more potential cooling system emergency: On most installations the sea water exiting from the engine is injected into the exhaust pipe, thereby cooling the exhaust gases on their way out so that they don’t melt the flexible rubber sections of the exhaust. If that water injection into the exhaust fails, hot exhaust gases are directly released onto the rubber piping and the best you can hope for is that the rubber will just melt. In a worst-case (and most likely) scenario the rubber will catch fire, meaning you could be faced with the double whammy of having the boat sinking from water ingress and catching fire through exhaust pipe failure. At least the incoming water might put out the fire! All this should be enough to convince you to check out the sea water side of the cooling system very, very carefully.
You may still find direct cooling systems on older boats, in which the sea water circulates directly around the engine to cool it, but modern engines have an indirect cooling system, in which the sea water passes through a heat exchanger where it cools the closed fresh water system that circulates around the engine. This gives a more consistent cooling of the engine and also removes the corrosive sea water from sensitive parts of the engine interior. On both systems there are likely to be anodes fitted inside the engine and on associated pipework to reduce the possibility of electrolytic action between different metals.
Cooling System Survey Routine
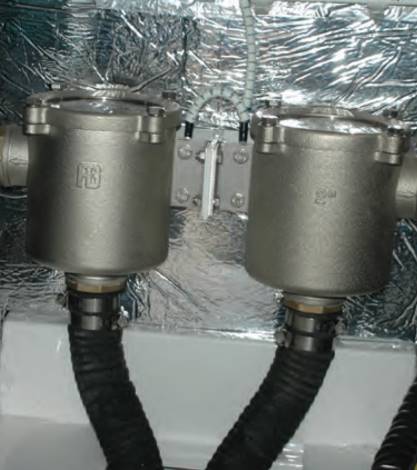
Marine Plumbing – Systems and Materials“Marine Plumbing – What You Need to Pay Attention To” covers seacocks in detail, so let’s start at the hose connected to the seacocks. Here you would expect to find double hose clips securing the hose in position, and these should be free of corrosion. Some types of stainless steel are not resistant to sea water so the clips should ideally be proper marine grade types. Check that they are actually located fully over the seacock spigot because you can sometimes find the second clip teetering on the edge or unevenly tightened.
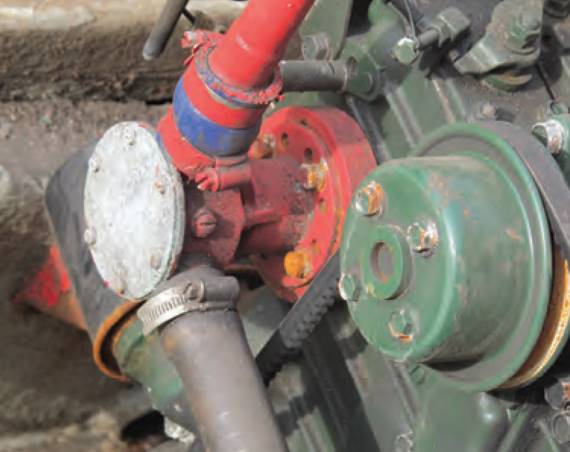
Next, check the hose itself to ensure there are no signs of swelling, which you would see around the outer securing clip. Any sign of swelling in the hose is a sign that it is deteriorating and needs replacing. If replacement is needed, make sure you use the highest quality rubber hose designed for the purpose and that you avoid plastic, which can harden and crack.
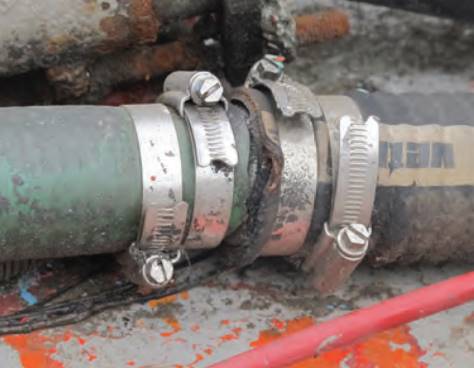
Follow the same routine around each of the sea water hoses where they connect with and leave the engine. You will find some that are actually an integral part of the engine, so follow the engine manufacturer’s recommendations regarding their replacement, unless you find that they look suspect. A sensible precaution would be to replace the connections to the seacock and filter every two years, even if there are no visible signs of deterioration. The filter unit can be a weak point in the cooling system and is often constructed from clear plastic so that you can see any muck or debris that has collected. however, rigid plastic is often brittle and easily damaged when knocked. Therefore, check the filter for any signs of cracking and the contents for any signs of debris.
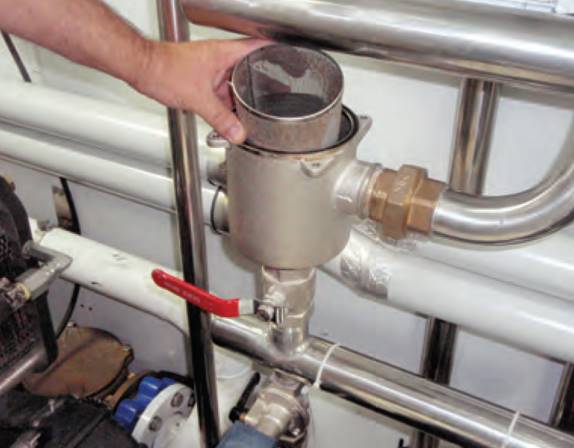
Seacocks for the engine cooling water system are usually located in the bottom of the boat, which helps to ensure continuity of the cooling water supply if the boat is moving in waves but it also means they are the first thing to get covered in water if the system springs a leak. It can be a challenge trying to find them underwater, so you may want to consider fitting an extension to the valve spindle, or another means of turning them off that will be well above any incoming water or even above decks. When underway you won’t immediately see any leak in the cooling system in the enclosed engine compartment, so you may consider fitting an early warning flow sensor. This should be fitted in the exhaust end of the system otherwise you could have a leak where the sensor would not sound the warning.
Exhaust systems
THE ENGINE EXHAUST system is just as critical as the rest of the engine systems and defects here could lead to the engine compartment flooding and exhaust fumes entering the boat. Even a small leak in the pipework may release fumes that could build up to poisonous levels of carbon monoxide and if a crewmember is sleeping in the aft cabin on a sailboat, he/she could be vulnerable.
In addition to removing exhaust gases the exhaust system usually channels the sea water cooling away. Combine the corrosive characteristics of exhaust gases with those of sea water and the exhaust system comes in for considerable abuse, particularly as parts of it are often hidden when it comes to a routine inspection. To check the exhaust you need to track the whole length of the piping, which on a sailboat could be quite a length running along in the bilges.
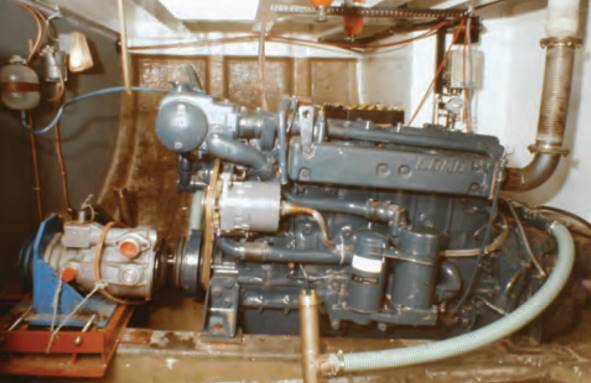
Today, it is usual to find the exhaust system comprises a reinforced flexible pipe which connects the exhaust elbow on the engine to the outlet pipe in the hull. This outlet might be underwater, since this can help to reduce the noise levels of the exhaust, or it could be just above the waterline. Either way there will be the risk of water finding its way in if there is any leak and this is one outlet in the hull where you are unlikely to find a seacock. The layout of the exhaust pipe should be such that water cannot find its way back up the pipe and into the engine and this means it will often have an anti-siphon elbow built in. A silencer might also be included in the system.
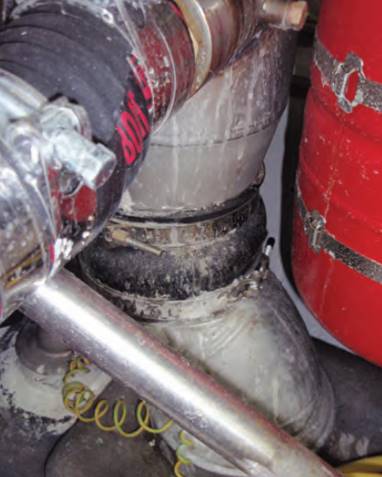
To survey the exhaust, look for external signs of deterioration in the fixed and flexible sections of the pipework. The flexible rubber pipe has to be of the highest standard since it has to cope with both heat and sea water: any signs of swelling or softness in the rubber should ring alarm bells. This can be particularly apparent at connections and joints and the worm drive clips used for these connections should be free of corrosion or deterioration. Like most of the engine cooling systems there should be double clips at these connections. Any signs of white crystals showing at the clips, connections and joints would indicate a sea water leak.
Hydraulics
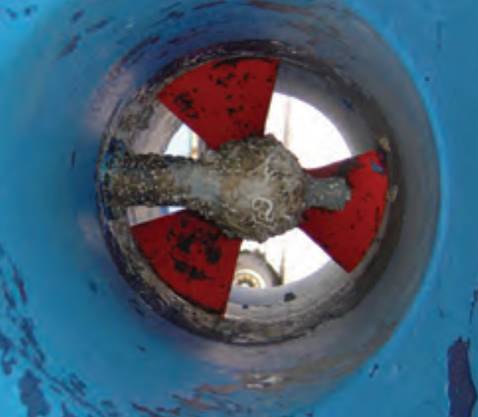
TODAY HYDRAULIC SYSTEMS, either hand or engine powered, are a feature of many boats. On sailboats you may find hand hydraulics used for the backstay tightening and for the vang, while engine powered hydraulics may power the thruster(s) and a passerelle. Many steering systems are also based on hydraulic systems, which translate the wheel movements into the actions of the hydraulic ram that operates the tiller arm. On engine powered hydraulic systems the hydraulic pump is usually attached to the engine side of the gearbox and will include an oil tank, perhaps a cooler, the control valves and the pipework.
Read also: Basic Equipment of a Sailboat and Their Characteristics
Hydraulic systems are usually fully self-contained and reliable, so your survey should focus on possible oil leaks and corrosion. Oil leaks may not be easily visible but you can quickly feel any oil by rubbing your hand along the pipework and around the joints. Check that the oil tank level is reasonably full (which, as we now know, is a sign of good maintenance). Examine the ferules around the joints; standard hydraulic hoses are designed primarily for land use and are usually constructed from plated steel, which doesn’t stand up well to the marine environment, so it’s likely you’ll find light corrosion here. It’s not necessarily a serious problem unless the corrosion has developed into serious rust, in which case it might be time to replace the hoses. Any swelling or softness in the flexible sections of hose should be viewed with suspicion and is likely to require replacement. Hoses, both flexible and rigid, in the hydraulic system should be supported to prevent chafe and wear, so check clips and restraints, particularly in hidden areas if you can get to them. While hydraulic system failures are not likely to be life-threatening, they are generally a job for the experts, so could turn out to be expensive should you decide to go ahead with the purchase of the boat.
Generators
GENERATORS ARE NOW a common installation on many modern motorboats, since they supply power for cooking and air conditioning units. Because the generator is usually housed in a soundproof box it can be a case of out of sight, out of mind. Generator operation is not usually critical to the safety of a boat, although like the main engine(s), the diesel engine section of the generator has the potential to flood the boat if there is a failure in its sea water cooling system. In fact, the situation could be much worse; a main engine failure is likely to be detected much sooner, but a generator could be running overnight when everyone on board is fast asleep and you’ll only discover there’s been a failure when your feet get wet!
We’ll look at the electrical aspects of generators in more detail in Ship Electrical System“How the Ship Electrical System is Arranged and What it is for”, but suffice to say detailed checks are vital when you are dealing with the high voltages associated with this piece of equipment.
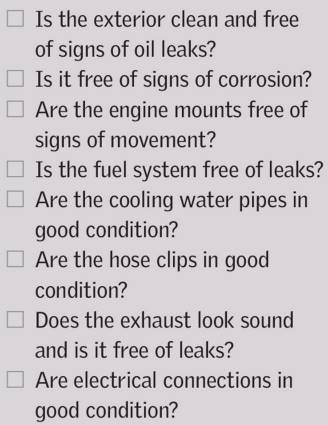
Therefore, your survey should include just as close an examination of the generator and its systems as that of the main engine, so be sure to trace the associated pipework and fuel systems and remove the covers to inspect the engine.
